La renaissance de ma G60! Récaro XT P107!!
+158
PAPY
Tomtom
Leda-34
franck.vw
kainkus G
chopsauce
Nemesis
dump
Dàf Ponk
jéjé
mihran
fifou 38
RABBIT
actarus
golf 2 tdi
psok
Joker068
1Furieux2+
pico
rmauto59
znsports
audric2005
peg
tips
deslandes
passatg60syncro
$pike
Hova
vageneration
marc.che
loostic
rams16
denisse
SamOuraI_Du_SoLeiL
julien.m
2seuk
skipdrx
mikelaoule
GolfX
gt95turbo
g@zoo
porci82
moreno5401
tomtom-GPS
El Doctor
seb84
El Poulpo
Black6
Boston
pimenta da rua68
ric160
rom's_15
alex59
golf rs
gaby29
WOBLAW
popeye
Mehran
jd59
bastianos
mafiaforhouse
toutoune
SOUFDU33
nickofaye
Romus
aurelien
wolfsburg 36
golfopierrot
lozoic
clean.mister
yanncox
BUG
sunrise
noodles
yangra
red pepper
hotsauce
nas
chopine29
ERIC16S
yoann(legros)
golfus
eddy92
diboule
rom30
Alphonse Magova
yopkiwi
DAVIDVR6
edition-one16
spartien
vincegolf
Davy 26
praz
koxx63
guitou
jc2lg60
poloman
toto581
fatcap59
brownies023
29i
jul
Wobiste
atomic car
electricboy
baracouda
typ1
Juju
Rayane
moreycap2
fido-dido
Meaculpa
pier
arno29
GG
elpadre76
Châtelain
evernew84
eddyTDI
stef 87
Sekel-Fou
jojo94
Sergeï
julien.VW
toogolf
alban
yanos 95
wileracing
rems
BAYOUXX
francois77
david76
manu16v
STEPH8S
J P
Jim16G
Zurma
gibsy
Phoenix
boolbi
xavier
WottY
benj
Win93
thomg60
Fred77
D.o.m
Les frangins
162 participants
Page 1 sur 40 • 1, 2, 3 ... 20 ... 40 

 yangraGolfoo d'argent confirmé
- Messages : 559
Date d'inscription : 05/11/2003
Localisation : Alsace
 La renaissance de ma G60! Récaro XT P107!!
Mer 2 Jan 2008 - 16:01
Salut, et bonne année à tous!
Voici ma G60, en cours de restauration. Elle a 145000kms au compteur (donc non certifiés). Elle est dans une couleur hyper rare en G60, un vert turquoise : LA6U (couleur d'origine!!!). L'étiquette en atteste :

By yangra, shot with [URL=http://profile.imageshack.us/camerabuy.php?model=CI6330&
make=Acer+Corporation]CI6330[/URL] at 2007-09-02
La voiture a quelque peu mal vieillie, et montre des traces de rouille un peu partout, des bosses, et matraquages mécaniques comme des vis foirrées, alterateur fendu, taraudages HS,.... bref du boulot sur la planche, mais ça je m'en doutais en devenant propriétaire... Voici les photos le jour de l'achat :

By yangra, shot with [URL=http://profile.imageshack.us/camerabuy.php?model=DSC-P72&
make=SONY]DSC-P72[/URL] at 2007-09-02
Oui, je sais la calandre de Jetta fait dégueu, évidemment, je la remet origine...

By yangra, shot with [URL=http://profile.imageshack.us/camerabuy.php?model=DSC-P72&
make=SONY]DSC-P72[/URL] at 2007-09-02

By yangra, shot with [URL=http://profile.imageshack.us/camerabuy.php?model=DSC-P72&
make=SONY]DSC-P72[/URL] at 2007-09-02

By yangra, shot with [URL=http://profile.imageshack.us/camerabuy.php?model=DSC-P72&
make=SONY]DSC-P72[/URL] at 2007-09-02
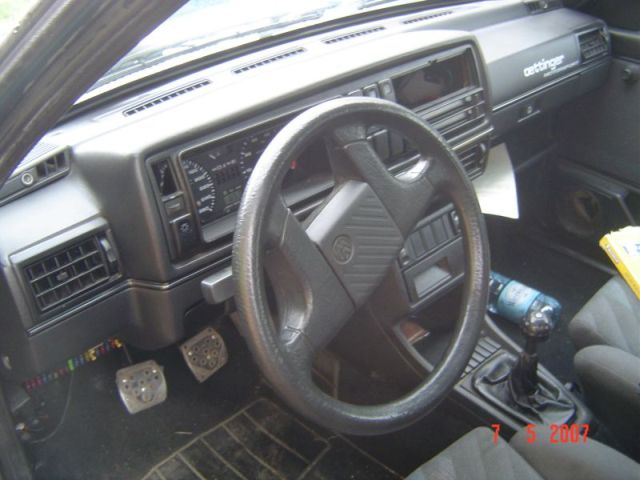
By yangra at 2007-09-02

By yangra, shot with [URL=http://profile.imageshack.us/camerabuy.php?model=DSC-P72&
make=SONY]DSC-P72[/URL] at 2007-09-02

By yangra, shot with [URL=http://profile.imageshack.us/camerabuy.php?model=DSC-P72&
make=SONY]DSC-P72[/URL] at 2007-09-02

By yangra, shot with [URL=http://profile.imageshack.us/camerabuy.php?model=DSC-P72&
make=SONY]DSC-P72[/URL] at 2007-09-02

By yangra at 2007-09-02

By yangra at 2007-09-02

By yangra, shot with [URL=http://profile.imageshack.us/camerabuy.php?model=DSC-P72&
make=SONY]DSC-P72[/URL] at 2007-09-02
La tête de Delco tient avec du fil de fer!
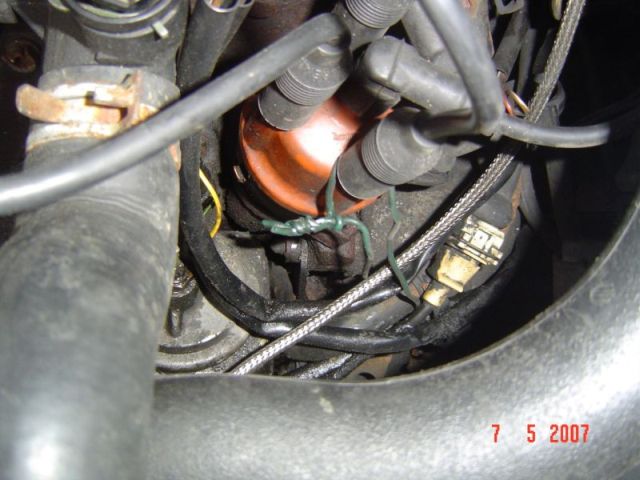
By yangra, shot with [URL=http://profile.imageshack.us/camerabuy.php?model=DSC-P72&
make=SONY]DSC-P72[/URL] at 2007-09-02
Le moteur pésentait des atés importantes, la panne : Un fil de masse débranché! La cosse sur lz pipe d'eau a cassé...
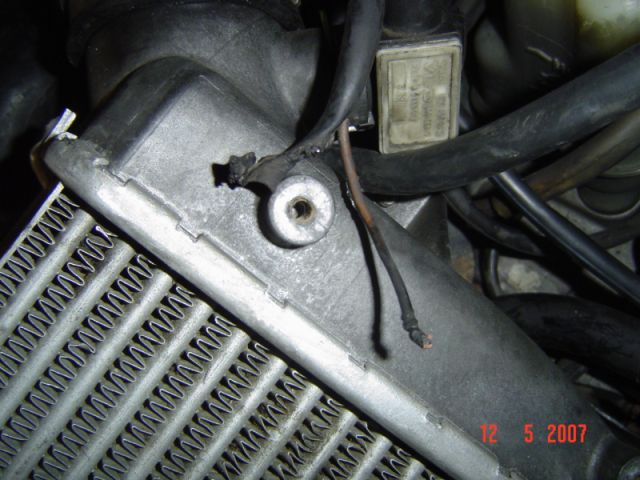
By yangra, shot with [URL=http://profile.imageshack.us/camerabuy.php?model=DSC-P72&
make=SONY]DSC-P72[/URL] at 2007-09-02
La verte à coté de la blanche...

By yangra, shot with [URL=http://profile.imageshack.us/camerabuy.php?model=DSC-P72&
make=SONY]DSC-P72[/URL] at 2007-09-02
Le démontage commence... pour une restauration totale!
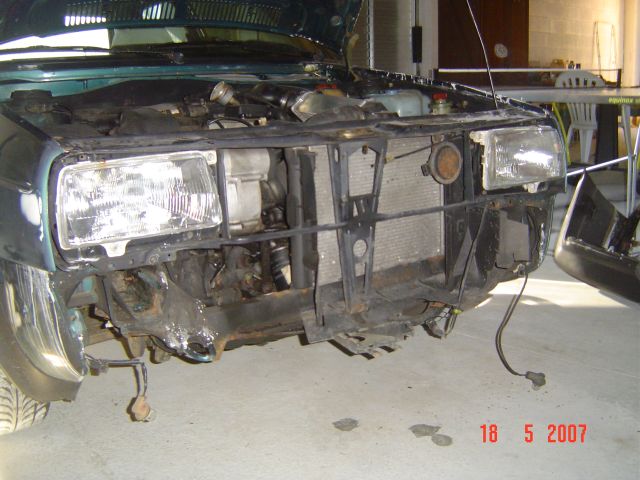
By yangra at 2007-09-02

By yangra, shot with [URL=http://profile.imageshack.us/camerabuy.php?model=DSC-P72&
make=SONY]DSC-P72[/URL] at 2007-09-02
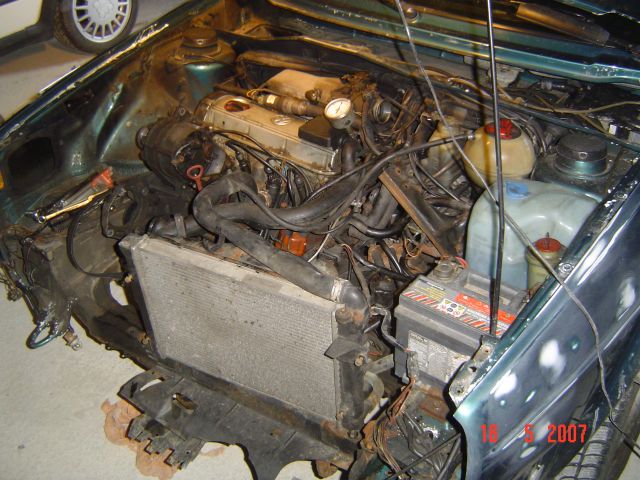
By yangra, shot with [URL=http://profile.imageshack.us/camerabuy.php?model=DSC-P72&
make=SONY]DSC-P72[/URL] at 2007-09-02
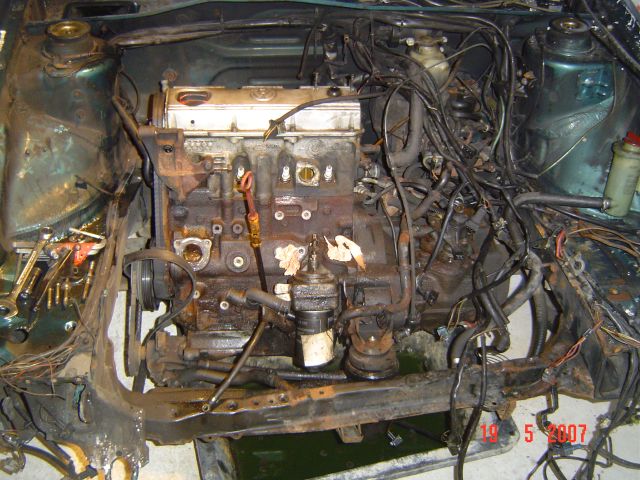
By yangra at 2007-09-02

By yangra at 2007-09-02
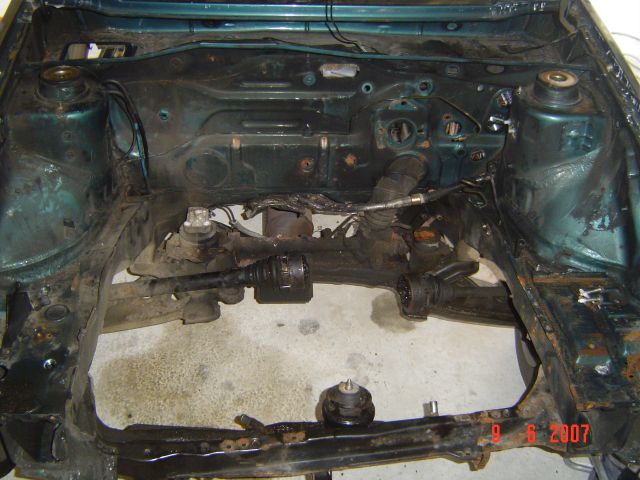
By yangra, shot with [URL=http://profile.imageshack.us/camerabuy.php?model=DSC-P72&
make=SONY]DSC-P72[/URL] at 2007-09-02
La corrosion dans le coin d'aile arrière...
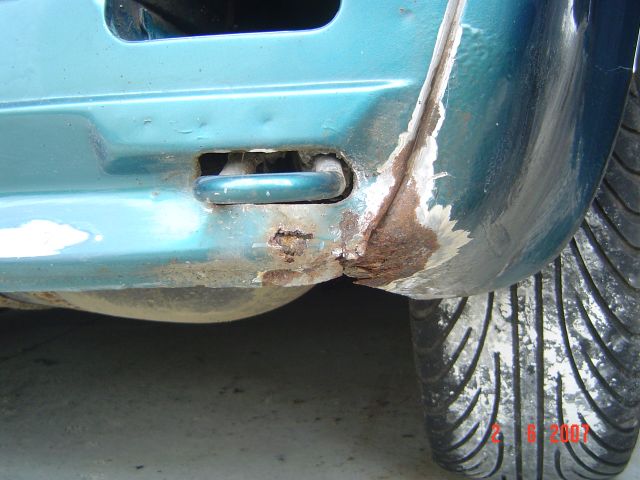
By yangra, shot with [URL=http://profile.imageshack.us/camerabuy.p
hp?model=DSC-P72&
make=SONY]DSC-P72[/URL] at 2007-09-02

By yangra, shot with [URL=http://profile.imageshack.us/camerabuy.php?model=DSC-P72&
make=SONY]DSC-P72[/URL] at 2007-09-02
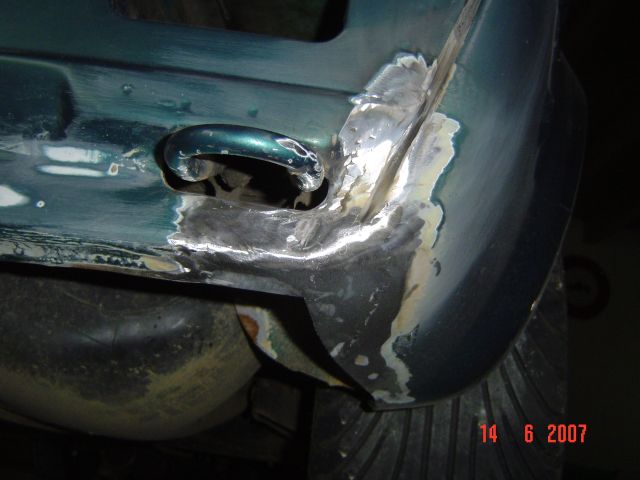
By yangra at 2007-09-02
Nettoyage du compartiment moteur
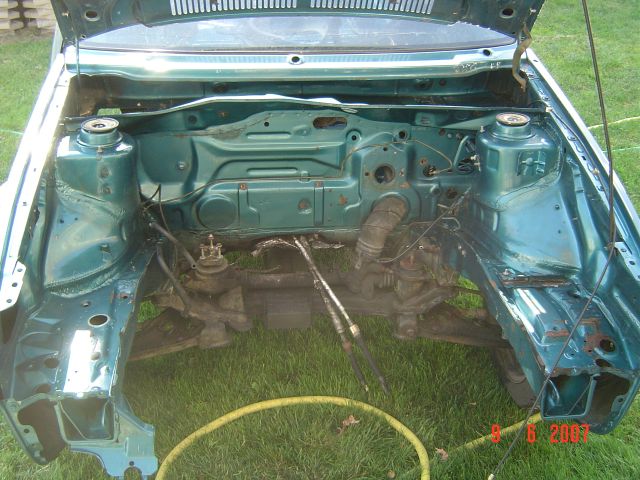
By yangra, shot with [URL=http://profile.imageshack.us/camerabuy.php?model=DSC-P72&
make=SONY]DSC-P72[/URL] at 2007-09-02
Encore de la rouille...

By yangra at 2007-09-02
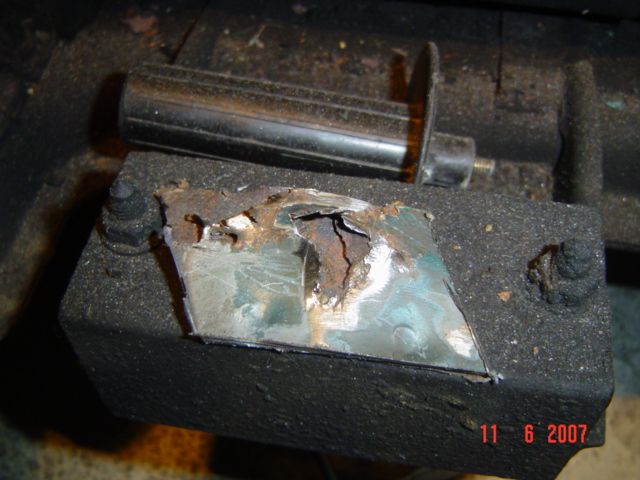
By yangra at 2007-09-02

By yangra, shot with [URL=http://profile.imageshack.us/camerabuy.php?model=DSC-P72&
make=SONY]DSC-P72[/URL] at 2007-09-02

By yangra at 2007-09-02
Encore la rouille...
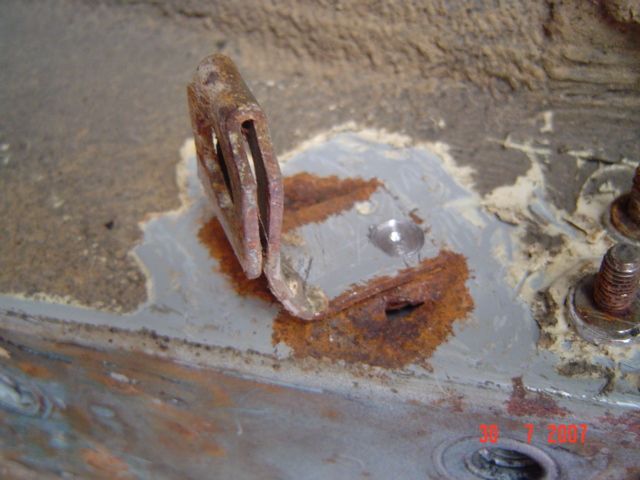
By yangra, shot with [URL=http://profile.imageshack.us/camerabuy.php?model=DSC-P72&
make=SONY]DSC-P72[/URL] at 2007-09-02
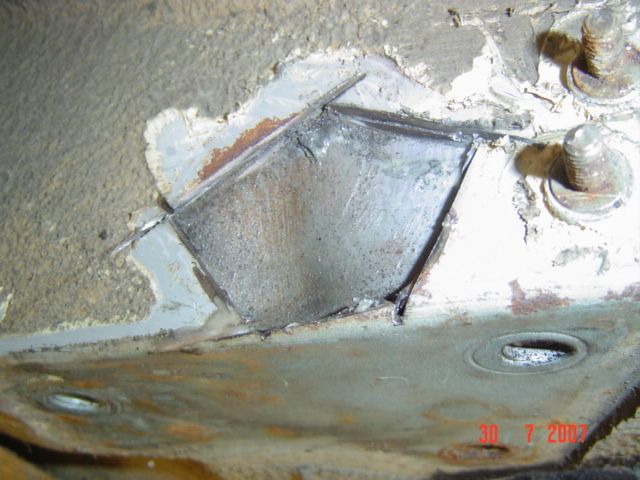
By yangra at 2007-09-02

By yangra, shot with [URL=http://profile.imageshack.us/camerabuy.php?model=DSC-P72&
make=SONY]DSC-P72[/URL] at 2007-09-02

By yangra, shot with [URL=http://profile.imageshack.us/camerabuy.php?model=DSC-P72&
make=SONY]DSC-P72[/URL] at 2007-09-02
Les coins d'aile arrière refaits

By yangra, shot with [URL=http://profile.imageshack.us/camerabuy.php?model=DSC-P72&
make=SONY]DSC-P72[/URL] at 2007-09-02

By yangra, shot with [URL=http://profile.imageshack.us/camerabuy.php?model=DSC-P72&
make=SONY]DSC-P72[/URL] at 2007-09-02
Le cotour de tarppe à essence rouillé aussi...

By yangra, shot with [URL=http://profile.imageshack.us/camerabuy.php?model=DSC-P72&
make=SONY]DSC-P72[/URL] at 2007-09-02

By yangra, shot with [URL=http://profile.imageshack.us/camerabuy.php?model=DSC-P72&
make=SONY]DSC-P72[/URL] at 2007-09-02

By yangra at 2007-09-02

By yangra, shot with [URL=http://profile.imageshack.us/camerabuy.php?model=DSC-P72&
make=SONY]DSC-P72[/URL] at 2007-09-02

By yangra, shot with [URL=http://profile.imageshack.us/camerabuy.php?model=DSC-P72&
make=SONY]DSC-P72[/URL] at 2007-09-02
Les passages de roue arrière meulées par l'ancien proprio...

By yangra, shot with [URL=http://profile.imageshack.us/camerabuy.php?model=DSC-P72&
make=SONY]DSC-P72[/URL] at 2007-09-02

By yangra, shot with [URL=http://profile.imageshack.us/camerabuy.php?model=DSC-P72&
make=SONY]DSC-P72[/URL] at 2007-09-02

By yangra at 2007-09-02

By yangra, shot with [URL=http://profile.imageshack.us/camerabuy.php?model=DSC-P72&
make=SONY]DSC-P72[/URL] at 2007-09-02

By yangra, shot with [URL=http://profile.imageshack.us/camerabuy.php?model=DSC-P72&
make=SONY]DSC-P72[/URL] at 2007-09-02
Dépose du réservoir...

By yangra at 2007-09-02
Encore de la rouille !
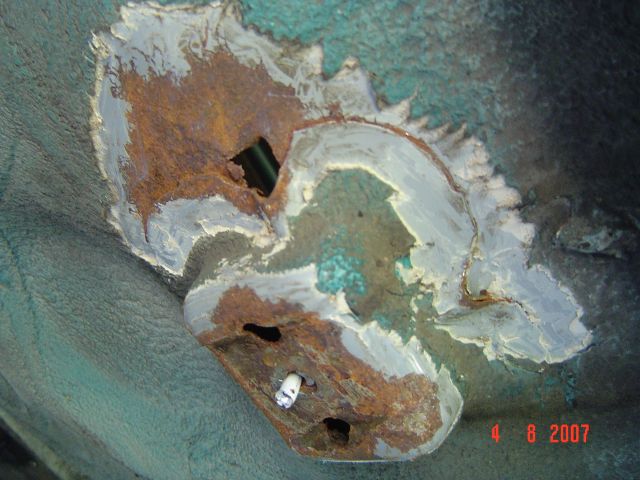
By yangra at 2007-09-02
On découpe et on remet un morceau sain...

By yangra, shot with [URL=http://profile.imageshack.us/camerabuy.php?model=DSC-P72&
make=SONY]DSC-P72[/URL] at 2007-09-02

By yangra at 2007-09-02

By yangra at 2007-09-02
Dépose du train arrière...

By yangra, shot with [URL=http://profile.imageshack.us/camerabuy.php?model=DSC-P72&
make=SONY]DSC-P72[/URL] at 2007-09-02
Paliers de bras HS, bouffés par la rouille...

By yangra, shot with [URL=http://profile.imageshack.us/camerabuy.php?model=DSC-P72&
make=SONY]DSC-P72[/URL] at 2007-09-02
Mise en place des neufs, montés à la presse...

By yangra, shot with [URL=http://profile.imageshack.us/camerabuy.php?model=DSC-P72&
make=SONY]DSC-P72[/URL] at 2007-09-02
Mise en peinture antirouille mate...
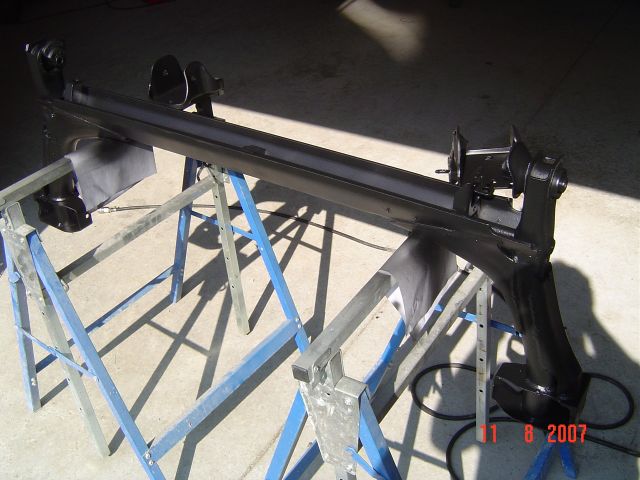
By yangra at 2007-09-02
Les portes, capots, et ailes vont être déposés...
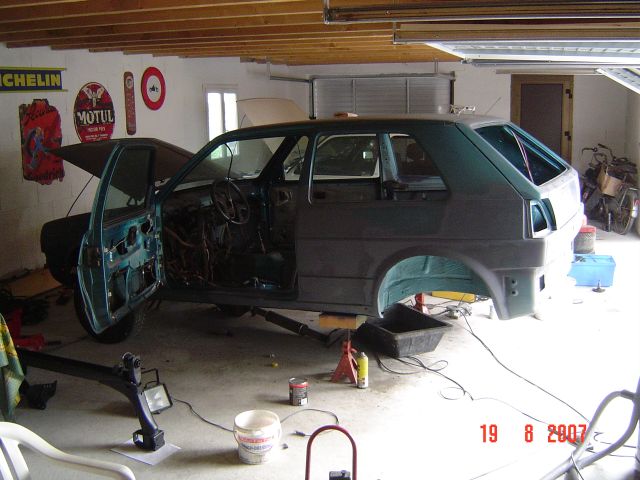
By yangra, shot with [URL=http://profile.imageshack.us/camerabuy.php?model=DSC-P72&
make=SONY]DSC-P72[/URL] at 2007-09-02
Dépose du train avant...

By yangra at 2007-09-02
Les vis de fixation du train avant...

By yangra, shot with [URL=http://profile.imageshack.us/camerabuy.php?model=DSC-P72&
make=SONY]DSC-P72[/URL] at 2007-09-02
Nettoyage des passages de roue...

By yangra at 2007-09-02
Réalistaion du trou d'évacuation d'eau de clim...

By yangra at 2007-09-02

By yangra, shot with [URL=http://profile.imageshack.us/camerabuy.php?model=DSC-P72&
make=SONY]DSC-P72[/URL] at 2007-09-02

By yangra at 2007-09-02
Une petite idée de l'état du circuit de freinage en voyant le répartiteur arrière...
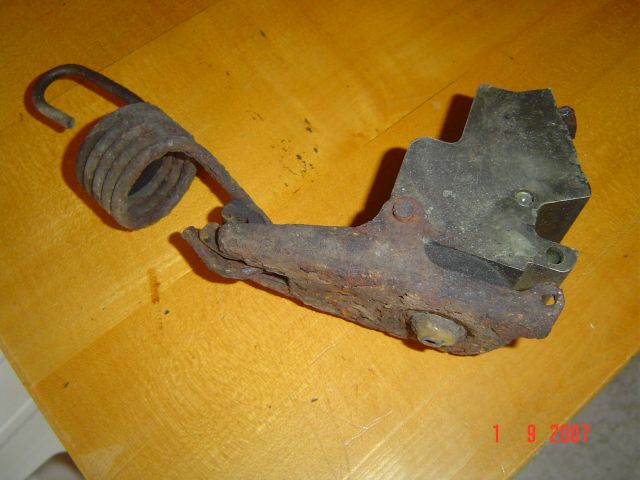
By yangra, shot with [URL=http://profile.imageshack.us/camerabuy.php?model=DSC-P72&
make=SONY]DSC-P72[/URL] at 2007-09-02
Remplacement du système...

By yangra at 2007-09-02

By yangra, shot with [URL=http://profile.imageshack.us/camerabuy.php?model=DSC-P72&
make=SONY]DSC-P72[/URL] at 2007-09-02
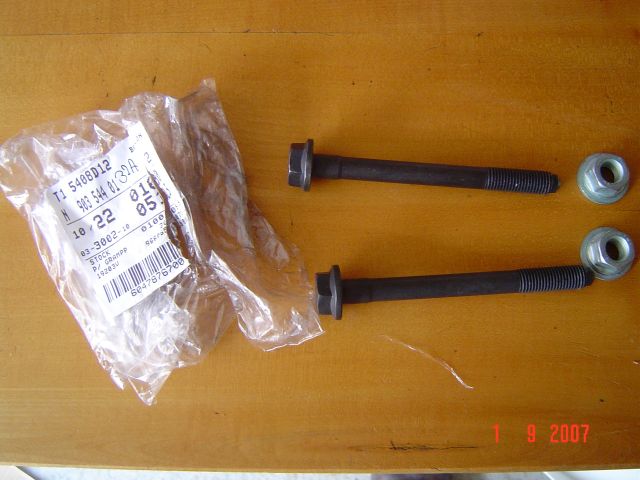
By yangra, shot with [URL=http://profile.imageshack.us/camerabuy.php?model=DSC-P72&
make=SONY]DSC-P72[/URL] at 2007-09-02

By yangra at 2007-09-02

By yangra, shot with [URL=http://profile.imageshack.us/camerabuy.php?model=DSC-P72&
make=SONY]DSC-P72[/URL] at 2007-09-02
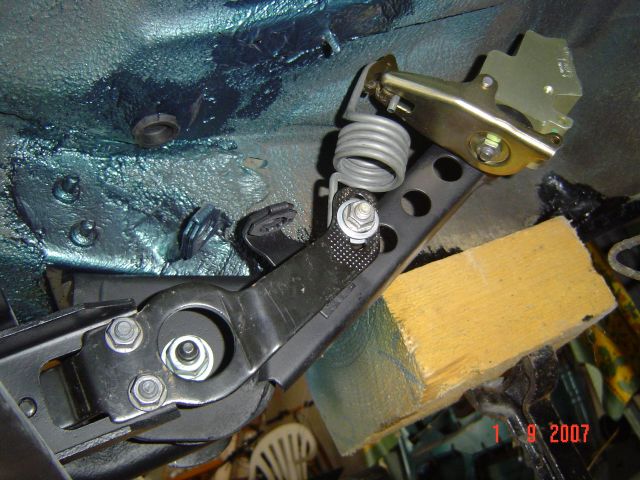
By yangra at 2007-09-02
Le train arrière à nouveau en place...

By yangra at 2007-09-02
ça avance, ça avance...
Mes projets :
Remettre en état irréprochable, rabaissée -4, avec BB RM en 1,5"
. Full options, avec sièges chauffants, clim, régulateur de vitesse, rétros électriques,..... et mon petit péché mignon, (j'espère que je vai pas froissé les puristes), mettre un intérieur de fire&
ice... Ma femme et moi on adore! J'ai deux intérieurs chez moi...
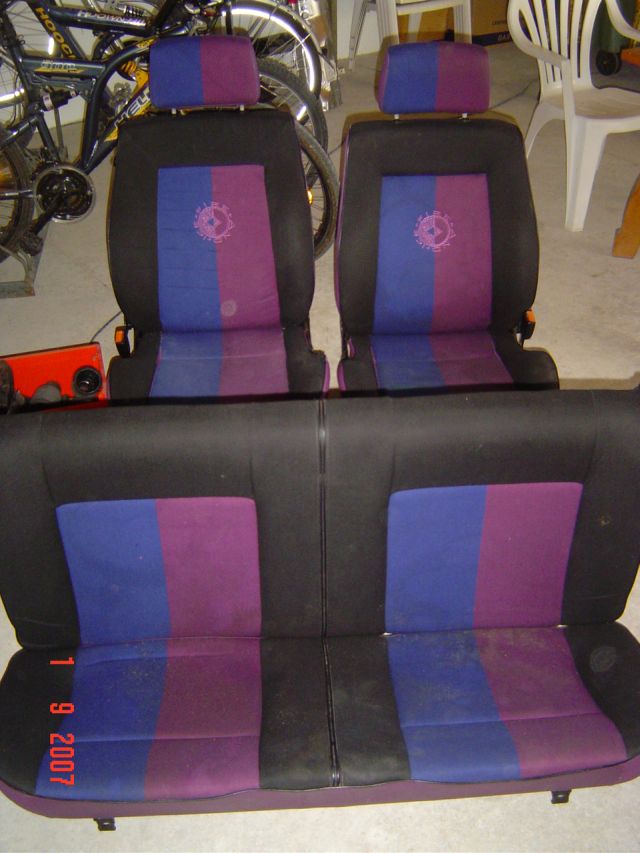
By yangra, shot with [URL=http://profile.imageshack.us/camerabuy.php?model=DSC-P72&
make=SONY]DSC-P72[/URL] at 2007-09-02
Voici ma G60, en cours de restauration. Elle a 145000kms au compteur (donc non certifiés). Elle est dans une couleur hyper rare en G60, un vert turquoise : LA6U (couleur d'origine!!!). L'étiquette en atteste :

By yangra, shot with [URL=http://profile.imageshack.us/camerabuy.php?model=CI6330&
make=Acer+Corporation]CI6330[/URL] at 2007-09-02
La voiture a quelque peu mal vieillie, et montre des traces de rouille un peu partout, des bosses, et matraquages mécaniques comme des vis foirrées, alterateur fendu, taraudages HS,.... bref du boulot sur la planche, mais ça je m'en doutais en devenant propriétaire... Voici les photos le jour de l'achat :

By yangra, shot with [URL=http://profile.imageshack.us/camerabuy.php?model=DSC-P72&
make=SONY]DSC-P72[/URL] at 2007-09-02
Oui, je sais la calandre de Jetta fait dégueu, évidemment, je la remet origine...

By yangra, shot with [URL=http://profile.imageshack.us/camerabuy.php?model=DSC-P72&
make=SONY]DSC-P72[/URL] at 2007-09-02

By yangra, shot with [URL=http://profile.imageshack.us/camerabuy.php?model=DSC-P72&
make=SONY]DSC-P72[/URL] at 2007-09-02

By yangra, shot with [URL=http://profile.imageshack.us/camerabuy.php?model=DSC-P72&
make=SONY]DSC-P72[/URL] at 2007-09-02

By yangra at 2007-09-02

By yangra, shot with [URL=http://profile.imageshack.us/camerabuy.php?model=DSC-P72&
make=SONY]DSC-P72[/URL] at 2007-09-02

By yangra, shot with [URL=http://profile.imageshack.us/camerabuy.php?model=DSC-P72&
make=SONY]DSC-P72[/URL] at 2007-09-02

By yangra, shot with [URL=http://profile.imageshack.us/camerabuy.php?model=DSC-P72&
make=SONY]DSC-P72[/URL] at 2007-09-02

By yangra at 2007-09-02

By yangra at 2007-09-02

By yangra, shot with [URL=http://profile.imageshack.us/camerabuy.php?model=DSC-P72&
make=SONY]DSC-P72[/URL] at 2007-09-02
La tête de Delco tient avec du fil de fer!

By yangra, shot with [URL=http://profile.imageshack.us/camerabuy.php?model=DSC-P72&
make=SONY]DSC-P72[/URL] at 2007-09-02
Le moteur pésentait des atés importantes, la panne : Un fil de masse débranché! La cosse sur lz pipe d'eau a cassé...

By yangra, shot with [URL=http://profile.imageshack.us/camerabuy.php?model=DSC-P72&
make=SONY]DSC-P72[/URL] at 2007-09-02
La verte à coté de la blanche...

By yangra, shot with [URL=http://profile.imageshack.us/camerabuy.php?model=DSC-P72&
make=SONY]DSC-P72[/URL] at 2007-09-02
Le démontage commence... pour une restauration totale!

By yangra at 2007-09-02

By yangra, shot with [URL=http://profile.imageshack.us/camerabuy.php?model=DSC-P72&
make=SONY]DSC-P72[/URL] at 2007-09-02

By yangra, shot with [URL=http://profile.imageshack.us/camerabuy.php?model=DSC-P72&
make=SONY]DSC-P72[/URL] at 2007-09-02

By yangra at 2007-09-02

By yangra at 2007-09-02

By yangra, shot with [URL=http://profile.imageshack.us/camerabuy.php?model=DSC-P72&
make=SONY]DSC-P72[/URL] at 2007-09-02
La corrosion dans le coin d'aile arrière...

By yangra, shot with [URL=http://profile.imageshack.us/camerabuy.p
hp?model=DSC-P72&
make=SONY]DSC-P72[/URL] at 2007-09-02

By yangra, shot with [URL=http://profile.imageshack.us/camerabuy.php?model=DSC-P72&
make=SONY]DSC-P72[/URL] at 2007-09-02

By yangra at 2007-09-02
Nettoyage du compartiment moteur

By yangra, shot with [URL=http://profile.imageshack.us/camerabuy.php?model=DSC-P72&
make=SONY]DSC-P72[/URL] at 2007-09-02
Encore de la rouille...

By yangra at 2007-09-02

By yangra at 2007-09-02

By yangra, shot with [URL=http://profile.imageshack.us/camerabuy.php?model=DSC-P72&
make=SONY]DSC-P72[/URL] at 2007-09-02

By yangra at 2007-09-02
Encore la rouille...

By yangra, shot with [URL=http://profile.imageshack.us/camerabuy.php?model=DSC-P72&
make=SONY]DSC-P72[/URL] at 2007-09-02

By yangra at 2007-09-02

By yangra, shot with [URL=http://profile.imageshack.us/camerabuy.php?model=DSC-P72&
make=SONY]DSC-P72[/URL] at 2007-09-02

By yangra, shot with [URL=http://profile.imageshack.us/camerabuy.php?model=DSC-P72&
make=SONY]DSC-P72[/URL] at 2007-09-02
Les coins d'aile arrière refaits

By yangra, shot with [URL=http://profile.imageshack.us/camerabuy.php?model=DSC-P72&
make=SONY]DSC-P72[/URL] at 2007-09-02

By yangra, shot with [URL=http://profile.imageshack.us/camerabuy.php?model=DSC-P72&
make=SONY]DSC-P72[/URL] at 2007-09-02
Le cotour de tarppe à essence rouillé aussi...

By yangra, shot with [URL=http://profile.imageshack.us/camerabuy.php?model=DSC-P72&
make=SONY]DSC-P72[/URL] at 2007-09-02

By yangra, shot with [URL=http://profile.imageshack.us/camerabuy.php?model=DSC-P72&
make=SONY]DSC-P72[/URL] at 2007-09-02

By yangra at 2007-09-02

By yangra, shot with [URL=http://profile.imageshack.us/camerabuy.php?model=DSC-P72&
make=SONY]DSC-P72[/URL] at 2007-09-02

By yangra, shot with [URL=http://profile.imageshack.us/camerabuy.php?model=DSC-P72&
make=SONY]DSC-P72[/URL] at 2007-09-02
Les passages de roue arrière meulées par l'ancien proprio...

By yangra, shot with [URL=http://profile.imageshack.us/camerabuy.php?model=DSC-P72&
make=SONY]DSC-P72[/URL] at 2007-09-02

By yangra, shot with [URL=http://profile.imageshack.us/camerabuy.php?model=DSC-P72&
make=SONY]DSC-P72[/URL] at 2007-09-02

By yangra at 2007-09-02

By yangra, shot with [URL=http://profile.imageshack.us/camerabuy.php?model=DSC-P72&
make=SONY]DSC-P72[/URL] at 2007-09-02

By yangra, shot with [URL=http://profile.imageshack.us/camerabuy.php?model=DSC-P72&
make=SONY]DSC-P72[/URL] at 2007-09-02
Dépose du réservoir...

By yangra at 2007-09-02
Encore de la rouille !

By yangra at 2007-09-02
On découpe et on remet un morceau sain...

By yangra, shot with [URL=http://profile.imageshack.us/camerabuy.php?model=DSC-P72&
make=SONY]DSC-P72[/URL] at 2007-09-02

By yangra at 2007-09-02

By yangra at 2007-09-02
Dépose du train arrière...

By yangra, shot with [URL=http://profile.imageshack.us/camerabuy.php?model=DSC-P72&
make=SONY]DSC-P72[/URL] at 2007-09-02
Paliers de bras HS, bouffés par la rouille...

By yangra, shot with [URL=http://profile.imageshack.us/camerabuy.php?model=DSC-P72&
make=SONY]DSC-P72[/URL] at 2007-09-02
Mise en place des neufs, montés à la presse...

By yangra, shot with [URL=http://profile.imageshack.us/camerabuy.php?model=DSC-P72&
make=SONY]DSC-P72[/URL] at 2007-09-02
Mise en peinture antirouille mate...

By yangra at 2007-09-02
Les portes, capots, et ailes vont être déposés...

By yangra, shot with [URL=http://profile.imageshack.us/camerabuy.php?model=DSC-P72&
make=SONY]DSC-P72[/URL] at 2007-09-02
Dépose du train avant...

By yangra at 2007-09-02
Les vis de fixation du train avant...

By yangra, shot with [URL=http://profile.imageshack.us/camerabuy.php?model=DSC-P72&
make=SONY]DSC-P72[/URL] at 2007-09-02
Nettoyage des passages de roue...

By yangra at 2007-09-02
Réalistaion du trou d'évacuation d'eau de clim...

By yangra at 2007-09-02

By yangra, shot with [URL=http://profile.imageshack.us/camerabuy.php?model=DSC-P72&
make=SONY]DSC-P72[/URL] at 2007-09-02

By yangra at 2007-09-02
Une petite idée de l'état du circuit de freinage en voyant le répartiteur arrière...

By yangra, shot with [URL=http://profile.imageshack.us/camerabuy.php?model=DSC-P72&
make=SONY]DSC-P72[/URL] at 2007-09-02
Remplacement du système...

By yangra at 2007-09-02

By yangra, shot with [URL=http://profile.imageshack.us/camerabuy.php?model=DSC-P72&
make=SONY]DSC-P72[/URL] at 2007-09-02

By yangra, shot with [URL=http://profile.imageshack.us/camerabuy.php?model=DSC-P72&
make=SONY]DSC-P72[/URL] at 2007-09-02

By yangra at 2007-09-02

By yangra, shot with [URL=http://profile.imageshack.us/camerabuy.php?model=DSC-P72&
make=SONY]DSC-P72[/URL] at 2007-09-02

By yangra at 2007-09-02
Le train arrière à nouveau en place...

By yangra at 2007-09-02
ça avance, ça avance...
Mes projets :
Remettre en état irréprochable, rabaissée -4, avec BB RM en 1,5"
. Full options, avec sièges chauffants, clim, régulateur de vitesse, rétros électriques,..... et mon petit péché mignon, (j'espère que je vai pas froissé les puristes), mettre un intérieur de fire&
ice... Ma femme et moi on adore! J'ai deux intérieurs chez moi...

By yangra, shot with [URL=http://profile.imageshack.us/camerabuy.php?model=DSC-P72&
make=SONY]DSC-P72[/URL] at 2007-09-02
 Les franginsStaff Golfoo
Modérateur
- Messages : 30073
Date d'inscription : 09/08/2004
Localisation : 34 Montpellier, en terrasse ! pastis powaaaaa !
 Re: La renaissance de ma G60! Récaro XT P107!!
Mer 2 Jan 2008 - 16:07
Salut yangra, tu pourrais nous faire une petite présentation de ta golf stp, au lieu de juste nous donner le lien 
 D.o.mGolfoo sur-actif
- Messages : 8288
Date d'inscription : 19/11/2003
Localisation : pas loin d'un jaune.........avec deux glaçons !!!!
 Re: La renaissance de ma G60! Récaro XT P107!!
Mer 2 Jan 2008 - 16:46
ouaip.....................pas mieux........tout le monde ne fréquente pas forcément"
Golfistes.com"


Golfistes.com"
 Fred77Golfoo de Diamant confirmé
- Messages : 5090
Date d'inscription : 09/07/2005
Localisation : 77
 Re: La renaissance de ma G60! Récaro XT P107!!
Mer 2 Jan 2008 - 18:07
Bienvenue
Si tu cherches qui a viré ton lien c'est moi
Imagine un peu si tous le monde fais comme toi :? , donc merci de prendre la peine de faire la présentation de ton vehicule et pas seulement un lien.

Si tu cherches qui a viré ton lien c'est moi
Imagine un peu si tous le monde fais comme toi :? , donc merci de prendre la peine de faire la présentation de ton vehicule et pas seulement un lien.
 yangraGolfoo d'argent confirmé
- Messages : 559
Date d'inscription : 05/11/2003
Localisation : Alsace
 Re: La renaissance de ma G60! Récaro XT P107!!
Mer 2 Jan 2008 - 18:41
OK, désolé... je crois que c'est bon maintenant! 
 yangraGolfoo d'argent confirmé
- Messages : 559
Date d'inscription : 05/11/2003
Localisation : Alsace
 Re: La renaissance de ma G60! Récaro XT P107!!
Mer 2 Jan 2008 - 18:43
Voici la suite du jour :
Montage des cables de frein à main
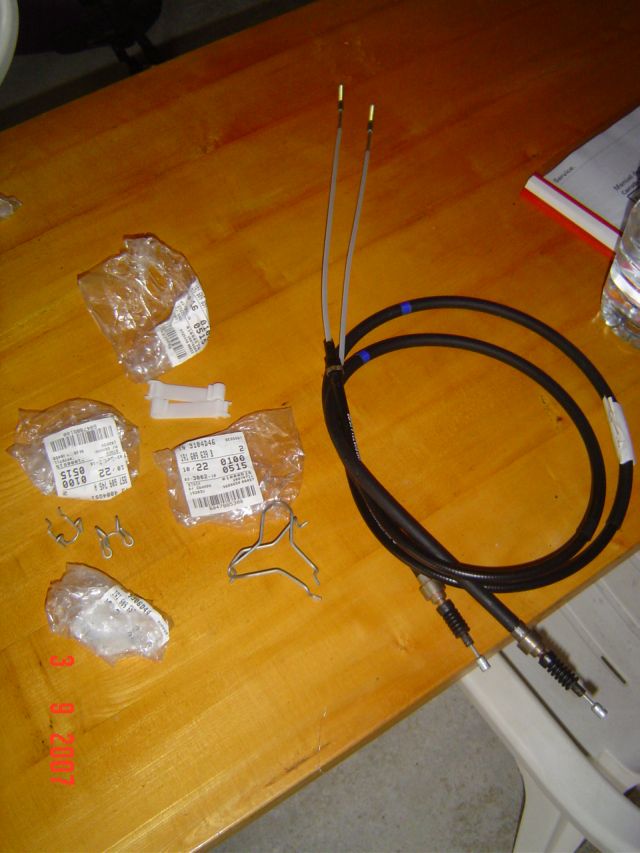
By yangra at 2007-09-03
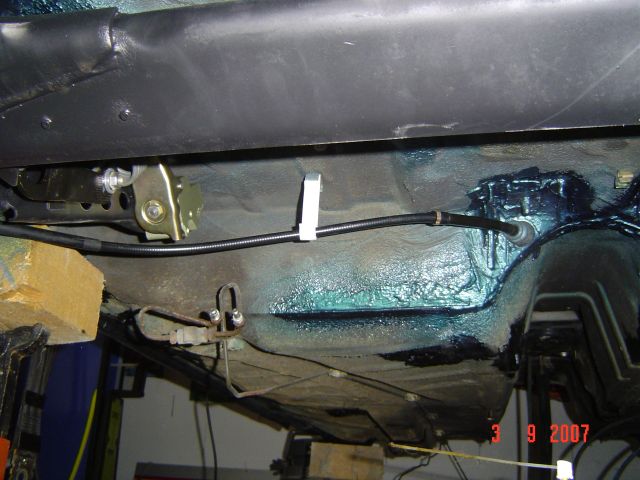
By yangra, shot with [URL=http://profile.imageshack.us/camerabuy.php?model=DSC-P72&
make=SONY]DSC-P72[/URL] at 2007-09-03
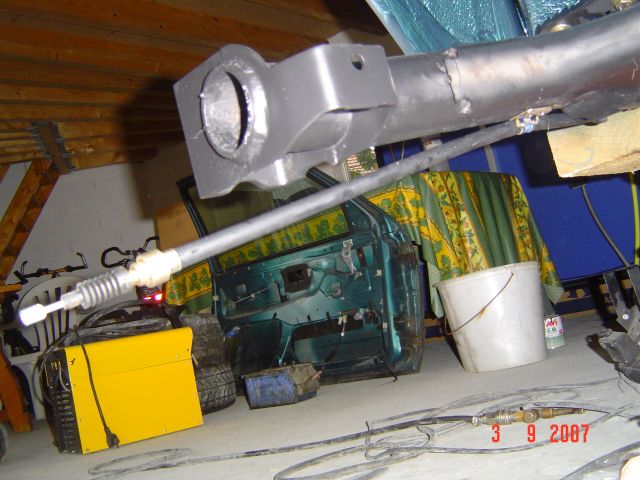
By yangra, shot with [URL=http://profile.imageshack.us/camerabuy.php?model=DSC-P72&
make=SONY]DSC-P72[/URL] at 2007-09-03
Petits clips...

By yangra, shot with [URL=http://profile.imageshack.us/camerabuy.php?model=DSC-P72&
make=SONY]DSC-P72[/URL] at 2007-09-03

By yangra, shot with [URL=http://profile.imageshack.us/camerabuy.php?model=DSC-P72&
make=SONY]DSC-P72[/URL] at 2007-09-03
Et j'ai enfin pu tester mon nouveau matériel de plomberie!

By yangra, shot with [URL=http://profile.imageshack.us/camerabuy.php?model=DSC-P72&
make=SONY]DSC-P72[/URL] at 2007-09-03

By yangra, shot with [URL=http://profile.imageshack.us/camerabuy.php?model=DSC-P72&
make=SONY]DSC-P72[/URL] at 2007-09-03

By yangra, shot with [URL=http://profile.imageshack.us/camerabuy.php?model=DSC-P72&
make=SONY]DSC-P72[/URL] at 2007-09-03

By yangra, shot with [URL=http://profile.imageshack.us/camerabuy.php?model=DSC-P72&
make=SONY]DSC-P72[/URL] at 2007-09-03
ça donne ça :

By yangra, shot with [URL=http://profile.imageshack.us/camerabuy.php?model=DSC-P72&
make=SONY]DSC-P72[/URL] at 2007-09-03

By yangra, shot with [URL=http://profile.imageshack.us/camerabuy.php?model=DSC-P72&
make=SONY]DSC-P72[/URL] at 2007-09-03
Pas trop mal hein! :Biggrin:
Montage des cables de frein à main

By yangra at 2007-09-03

By yangra, shot with [URL=http://profile.imageshack.us/camerabuy.php?model=DSC-P72&
make=SONY]DSC-P72[/URL] at 2007-09-03

By yangra, shot with [URL=http://profile.imageshack.us/camerabuy.php?model=DSC-P72&
make=SONY]DSC-P72[/URL] at 2007-09-03
Petits clips...

By yangra, shot with [URL=http://profile.imageshack.us/camerabuy.php?model=DSC-P72&
make=SONY]DSC-P72[/URL] at 2007-09-03

By yangra, shot with [URL=http://profile.imageshack.us/camerabuy.php?model=DSC-P72&
make=SONY]DSC-P72[/URL] at 2007-09-03
Et j'ai enfin pu tester mon nouveau matériel de plomberie!

By yangra, shot with [URL=http://profile.imageshack.us/camerabuy.php?model=DSC-P72&
make=SONY]DSC-P72[/URL] at 2007-09-03

By yangra, shot with [URL=http://profile.imageshack.us/camerabuy.php?model=DSC-P72&
make=SONY]DSC-P72[/URL] at 2007-09-03

By yangra, shot with [URL=http://profile.imageshack.us/camerabuy.php?model=DSC-P72&
make=SONY]DSC-P72[/URL] at 2007-09-03

By yangra, shot with [URL=http://profile.imageshack.us/camerabuy.php?model=DSC-P72&
make=SONY]DSC-P72[/URL] at 2007-09-03
ça donne ça :

By yangra, shot with [URL=http://profile.imageshack.us/camerabuy.php?model=DSC-P72&
make=SONY]DSC-P72[/URL] at 2007-09-03

By yangra, shot with [URL=http://profile.imageshack.us/camerabuy.php?model=DSC-P72&
make=SONY]DSC-P72[/URL] at 2007-09-03
Pas trop mal hein! :Biggrin:
 yangraGolfoo d'argent confirmé
- Messages : 559
Date d'inscription : 05/11/2003
Localisation : Alsace
 Re: La renaissance de ma G60! Récaro XT P107!!
Mer 2 Jan 2008 - 18:45

By yangra at 2007-09-05
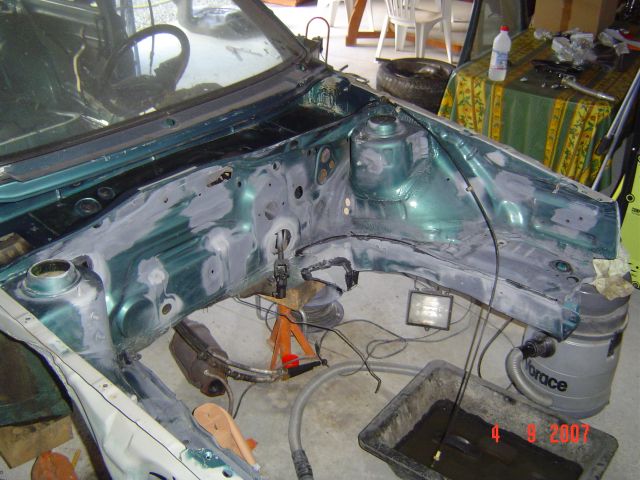
By yangra, shot with [URL=http://profile.imageshack.us/camerabuy.php?model=DSC-P72&
make=SONY]DSC-P72[/URL] at 2007-09-05
La couche de fond :

By yangra, shot with [URL=http://profile.imageshack.us/camerabuy.php?model=DSC-P72&
make=SONY]DSC-P72[/URL] at 2007-09-05
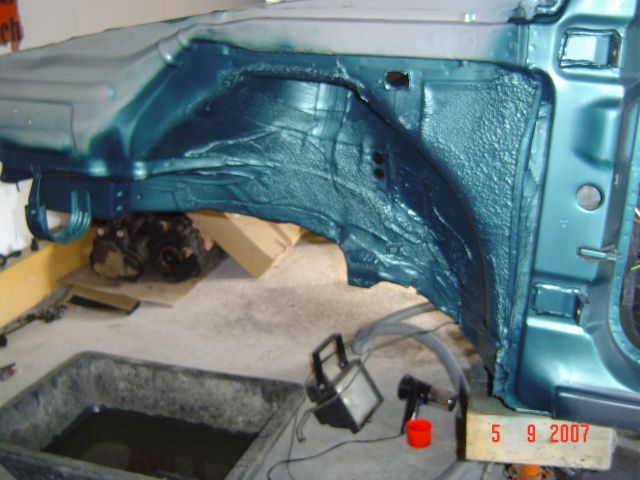
By yangra, shot with [URL=http://profile.imageshack.us/camerabuy.php?model=DSC-P72&
make=SONY]DSC-P72[/URL] at 2007-09-05

By yangra, shot with [URL=http://profile.imageshack.us/camerabuy.php?model=DSC-P72&
make=SONY]DSC-P72[/URL] at 2007-09-05
Puis le vernis :

By yangra, shot with [URL=http://profile.imageshack.us/camerabuy.php?model=DSC-P72&
make=SONY]DSC-P72[/URL] at 2007-09-05
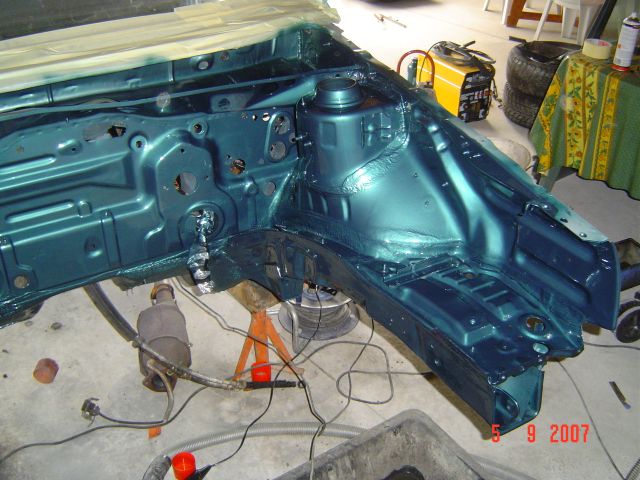
By yangra at 2007-09-05
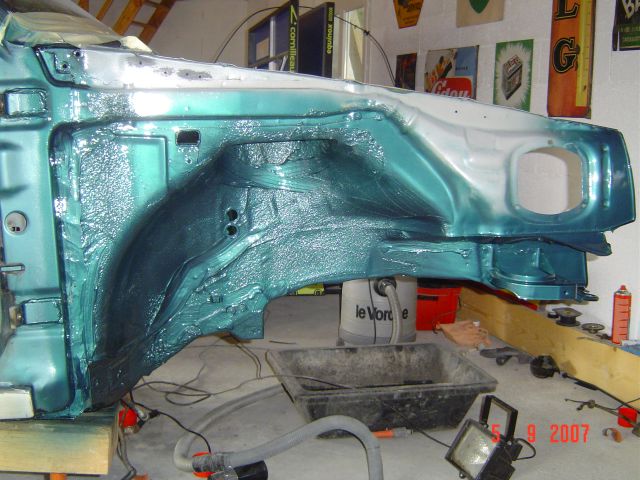
By yangra, shot with [URL=http://profile.imageshack.us/camerabuy.php?model=DSC-P72&
make=SONY]DSC-P72[/URL] at 2007-09-05
Le AVANT / APRES :

By yangra at 2007-09-05

By yangra, shot with [URL=http://profile.imageshack.us/camerabuy.php?model=DSC-P72&
make=SONY]DSC-P72[/URL] at 2007-09-05
 yangraGolfoo d'argent confirmé
- Messages : 559
Date d'inscription : 05/11/2003
Localisation : Alsace
 Re: La renaissance de ma G60! Récaro XT P107!!
Mer 2 Jan 2008 - 18:50
La suite!!!

By yangra, shot with [URL=http://profile.imageshack.us/camerabuy.php?model=DSC-P72&
make=SONY]DSC-P72[/URL] at 2007-09-06

By yangra at 2007-09-06

By yangra, shot with [URL=http://profile.imageshack.us/camerabuy.php?model=DSC-P72&
make=SONY]DSC-P72[/URL] at 2007-09-06

By yangra, shot with [URL=http://profile.imageshack.us/camerabuy.php?model=DSC-P72&
make=SONY]DSC-P72[/URL] at 2007-09-06

By yangra at 2007-09-06

By yangra, shot with [URL=http://profile.imageshack.us/camerabuy.php?model=DSC-P72&
make=SONY]DSC-P72[/URL] at 2007-09-06

By yangra at 2007-09-06

By yangra, shot with [URL=http://profile.imageshack.us/camerabuy.php?model=DSC-P72&
make=SONY]DSC-P72[/URL] at 2007-09-06

By yangra, shot with [URL=http://profile.imageshack.us/camerabuy.php?model=DSC-P72&
make=SONY]DSC-P72[/URL] at 2007-09-07

By yangra, shot with [URL=http://profile.imageshack.us/camerabuy.php?model=DSC-P72&
make=SONY]DSC-P72[/URL] at 2007-09-07

By yangra, shot with [URL=http://profile.imageshack.us/camerabuy.php?model=DSC-P72&
make=SONY]DSC-P72[/URL] at 2007-09-07

By yangra, shot with [URL=http://profile.imageshack.us/camerabuy.php?model=DSC-P72&
make=SONY]DSC-P72[/URL] at 2007-09-07

By yangra, shot with [URL=http://profile.imageshack.us/camerabuy.php?model=DSC-P72&
make=SONY]DSC-P72[/URL] at 2007-09-07
By yangra, shot with [URL=http://profile.imageshack.us/camerabuy.php?model=DSC-P72&
make=SONY]DSC-P72[/URL] at 2007-09-07
By yangra, shot with [URL=http://profile.imageshack.us/camerabuy.php?model=DSC-P72&
make=SONY]DSC-P72[/URL] at 2007-09-07

By yangra, shot with [URL=http://profile.imageshack.us/camerabuy.php?model=DSC-P72&
make=SONY]DSC-P72[/URL] at 2007-09-07

By yangra, shot with [URL=http://profile.imageshack.us/camerabuy.php?model=DSC-P72&
make=SONY]DSC-P72[/URL] at 2007-09-07

By yangra, shot with [URL=http://profile.imageshack.us/camerabuy.php?model=DSC-P72&
make=SONY]DSC-P72[/URL] at 2007-09-07

By yangra, shot with [URL=http://profile.imageshack.us/camerabuy.php?model=DSC-P72&
make=SONY]DSC-P72[/URL] at 2007-09-06

By yangra at 2007-09-06

By yangra, shot with [URL=http://profile.imageshack.us/camerabuy.php?model=DSC-P72&
make=SONY]DSC-P72[/URL] at 2007-09-06

By yangra, shot with [URL=http://profile.imageshack.us/camerabuy.php?model=DSC-P72&
make=SONY]DSC-P72[/URL] at 2007-09-06

By yangra at 2007-09-06

By yangra, shot with [URL=http://profile.imageshack.us/camerabuy.php?model=DSC-P72&
make=SONY]DSC-P72[/URL] at 2007-09-06

By yangra at 2007-09-06

By yangra, shot with [URL=http://profile.imageshack.us/camerabuy.php?model=DSC-P72&
make=SONY]DSC-P72[/URL] at 2007-09-06

By yangra, shot with [URL=http://profile.imageshack.us/camerabuy.php?model=DSC-P72&
make=SONY]DSC-P72[/URL] at 2007-09-07

By yangra, shot with [URL=http://profile.imageshack.us/camerabuy.php?model=DSC-P72&
make=SONY]DSC-P72[/URL] at 2007-09-07

By yangra, shot with [URL=http://profile.imageshack.us/camerabuy.php?model=DSC-P72&
make=SONY]DSC-P72[/URL] at 2007-09-07

By yangra, shot with [URL=http://profile.imageshack.us/camerabuy.php?model=DSC-P72&
make=SONY]DSC-P72[/URL] at 2007-09-07

By yangra, shot with [URL=http://profile.imageshack.us/camerabuy.php?model=DSC-P72&
make=SONY]DSC-P72[/URL] at 2007-09-07

By yangra, shot with [URL=http://profile.imageshack.us/camerabuy.php?model=DSC-P72&
make=SONY]DSC-P72[/URL] at 2007-09-07

By yangra, shot with [URL=http://profile.imageshack.us/camerabuy.php?model=DSC-P72&
make=SONY]DSC-P72[/URL] at 2007-09-07

By yangra, shot with [URL=http://profile.imageshack.us/camerabuy.php?model=DSC-P72&
make=SONY]DSC-P72[/URL] at 2007-09-07

By yangra, shot with [URL=http://profile.imageshack.us/camerabuy.php?model=DSC-P72&
make=SONY]DSC-P72[/URL] at 2007-09-07

By yangra, shot with [URL=http://profile.imageshack.us/camerabuy.php?model=DSC-P72&
make=SONY]DSC-P72[/URL] at 2007-09-07
 yangraGolfoo d'argent confirmé
- Messages : 559
Date d'inscription : 05/11/2003
Localisation : Alsace
 Re: La renaissance de ma G60! Récaro XT P107!!
Mer 2 Jan 2008 - 18:53
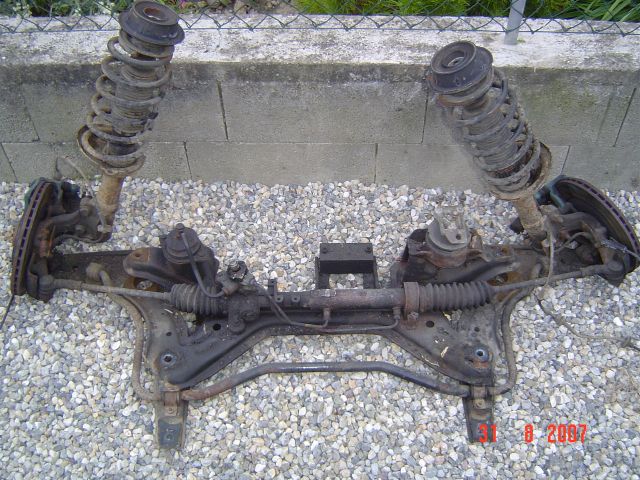
préparation de certaines pièces au sablage.
By yangra, shot with [URL=http://profile.imageshack.us/camerabuy.php?model=DSC-P72&
make=SONY]DSC-P72[/URL] at 2007-09-08
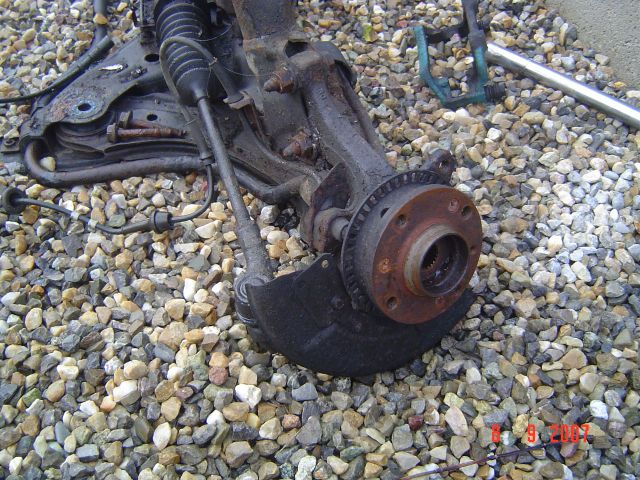
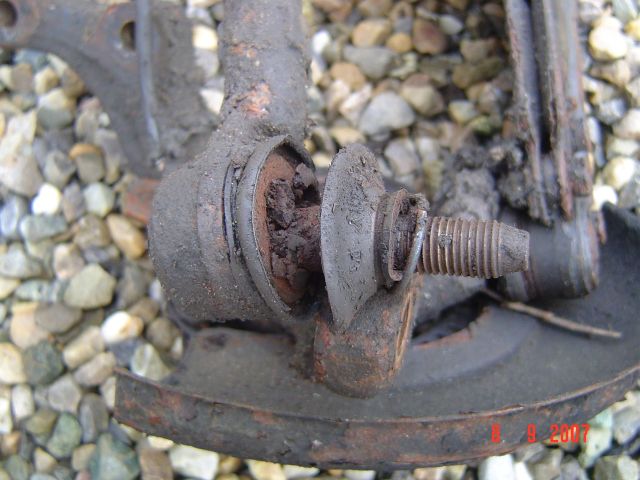
C'était serré comme des malades!! Il faut être fou pour serrer aussi fort!!!

By yangra, shot with [URL=http://profile.imageshack.us/camerabuy.php?model=DSC-P72&
make=SONY]DSC-P72[/URL] at 2007-09-08

By yangra, shot with [URL=http://profile.imageshack.us/camerabuy.php?model=DSC-P72&
make=SONY]DSC-P72[/URL] at 2007-09-08

By yangra, shot with [URL=http://profile.imageshack.us/camerabuy.php?model=DSC-P72&
make=SONY]DSC-P72[/URL] at 2007-09-08
By yangra at 2007-09-08

By yangra, shot with [URL=http://profile.imageshack.us/camerabuy.php?model=DSC-P72&
make=SONY]DSC-P72[/URL] at 2007-09-08
By yangra, shot with [URL=http://profile.imageshack.us/camerabuy.php?model=DSC-P72&
make=SONY]DSC-P72[/URL] at 2007-09-08

By yangra, shot with [URL=http://profile.imageshack.us/camerabuy.php?model=DSC-P72&
make=SONY]DSC-P72[/URL] at 2007-09-08

By yangra at 2007-09-08
Une vis qui a résisté... mais pas longtemps, en chauffant un peu, ça vient tout seul!

By yangra, shot with [URL=http://profile.imageshack.us/camerabuy.php?model=DSC-P72&
make=SONY]DSC-P72[/URL] at 2007-09-08

By yangra, shot with [URL=http://profile.imageshack.us/camerabuy.php?model=DSC-P72&
make=SONY]DSC-P72[/URL] at 2007-09-08

By yangra, shot with [URL=http://profile.imageshack.us/camerabuy.php?model=DSC-P72&
make=SONY]DSC-P72[/URL] at 2007-09-08

By yangra, shot with [URL=http://profile.imageshack.us/camerabuy.php?model=DSC-P72&
make=SONY]DSC-P72[/URL] at 2007-09-08
Là je leur prépare un bain d'essence pour dégraisser un peu...

By yangra, shot with [URL=http://profile.imageshack.us/camerabuy.php?model=DSC-P72&
make=SONY]DSC-P72[/URL] at 2007-09-08

By yangra, shot with [URL=http://profile.imageshack.us/camerabuy.php?model=DSC-P72&
make=SONY]DSC-P72[/URL] at 2007-09-08
Voici la plus grande aide que j'ai pour réussir jusqu'au bout :

By yangra, shot with [URL=http://profile.imageshack.us/camerabuy.php?model=DSC-P72&
make=SONY]DSC-P72[/URL] at 2007-09-08
Pour info, CORRADO = même mécanique que Golf.....
et ça :

By yangra, shot with [URL=http://profile.imageshack.us/camerabuy.php?model=DSC-P72&
make=SONY]DSC-P72[/URL] at 2007-09-08
En suite j'ai remis quelques faisceaux électriques en place :

By yangra at 2007-09-08

By yangra, shot with [URL=http://profile.imageshack.us/camerabuy.php?model=DSC-P72&
make=SONY]DSC-P72[/URL] at 2007-09-08
Vous y comprenez quelque chose vous??? moi oui! :laugh:
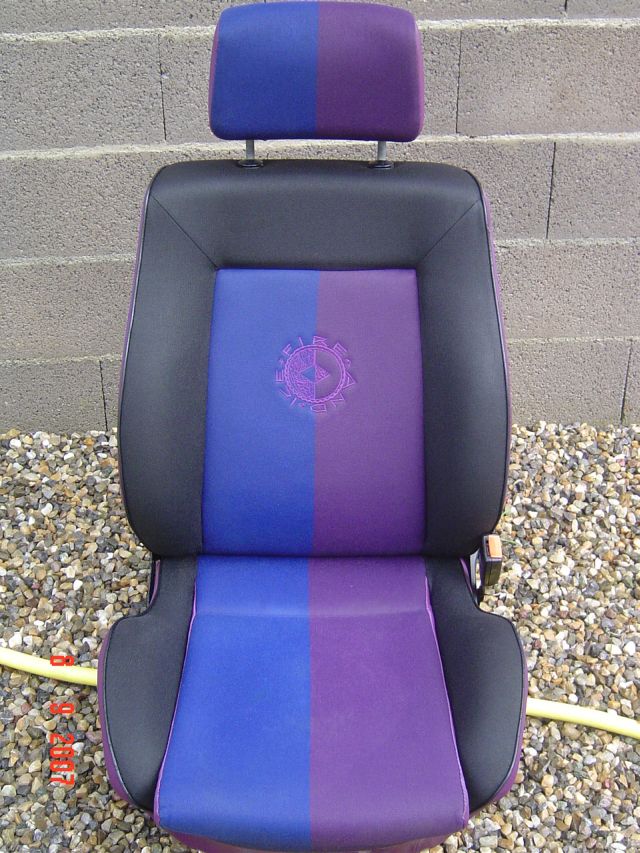
et Comme j'avais un peu de temps j'ai nettoyé un de mes futurs siège :
By yangra, shot with [URL=http://profile.imageshack.us/camerabuy.php?model=DSC-P72&
make=SONY]DSC-P72[/URL] at 2007-09-08

By yangra, shot with [URL=http://profile.imageshack.us/camerabuy.php?model=DSC-P72&
make=SONY]DSC-P72[/URL] at 2007-09-08
C'était serré comme des malades!! Il faut être fou pour serrer aussi fort!!!

By yangra, shot with [URL=http://profile.imageshack.us/camerabuy.php?model=DSC-P72&
make=SONY]DSC-P72[/URL] at 2007-09-08

By yangra, shot with [URL=http://profile.imageshack.us/camerabuy.php?model=DSC-P72&
make=SONY]DSC-P72[/URL] at 2007-09-08

By yangra, shot with [URL=http://profile.imageshack.us/camerabuy.php?model=DSC-P72&
make=SONY]DSC-P72[/URL] at 2007-09-08

By yangra at 2007-09-08

By yangra, shot with [URL=http://profile.imageshack.us/camerabuy.php?model=DSC-P72&
make=SONY]DSC-P72[/URL] at 2007-09-08

By yangra, shot with [URL=http://profile.imageshack.us/camerabuy.php?model=DSC-P72&
make=SONY]DSC-P72[/URL] at 2007-09-08

By yangra, shot with [URL=http://profile.imageshack.us/camerabuy.php?model=DSC-P72&
make=SONY]DSC-P72[/URL] at 2007-09-08

By yangra at 2007-09-08
Une vis qui a résisté... mais pas longtemps, en chauffant un peu, ça vient tout seul!

By yangra, shot with [URL=http://profile.imageshack.us/camerabuy.php?model=DSC-P72&
make=SONY]DSC-P72[/URL] at 2007-09-08

By yangra, shot with [URL=http://profile.imageshack.us/camerabuy.php?model=DSC-P72&
make=SONY]DSC-P72[/URL] at 2007-09-08

By yangra, shot with [URL=http://profile.imageshack.us/camerabuy.php?model=DSC-P72&
make=SONY]DSC-P72[/URL] at 2007-09-08

By yangra, shot with [URL=http://profile.imageshack.us/camerabuy.php?model=DSC-P72&
make=SONY]DSC-P72[/URL] at 2007-09-08
Là je leur prépare un bain d'essence pour dégraisser un peu...

By yangra, shot with [URL=http://profile.imageshack.us/camerabuy.php?model=DSC-P72&
make=SONY]DSC-P72[/URL] at 2007-09-08

By yangra, shot with [URL=http://profile.imageshack.us/camerabuy.php?model=DSC-P72&
make=SONY]DSC-P72[/URL] at 2007-09-08
Voici la plus grande aide que j'ai pour réussir jusqu'au bout :

By yangra, shot with [URL=http://profile.imageshack.us/camerabuy.php?model=DSC-P72&
make=SONY]DSC-P72[/URL] at 2007-09-08
Pour info, CORRADO = même mécanique que Golf.....
et ça :

By yangra, shot with [URL=http://profile.imageshack.us/camerabuy.php?model=DSC-P72&
make=SONY]DSC-P72[/URL] at 2007-09-08
En suite j'ai remis quelques faisceaux électriques en place :

By yangra at 2007-09-08

By yangra, shot with [URL=http://profile.imageshack.us/camerabuy.php?model=DSC-P72&
make=SONY]DSC-P72[/URL] at 2007-09-08
Vous y comprenez quelque chose vous??? moi oui! :laugh:
et Comme j'avais un peu de temps j'ai nettoyé un de mes futurs siège :

By yangra, shot with [URL=http://profile.imageshack.us/camerabuy.php?model=DSC-P72&
make=SONY]DSC-P72[/URL] at 2007-09-08
 yangraGolfoo d'argent confirmé
- Messages : 559
Date d'inscription : 05/11/2003
Localisation : Alsace
 Re: La renaissance de ma G60! Récaro XT P107!!
Mer 2 Jan 2008 - 18:59
Réalisation du faisceau de cables d'alim pour un futur ampli dans le coffre
Les cables, et la gaine tressée

By yangra, shot with [URL=http://profile.imageshack.us/camerabuy.php?model=DSC-P72&
make=SONY]DSC-P72[/URL] at 2007-09-14
Une fois les fils passés dans la gaine, el l'ensemble posé, le faisceau sort devant au niveau de la boite à fusibles

By yangra, shot with [URL=http://profile.imageshack.us/camerabuy.php?model=DSC-P72&
make=SONY]DSC-P72[/URL] at 2007-09-14
A l'arrière

By yangra, shot with [URL=http://profile.imageshack.us/camerabuy.php?model=DSC-P72&
make=SONY]DSC-P72[/URL] at 2007-09-14
Je vous montre un peu avec quoi je bosse
L'outillage et le matériel : pince à sertir spéciale, gaine thermorétractable, cosses adaptées à sertir.... pas de matos qu'on trouve en grande surface quoi. Ce n'est qu'un petit aperçu des modèles de cosses que j'ai...

By yangra, shot with [URL=http://profile.imageshack.us/camerabuy.php?model=DSC-P72&
make=SONY]DSC-P72[/URL] at 2007-09-14

By yangra at 2007-09-14
Les outils d'extraction de pins sur les connecteurs VW

By yangra at 2007-09-14
Le sertissage, comme à l'origine!

By yangra, shot with [URL=http://profile.imageshack.us/camerabuy.php?model=DSC-P72&
make=SONY]DSC-P72[/URL] at 2007-09-14

By yangra, shot with [URL=http://profile.imageshack.us/camerabuy.php?model=DSC-P72&
make=SONY]DSC-P72[/URL] at 2007-09-14
Montage du connecteur de l'auto radio, les fils

By yangra, shot with [URL=http://profile.imageshack.us/camerabuy.php?model=DSC-P72&
make=SONY]DSC-P72[/URL] at 2007-09-14
Le sertissage des cosses

By yangra, shot with [URL=http://profile.imageshack.us/camerabuy.php?model=DSC-P72&
make=SONY]DSC-P72[/URL] at 2007-09-14
et le montage du connecteur

By yangra, shot with [URL=http://profile.imageshack.us/camerabuy.php?model=DSC-P72&
make=SONY]DSC-P72[/URL] at 2007-09-14
Voici ma petite malette à bricoles électriques...

By yangra, shot with [URL=http://profile.imageshack.us/camerabuy.php?model=DSC-P72&
make=SONY]DSC-P72[/URL] at 2007-09-14
Les cables, et la gaine tressée

By yangra, shot with [URL=http://profile.imageshack.us/camerabuy.php?model=DSC-P72&
make=SONY]DSC-P72[/URL] at 2007-09-14
Une fois les fils passés dans la gaine, el l'ensemble posé, le faisceau sort devant au niveau de la boite à fusibles

By yangra, shot with [URL=http://profile.imageshack.us/camerabuy.php?model=DSC-P72&
make=SONY]DSC-P72[/URL] at 2007-09-14
A l'arrière

By yangra, shot with [URL=http://profile.imageshack.us/camerabuy.php?model=DSC-P72&
make=SONY]DSC-P72[/URL] at 2007-09-14
Je vous montre un peu avec quoi je bosse
L'outillage et le matériel : pince à sertir spéciale, gaine thermorétractable, cosses adaptées à sertir.... pas de matos qu'on trouve en grande surface quoi. Ce n'est qu'un petit aperçu des modèles de cosses que j'ai...

By yangra, shot with [URL=http://profile.imageshack.us/camerabuy.php?model=DSC-P72&
make=SONY]DSC-P72[/URL] at 2007-09-14

By yangra at 2007-09-14
Les outils d'extraction de pins sur les connecteurs VW

By yangra at 2007-09-14
Le sertissage, comme à l'origine!

By yangra, shot with [URL=http://profile.imageshack.us/camerabuy.php?model=DSC-P72&
make=SONY]DSC-P72[/URL] at 2007-09-14

By yangra, shot with [URL=http://profile.imageshack.us/camerabuy.php?model=DSC-P72&
make=SONY]DSC-P72[/URL] at 2007-09-14
Montage du connecteur de l'auto radio, les fils

By yangra, shot with [URL=http://profile.imageshack.us/camerabuy.php?model=DSC-P72&
make=SONY]DSC-P72[/URL] at 2007-09-14
Le sertissage des cosses

By yangra, shot with [URL=http://profile.imageshack.us/camerabuy.php?model=DSC-P72&
make=SONY]DSC-P72[/URL] at 2007-09-14
et le montage du connecteur

By yangra, shot with [URL=http://profile.imageshack.us/camerabuy.php?model=DSC-P72&
make=SONY]DSC-P72[/URL] at 2007-09-14
Voici ma petite malette à bricoles électriques...

By yangra, shot with [URL=http://profile.imageshack.us/camerabuy.php?model=DSC-P72&
make=SONY]DSC-P72[/URL] at 2007-09-14
 yangraGolfoo d'argent confirmé
- Messages : 559
Date d'inscription : 05/11/2003
Localisation : Alsace
 Re: La renaissance de ma G60! Récaro XT P107!!
Mer 2 Jan 2008 - 19:03
Commençons soft, remontage des attaches de ceinture

By yangra, shot with [URL=http://profile.imageshack.us/camerabuy.php?model=DSC-P72&
make=SONY]DSC-P72[/URL] at 2007-09-14

By yangra, shot with [URL=http://profile.imageshack.us/camerabuy.php?model=DSC-P72&
make=SONY]DSC-P72[/URL] at 2007-09-14
L'équipement électrique étant presque terminé, voici à quoi ressemble ma boite à fusibles.

By yangra, shot with [URL=http://profile.imageshack.us/camerabuy.php?model=DSC-P72&
make=SONY]DSC-P72[/URL] at 2007-09-15
J'ai même pu tester mon digifiz!!!!

By yangra, shot with [URL=http://profile.imageshack.us/camerabuy.php?model=DSC-P72&
make=SONY]DSC-P72[/URL] at 2007-09-15
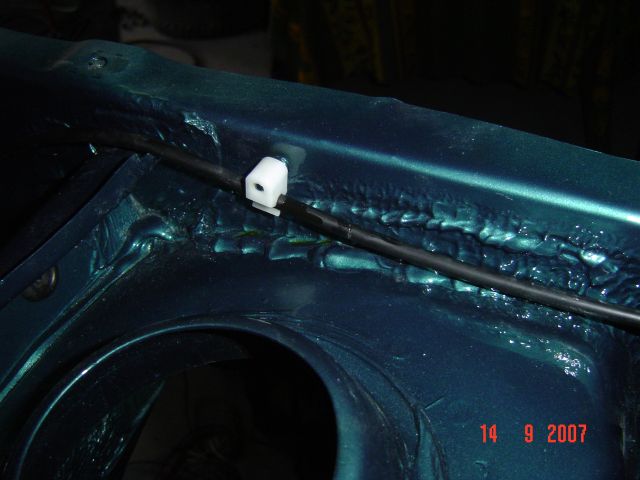
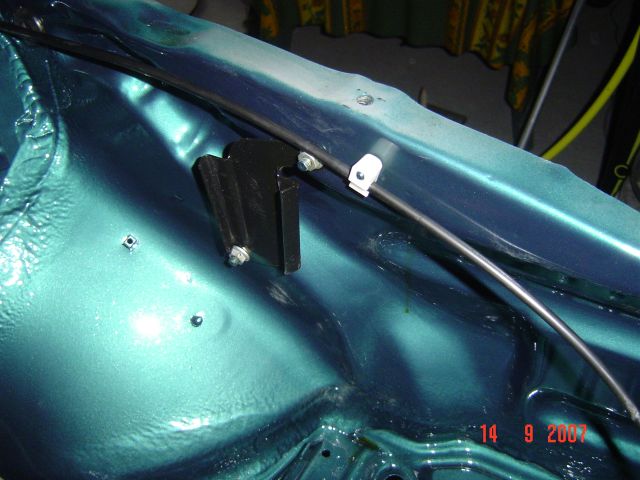
Ensuite le cable d'ouverture de capot

By yangra, shot with [URL=http://profile.imageshack.us/camerabuy.php?model=DSC-P72&
make=SONY]DSC-P72[/URL] at 2007-09-15
By yangra, shot with [URL=http://profile.imageshack.us/camerabuy.php?model=DSC-P72&
make=SONY]DSC-P72[/URL] at 2007-09-15
By yangra, shot with [URL=http://profile.imageshack.us/camerabuy.php?model=DSC-P72&
make=SONY]DSC-P72[/URL] at 2007-09-15
Les pattes support de tuyaux de frein avant

By yangra, shot with [URL=http://profile.imageshack.us/camerabuy.php?model=DSC-P72&
make=SONY]DSC-P72[/URL] at 2007-09-15

By yangra, shot with [URL=http://profile.imageshack.us/camerabuy.php?model=DSC-P72&
make=SONY]DSC-P72[/URL] at 2007-09-15

By yangra, shot with [URL=http://profile.imageshack.us/camerabuy.php?model=DSC-P72&
make=SONY]DSC-P72[/URL] at 2007-09-15
Montage du 'vérin' du régulateur de vitesse (vaut mieux le faire tant que le boitier de soufflerie est pas monté)

By yangra, shot with [URL=http://profile.imageshack.us/camerabuy.php?model=DSC-P72&
make=SONY]DSC-P72[/URL] at 2007-09-15

By yangra, shot with [URL=http://profile.imageshack.us/camerabuy.php?model=DSC-P72&
make=SONY]DSC-P72[/URL] at 2007-09-15
J'en profite pour remplacer la bague du cable d'accélérateur

By yangra, shot with [URL=http://profile.imageshack.us/camerabuy.php?model=DSC-P72&
make=SONY]DSC-P72[/URL] at 2007-09-15

By yangra, shot with [URL=http://profile.imageshack.us/camerabuy.php?model=DSC-P72&
make=SONY]DSC-P72[/URL] at 2007-09-15
Le faisceau de régulateur

By yangra, shot with [URL=http://profile.imageshack.us/camerabuy.php?model=DSC-P72&
make=SONY]DSC-P72[/URL] at 2007-09-15
Ensuite le gros morceau : installation du boitier de chauffage avec clim :
Le boitier complet :

By yangra, shot with [URL=http://profile.imageshack.us/camerabuy.php?model=DSC-P72&
make=SONY]DSC-P72[/URL] at 2007-09-15

By yangra, shot with [URL=http://profile.imageshack.us/camerabuy.php?model=DSC-P72&
make=SONY]DSC-P72[/URL] at 2007-09-15
Le réservoir à dépression :

By yangra, shot with [URL=http://profile.imageshack.us/camerabuy.php?model=DSC-P72&
make=SONY]DSC-P72[/URL] at 2007-09-15
L'évacuation d'eau de condensation :

By yangra, shot with [URL=http://profile.imageshack.us/camerabuy.php?model=DSC-P72&
make=SONY]DSC-P72[/URL] at 2007-09-15
Ne pas oublier de le brancher sur le conduit prévu!

By yangra, shot with [URL=http://profile.imageshack.us/camerabuy.php?model=DSC-P72&
make=SONY]DSC-P72[/URL] at 2007-09-15
Dépose du radiateur de chauffage

By yangra, shot with [URL=http://profile.imageshack.us/camerabuy.php?model=DSC-P72&
make=SONY]DSC-P72[/URL] at 2007-09-15
Séparation des deux éléments pour un nettoyage en profondeur

By yangra, shot with [URL=http://profile.imageshack.us/camerabuy.php?model=DSC-P72&
make=SONY]DSC-P72[/URL] at 2007-09-15
Le radiateur neuf

By yangra, shot with [URL=http://profile.imageshack.us/camerabuy.php?model=DSC-P72&
make=SONY]DSC-P72[/URL] at 2007-09-15
pose du radiateur

By yangra, shot with [URL=http://profile.imageshack.us/camerabuy.php?model=DSC-P72&
make=SONY]DSC-P72[/URL] at 2007-09-15
Controle des vannes à dépression avant de tout reposer. Vaut mieux tester avant.... là, miracle, tout baigne!

By yangra, shot with [URL=http://profile.imageshack.us/camerabuy.php?model=DSC-P72&
make=SONY]DSC-P72[/URL] at 2007-09-15

By yangra, shot with [URL=http://profile.imageshack.us/camerabuy.php?model=DSC-P72&
make=SONY]DSC-P72[/URL] at 2007-09-15
Avant le remontage, je fixe l'insonorisant au sol

By yangra, shot with [URL=http://profile.imageshack.us/camerabuy.php?model=DSC-P72&
make=SONY]DSC-P72[/URL] at 2007-09-15
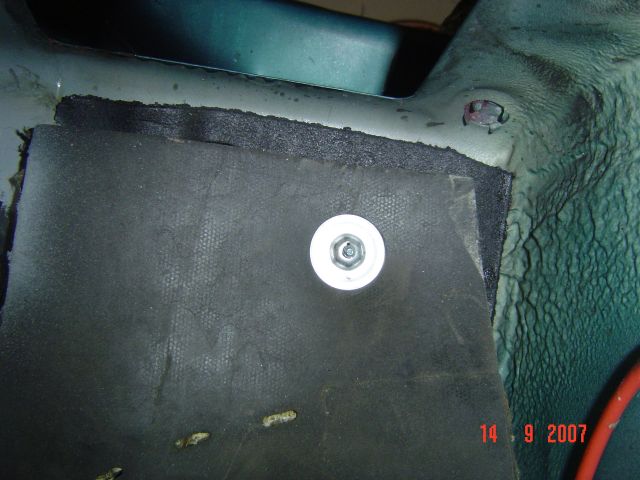
By yangra, shot with [URL=http://profile.imageshack.us/camerabuy.php?model=DSC-P72&
make=SONY]DSC-P72[/URL] at 2007-09-15
Les pièces pour le remontage

By yangra, shot with [URL=http://profile.imageshack.us/camerabuy.php?model=DSC-P72&
make=SONY]DSC-P72[/URL] at 2007-09-15
Le boitier en place

By yangra, shot with [URL=http://profile.imageshack.us/camerabuy.php?model=DSC-P72&
make=SONY]DSC-P72[/URL] at 2007-09-15
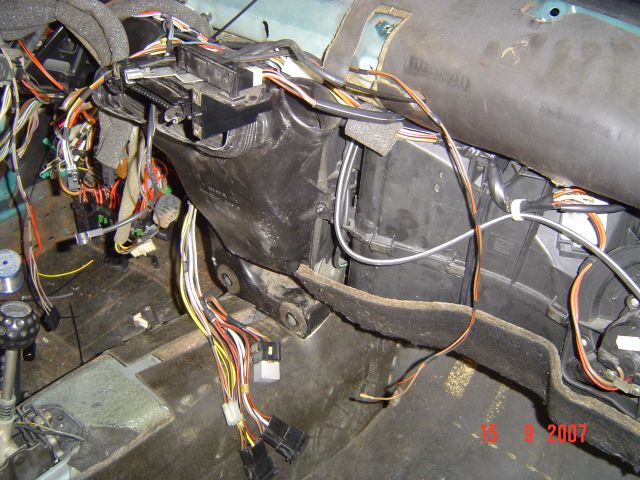
By yangra, shot with [URL=http://profile.imageshack.us/camerabuy.php?model=DSC-P72&
make=SONY]DSC-P72[/URL] at 2007-09-15
Du coté moteur

By yangra at 2007-09-15

By yangra at 2007-09-15
C'est beau!
remise en place des conduits latéraux
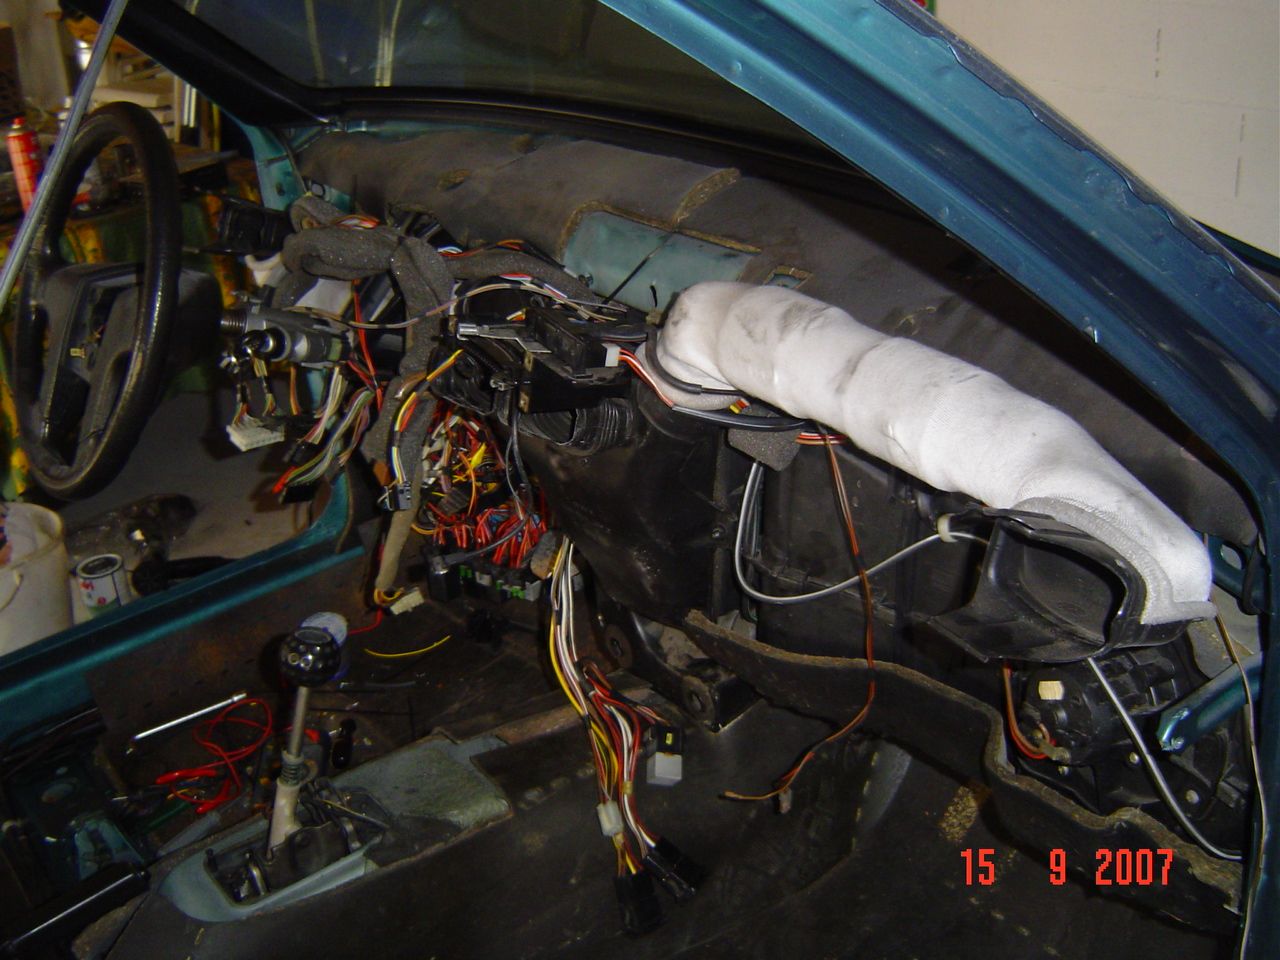
By yangra, shot with [URL=http://profile.imageshack.us/camerabuy.php?model=DSC-P72&
make=SONY]DSC-P72[/URL] at 2007-09-15
La gaine thermique

By yangra, shot with [URL=http://profile.imageshack.us/camerabuy.php?model=DSC-P72&
make=SONY]DSC-P72[/URL] at 2007-09-15

By yangra, shot with [URL=http://profile.imageshack.us/camerabuy.php?model=DSC-P72&
make=SONY]DSC-P72[/URL] at 2007-09-15
Et je termine la journée

By yangra at 2007-09-15

By yangra at 2007-09-15

By yangra, shot with [URL=http://profile.imageshack.us/camerabuy.php?model=DSC-P72&
make=SONY]DSC-P72[/URL] at 2007-09-15

By yangra, shot with [URL=http://profile.imageshack.us/camerabuy.php?model=DSC-P72&
make=SONY]DSC-P72[/URL] at 2007-09-14

By yangra, shot with [URL=http://profile.imageshack.us/camerabuy.php?model=DSC-P72&
make=SONY]DSC-P72[/URL] at 2007-09-14
L'équipement électrique étant presque terminé, voici à quoi ressemble ma boite à fusibles.

By yangra, shot with [URL=http://profile.imageshack.us/camerabuy.php?model=DSC-P72&
make=SONY]DSC-P72[/URL] at 2007-09-15
J'ai même pu tester mon digifiz!!!!

By yangra, shot with [URL=http://profile.imageshack.us/camerabuy.php?model=DSC-P72&
make=SONY]DSC-P72[/URL] at 2007-09-15
Ensuite le cable d'ouverture de capot

By yangra, shot with [URL=http://profile.imageshack.us/camerabuy.php?model=DSC-P72&
make=SONY]DSC-P72[/URL] at 2007-09-15

By yangra, shot with [URL=http://profile.imageshack.us/camerabuy.php?model=DSC-P72&
make=SONY]DSC-P72[/URL] at 2007-09-15

By yangra, shot with [URL=http://profile.imageshack.us/camerabuy.php?model=DSC-P72&
make=SONY]DSC-P72[/URL] at 2007-09-15
Les pattes support de tuyaux de frein avant

By yangra, shot with [URL=http://profile.imageshack.us/camerabuy.php?model=DSC-P72&
make=SONY]DSC-P72[/URL] at 2007-09-15

By yangra, shot with [URL=http://profile.imageshack.us/camerabuy.php?model=DSC-P72&
make=SONY]DSC-P72[/URL] at 2007-09-15

By yangra, shot with [URL=http://profile.imageshack.us/camerabuy.php?model=DSC-P72&
make=SONY]DSC-P72[/URL] at 2007-09-15
Montage du 'vérin' du régulateur de vitesse (vaut mieux le faire tant que le boitier de soufflerie est pas monté)

By yangra, shot with [URL=http://profile.imageshack.us/camerabuy.php?model=DSC-P72&
make=SONY]DSC-P72[/URL] at 2007-09-15

By yangra, shot with [URL=http://profile.imageshack.us/camerabuy.php?model=DSC-P72&
make=SONY]DSC-P72[/URL] at 2007-09-15
J'en profite pour remplacer la bague du cable d'accélérateur

By yangra, shot with [URL=http://profile.imageshack.us/camerabuy.php?model=DSC-P72&
make=SONY]DSC-P72[/URL] at 2007-09-15

By yangra, shot with [URL=http://profile.imageshack.us/camerabuy.php?model=DSC-P72&
make=SONY]DSC-P72[/URL] at 2007-09-15
Le faisceau de régulateur

By yangra, shot with [URL=http://profile.imageshack.us/camerabuy.php?model=DSC-P72&
make=SONY]DSC-P72[/URL] at 2007-09-15
Ensuite le gros morceau : installation du boitier de chauffage avec clim :
Le boitier complet :

By yangra, shot with [URL=http://profile.imageshack.us/camerabuy.php?model=DSC-P72&
make=SONY]DSC-P72[/URL] at 2007-09-15

By yangra, shot with [URL=http://profile.imageshack.us/camerabuy.php?model=DSC-P72&
make=SONY]DSC-P72[/URL] at 2007-09-15
Le réservoir à dépression :

By yangra, shot with [URL=http://profile.imageshack.us/camerabuy.php?model=DSC-P72&
make=SONY]DSC-P72[/URL] at 2007-09-15
L'évacuation d'eau de condensation :

By yangra, shot with [URL=http://profile.imageshack.us/camerabuy.php?model=DSC-P72&
make=SONY]DSC-P72[/URL] at 2007-09-15
Ne pas oublier de le brancher sur le conduit prévu!

By yangra, shot with [URL=http://profile.imageshack.us/camerabuy.php?model=DSC-P72&
make=SONY]DSC-P72[/URL] at 2007-09-15
Dépose du radiateur de chauffage

By yangra, shot with [URL=http://profile.imageshack.us/camerabuy.php?model=DSC-P72&
make=SONY]DSC-P72[/URL] at 2007-09-15
Séparation des deux éléments pour un nettoyage en profondeur

By yangra, shot with [URL=http://profile.imageshack.us/camerabuy.php?model=DSC-P72&
make=SONY]DSC-P72[/URL] at 2007-09-15
Le radiateur neuf

By yangra, shot with [URL=http://profile.imageshack.us/camerabuy.php?model=DSC-P72&
make=SONY]DSC-P72[/URL] at 2007-09-15
pose du radiateur

By yangra, shot with [URL=http://profile.imageshack.us/camerabuy.php?model=DSC-P72&
make=SONY]DSC-P72[/URL] at 2007-09-15
Controle des vannes à dépression avant de tout reposer. Vaut mieux tester avant.... là, miracle, tout baigne!

By yangra, shot with [URL=http://profile.imageshack.us/camerabuy.php?model=DSC-P72&
make=SONY]DSC-P72[/URL] at 2007-09-15

By yangra, shot with [URL=http://profile.imageshack.us/camerabuy.php?model=DSC-P72&
make=SONY]DSC-P72[/URL] at 2007-09-15
Avant le remontage, je fixe l'insonorisant au sol

By yangra, shot with [URL=http://profile.imageshack.us/camerabuy.php?model=DSC-P72&
make=SONY]DSC-P72[/URL] at 2007-09-15

By yangra, shot with [URL=http://profile.imageshack.us/camerabuy.php?model=DSC-P72&
make=SONY]DSC-P72[/URL] at 2007-09-15
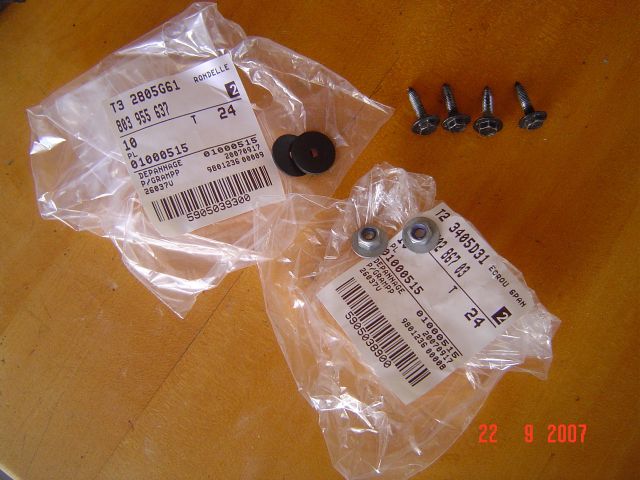
Les pièces pour le remontage

By yangra, shot with [URL=http://profile.imageshack.us/camerabuy.php?model=DSC-P72&
make=SONY]DSC-P72[/URL] at 2007-09-15
Le boitier en place

By yangra, shot with [URL=http://profile.imageshack.us/camerabuy.php?model=DSC-P72&
make=SONY]DSC-P72[/URL] at 2007-09-15

By yangra, shot with [URL=http://profile.imageshack.us/camerabuy.php?model=DSC-P72&
make=SONY]DSC-P72[/URL] at 2007-09-15
Du coté moteur

By yangra at 2007-09-15

By yangra at 2007-09-15
C'est beau!
remise en place des conduits latéraux

By yangra, shot with [URL=http://profile.imageshack.us/camerabuy.php?model=DSC-P72&
make=SONY]DSC-P72[/URL] at 2007-09-15
La gaine thermique

By yangra, shot with [URL=http://profile.imageshack.us/camerabuy.php?model=DSC-P72&
make=SONY]DSC-P72[/URL] at 2007-09-15

By yangra, shot with [URL=http://profile.imageshack.us/camerabuy.php?model=DSC-P72&
make=SONY]DSC-P72[/URL] at 2007-09-15
Et je termine la journée

By yangra at 2007-09-15

By yangra at 2007-09-15

By yangra, shot with [URL=http://profile.imageshack.us/camerabuy.php?model=DSC-P72&
make=SONY]DSC-P72[/URL] at 2007-09-15
 yangraGolfoo d'argent confirmé
- Messages : 559
Date d'inscription : 05/11/2003
Localisation : Alsace
 Re: La renaissance de ma G60! Récaro XT P107!!
Mer 2 Jan 2008 - 19:09
Un peu d'électricité pour terminer les lignes pour l'installation de l'autoradio

By yangra, shot with [URL=http://profile.imageshack.us/camerabuy.php?model=DSC-P72&
make=SONY]DSC-P72[/URL] at 2007-09-20

By yangra, shot with [URL=http://profile.imageshack.us/camerabuy.php?model=DSC-P72&
make=SONY]DSC-P72[/URL] at 2007-09-20

By yangra at 2007-09-20

By yangra, shot with [URL=http://profile.imageshack.us/camerabuy.php?model=DSC-P72&
make=SONY]DSC-P72[/URL] at 2007-09-20

By yangra at 2007-09-20

By yangra, shot with [URL=http://profile.imageshack.us/camerabuy.php?model=DSC-P72&
make=SONY]DSC-P72[/URL] at 2007-09-20
Fixation du cable d'antenne comme à l'origine, ou presque.

By yangra, shot with [URL=http://profile.imageshack.us/camerabuy.php?model=DSC-P72&
make=SONY]DSC-P72[/URL] at 2007-09-20

By yangra, shot with [URL=http://profile.imageshack.us/camerabuy.php?model=DSC-P72&
make=SONY]DSC-P72[/URL] at 2007-09-20

By yangra at 2007-09-20
Ensuite les amortisseurs arrières.... vousremarquerez que celui de gauche a la tige tordue!!!

By yangra, shot with [URL=http://profile.imageshack.us/camerabuy.php?model=DSC-P72&
make=SONY]DSC-P72[/URL] at 2007-09-20
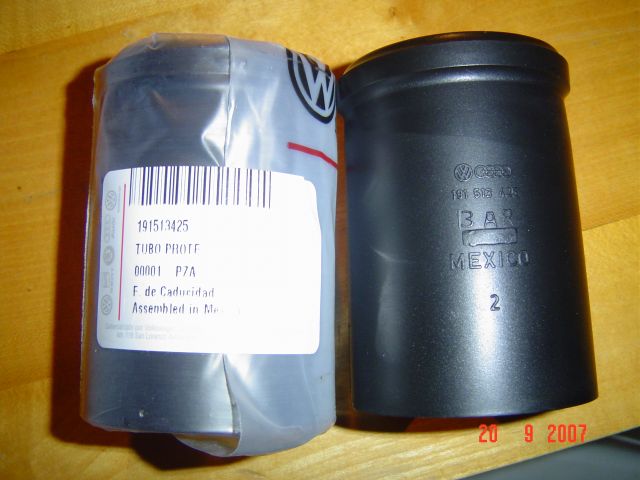
By yangra, shot with [URL=http://profile.imageshack.us/camerabuy.php?model=DSC-P72&
make=SONY]DSC-P72[/URL] at 2007-09-20

By yangra, shot with [URL=http://profile.imageshack.us/camerabuy.php?model=DSC-P72&
make=SONY]DSC-P72[/URL] at 2007-09-20

By yangra, shot with [URL=http://profile.imageshack.us/camerabuy.php?model=DSC-P72&
make=SONY]DSC-P72[/URL] at 2007-09-20
Ensuite je me suis occupé du réservoir :
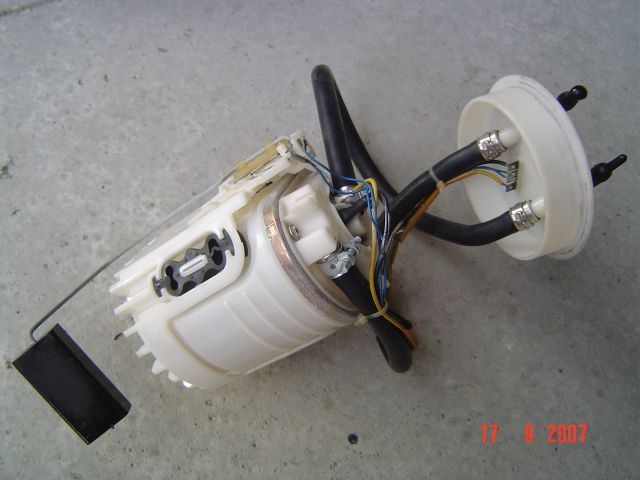
Dépose de la pompe
By yangra, shot with [URL=http://profile.imageshack.us/camerabuy.php?model=DSC-P72&
make=SONY]DSC-P72[/URL] at 2007-09-20
Les colliers sont bien rouillés

By yangra, shot with [URL=http://profile.imageshack.us/camerabuy.php?model=DSC-P72&
make=SONY]DSC-P72[/URL] at 2007-09-20
Les colliers neufs

By yangra at 2007-09-20
remplacement

By yangra, shot with [URL=http://profile.imageshack.us/camerabuy.php?model=DSC-P72&
make=SONY]DSC-P72[/URL] at 2007-09-20
Nettoyage interne du réservoir

By yangra at 2007-09-20
Le voilà prêt, après un bon nettoyage extérieur

By yangra, shot with [URL=http://profile.imageshack.us/camerabuy.php?model=DSC-P72&
make=SONY]DSC-P72[/URL] at 2007-09-20

By yangra, shot with [URL=http://profile.imageshack.us/camerabuy.php?model=DSC-P72&
make=SONY]DSC-P72[/URL] at 2007-09-20
Rapelez-vous à quoi il ressemblait!

By yangra, shot with [URL=http://profile.imageshack.us/camerabuy.php?model=DSC-P72&
make=SONY]DSC-P72[/URL] at 2007-09-20
les pièces de fixation

By yangra, shot with [URL=http://profile.imageshack.us/camerabuy.php?model=DSC-P72&
make=SONY]DSC-P72[/URL] at 2007-09-20

By yangra, shot with [URL=http://profile.imageshack.us/camerabuy.php?model=DSC-P72&
make=SONY]DSC-P72[/URL] at 2007-09-20
Puis la repose :

By yangra at 2007-09-20

By yangra, shot with [URL=http://profile.imageshack.us/camerabuy.php?model=DSC-P72&
make=SONY]DSC-P72[/URL] at 2007-09-20

By yangra, shot with [URL=http://profile.imageshack.us/camerabuy.php?model=DSC-P72&
make=SONY]DSC-P72[/URL] at 2007-09-20

By yangra, shot with [URL=http://profile.imageshack.us/camerabuy.php?model=DSC-P72&
make=SONY]DSC-P72[/URL] at 2007-09-20

By yangra at 2007-09-20

By yangra, shot with [URL=http://profile.imageshack.us/camerabuy.php?model=DSC-P72&
make=SONY]DSC-P72[/URL] at 2007-09-20

By yangra at 2007-09-20

By yangra, shot with [URL=http://profile.imageshack.us/camerabuy.php?model=DSC-P72&
make=SONY]DSC-P72[/URL] at 2007-09-20
Fixation du cable d'antenne comme à l'origine, ou presque.

By yangra, shot with [URL=http://profile.imageshack.us/camerabuy.php?model=DSC-P72&
make=SONY]DSC-P72[/URL] at 2007-09-20

By yangra, shot with [URL=http://profile.imageshack.us/camerabuy.php?model=DSC-P72&
make=SONY]DSC-P72[/URL] at 2007-09-20

By yangra at 2007-09-20
Ensuite les amortisseurs arrières.... vousremarquerez que celui de gauche a la tige tordue!!!

By yangra, shot with [URL=http://profile.imageshack.us/camerabuy.php?model=DSC-P72&
make=SONY]DSC-P72[/URL] at 2007-09-20

By yangra, shot with [URL=http://profile.imageshack.us/camerabuy.php?model=DSC-P72&
make=SONY]DSC-P72[/URL] at 2007-09-20

By yangra, shot with [URL=http://profile.imageshack.us/camerabuy.php?model=DSC-P72&
make=SONY]DSC-P72[/URL] at 2007-09-20

By yangra, shot with [URL=http://profile.imageshack.us/camerabuy.php?model=DSC-P72&
make=SONY]DSC-P72[/URL] at 2007-09-20
Ensuite je me suis occupé du réservoir :
Dépose de la pompe

By yangra, shot with [URL=http://profile.imageshack.us/camerabuy.php?model=DSC-P72&
make=SONY]DSC-P72[/URL] at 2007-09-20
Les colliers sont bien rouillés

By yangra, shot with [URL=http://profile.imageshack.us/camerabuy.php?model=DSC-P72&
make=SONY]DSC-P72[/URL] at 2007-09-20
Les colliers neufs

By yangra at 2007-09-20
remplacement

By yangra, shot with [URL=http://profile.imageshack.us/camerabuy.php?model=DSC-P72&
make=SONY]DSC-P72[/URL] at 2007-09-20
Nettoyage interne du réservoir

By yangra at 2007-09-20
Le voilà prêt, après un bon nettoyage extérieur

By yangra, shot with [URL=http://profile.imageshack.us/camerabuy.php?model=DSC-P72&
make=SONY]DSC-P72[/URL] at 2007-09-20

By yangra, shot with [URL=http://profile.imageshack.us/camerabuy.php?model=DSC-P72&
make=SONY]DSC-P72[/URL] at 2007-09-20
Rapelez-vous à quoi il ressemblait!

By yangra, shot with [URL=http://profile.imageshack.us/camerabuy.php?model=DSC-P72&
make=SONY]DSC-P72[/URL] at 2007-09-20
les pièces de fixation

By yangra, shot with [URL=http://profile.imageshack.us/camerabuy.php?model=DSC-P72&
make=SONY]DSC-P72[/URL] at 2007-09-20

By yangra, shot with [URL=http://profile.imageshack.us/camerabuy.php?model=DSC-P72&
make=SONY]DSC-P72[/URL] at 2007-09-20
Puis la repose :

By yangra at 2007-09-20

By yangra, shot with [URL=http://profile.imageshack.us/camerabuy.php?model=DSC-P72&
make=SONY]DSC-P72[/URL] at 2007-09-20
 yangraGolfoo d'argent confirmé
- Messages : 559
Date d'inscription : 05/11/2003
Localisation : Alsace
 Re: La renaissance de ma G60! Récaro XT P107!!
Mer 2 Jan 2008 - 19:14
Remontage des jambes arrières

By yangra, shot with [URL=http://profile.imageshack.us/camerabuy.php?model=DSC-P72&
make=SONY]DSC-P72[/URL] at 2007-09-21

By yangra, shot with [URL=http://profile.imageshack.us/camerabuy.php?model=DSC-P72&
make=SONY]DSC-P72[/URL] at 2007-09-21

By yangra, shot with [URL=http://profile.imageshack.us/camerabuy.php?model=DSC-P72&
make=SONY]DSC-P72[/URL] at 2007-09-21
Ensuite, les disques de frein arrière

By yangra, shot with [URL=http://profile.imageshack.us/camerabuy.php?model=DSC-P72&
make=SONY]DSC-P72[/URL] at 2007-09-22
Montage des bagues intérieures

By yangra, shot with [URL=http://profile.imageshack.us/camerabuy.php?model=DSC-P72&
make=SONY]DSC-P72[/URL] at 2007-09-22
Graissage

By yangra, shot with [URL=http://profile.imageshack.us/camerabuy.php?model=DSC-P72&
make=SONY]DSC-P72[/URL] at 2007-09-22
Montage des bagues intérieures

By yangra, shot with [URL=http://profile.imageshack.us/camerabuy.php?model=DSC-P72&
make=SONY]DSC-P72[/URL] at 2007-09-22
Montage des joints spis extérieurs

By yangra, shot with [URL=http://profile.imageshack.us/camerabuy.php?model=DSC-P72&
make=SONY]DSC-P72[/URL] at 2007-09-22
Les bagues pour l'ABS

By yangra at 2007-09-22

By yangra, shot with [URL=http://profile.imageshack.us/camerabuy.php?model=DSC-P72&
make=SONY]DSC-P72[/URL] at 2007-09-22
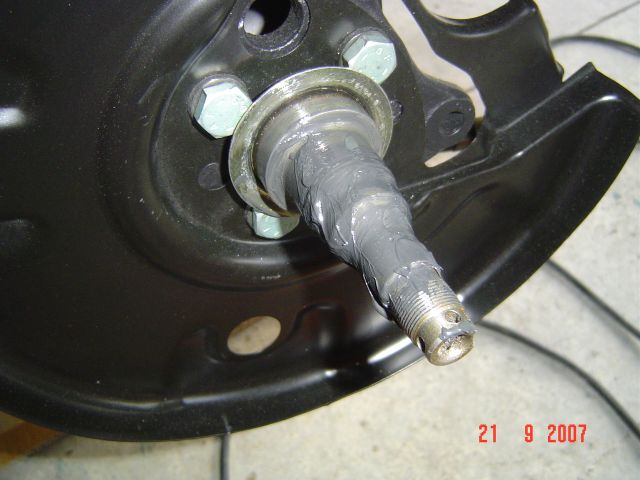
La fusée graissée
By yangra, shot with [URL=http://profile.imageshack.us/camerabuy.php?model=DSC-P72&
make=SONY]DSC-P72[/URL] at 2007-09-22
Mise en place du disque complet

By yangra at 2007-09-22
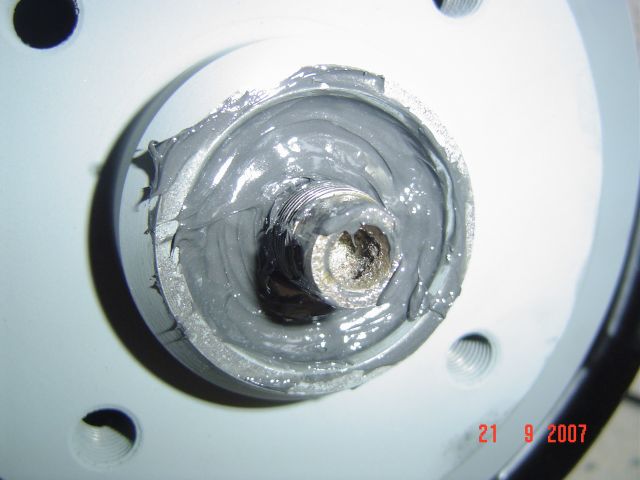
Mise en place de la bague intérieure + graisse
By yangra at 2007-09-22
Puis rondelle + écrou + rondelle canelée + goupille

By yangra, shot with [URL=http://profile.imageshack.us/camerabuy.php?model=DSC-P72&
make=SONY]DSC-P72[/URL] at 2007-09-22
Le bouchon + graisse

By yangra at 2007-09-22
emmanché

By yangra at 2007-09-22
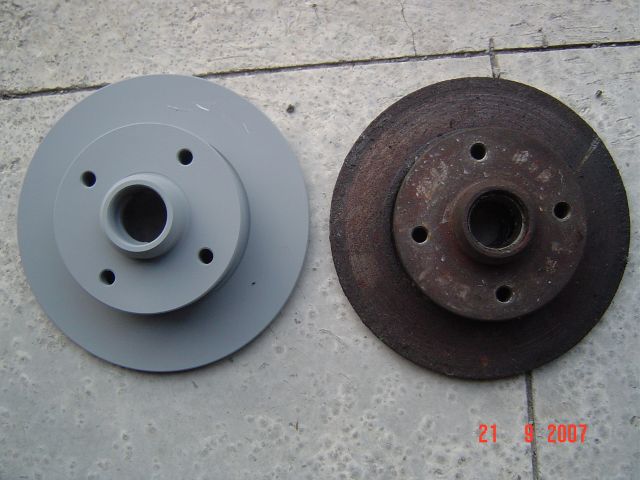
le avant/après
By yangra, shot with [URL=http://profile.imageshack.us/camerabuy.php?model=DSC-P72&
make=SONY]DSC-P72[/URL] at 2007-09-22
Ensuite, j'ai terminé la soufflerie
Un des joints qui pourri, avec l'age

By yangra, shot with [URL=http://profile.imageshack.us/camerabuy.php?model=DSC-P72&
make=SONY]DSC-P72[/URL] at 2007-09-22
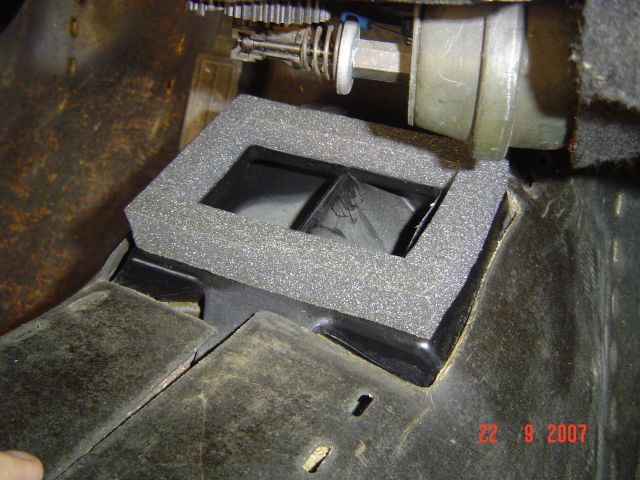
By yangra, shot with [URL=http://profile.imageshack.us/camerabuy.php?model=DSC-P72&
make=SONY]DSC-P72[/URL] at 2007-09-22

By yangra, shot with [URL=http://profile.imageshack.us/camerabuy.php?model=DSC-P72&
make=SONY]DSC-P72[/URL] at 2007-09-22
puis l'autre

By yangra, shot with [URL=http://profile.imageshack.us/camerabuy.php?model=DSC-P72&
make=SONY]DSC-P72[/URL] at 2007-09-22
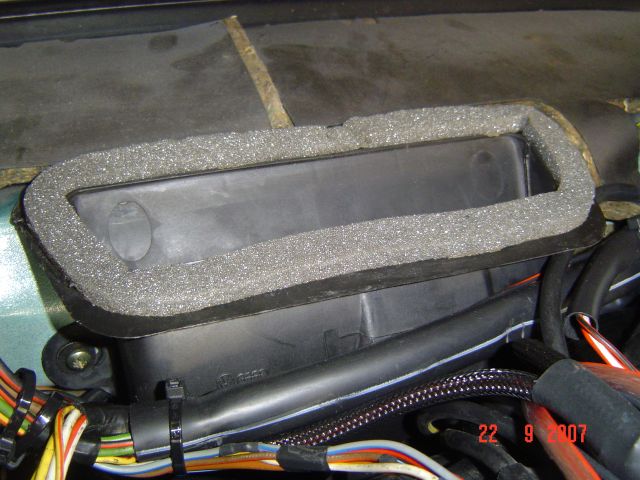
By yangra, shot with [URL=http://profile.imageshack.us/camerabuy.php?model=DSC-P72&
make=SONY]DSC-P72[/URL] at 2007-09-22
Puis, préparation du tableau de bord

By yangra, shot with [URL=http://profile.imageshack.us/camerabuy.php?model=DSC-P72&
make=SONY]DSC-P72[/URL] at 2007-09-22
Avec le temps, il est bien crado

By yangra, shot with [URL=http://profile.imageshack.us/camerabuy.php?model=DSC-P72&
make=SONY]DSC-P72[/URL] at 2007-09-22
Les pattes du bloc compteur traditionnelles

By yangra, shot with [URL=http://profile.imageshack.us/camerabuy.php?model=DSC-P72&
make=SONY]DSC-P72[/URL] at 2007-09-22

By yangra, shot with [URL=http://profile.imageshack.us/camerabuy.php?model=DSC-P72&
make=SONY]DSC-P72[/URL] at 2007-09-22
Les pattes pour le digifiz

By yangra, shot with [URL=http://profile.imageshack.us/camerabuy.php?model=DSC-P72&
make=SONY]DSC-P72[/URL] at 2007-09-22
Dépose des pattes

By yangra, shot with [URL=http://profile.imageshack.us/camerabuy.php?model=DSC-P72&
make=SONY]DSC-P72[/URL] at 2007-09-22
Les rivets spécifiques

By yangra, shot with [URL=http://profile.imageshack.us/camerabuy.php?model=DSC-P72&
make=SONY]DSC-P72[/URL] at 2007-09-22
Repose des pattes spécifiques
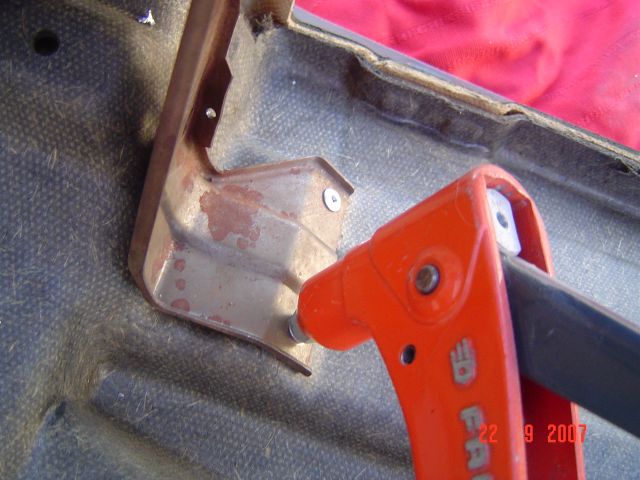
By yangra, shot with [URL=http://profile.imageshack.us/camerabuy.php?model=DSC-P72&
make=SONY]DSC-P72[/URL] at 2007-09-22
Je teste la pose du bloc, tout baigne...

By yangra, shot with [URL=http://profile.imageshack.us/camerabuy.php?model=DSC-P72&
make=SONY]DSC-P72[/URL] at 2007-09-22
J'en profite pour refixer la patte de l'autoradio

By yangra, shot with [URL=http://profile.imageshack.us/camerabuy.php?model=DSC-P72&
make=SONY]DSC-P72[/URL] at 2007-09-22
Remplacement de la boite à gants, pour le modèle avec clim : plus petite et capitonnée

By yangra, shot with [URL=http://profile.imageshack.us/camerabuy.php?model=DSC-P72&
make=SONY]DSC-P72[/URL] at 2007-09-22

By yangra, shot with [URL=http://profile.imageshack.us/camerabuy.php?model=DSC-P72&
make=SONY]DSC-P72[/URL] at 2007-09-22
ça y est c'est prêt à être monté

By yangra, shot with [URL=http://profile.imageshack.us/camerabuy.php?model=DSC-P72&
make=SONY]DSC-P72[/URL] at 2007-09-22
le tableau de bord est en place, attention aux buses de souffleries qui doivent parfaitement être emboitées

By yangra, shot with [URL=http://profile.imageshack.us/camerabuy.php?model=DSC-P72&
make=SONY]DSC-P72[/URL] at 2007-09-22
vissage du tableau de bord
By yangra, shot with [URL=http://profile.imageshack.us/camerabuy.php?model=DSC-P72&
make=SONY]DSC-P72[/URL] at 2007-09-22
Montage du digifiz et des leviers...

By yangra, shot with [URL=http://profile.imageshack.us/camerabuy.php?model=DSC-P72&
make=SONY]DSC-P72[/URL] at 2007-09-22
ça y est, tout est monté, avec la façade

By yangra, shot with [URL=http://profile.imageshack.us/camerabuy.php?model=DSC-P72&
make=SONY]DSC-P72[/URL] at 2007-09-22

By yangra, shot with [URL=http://profile.imageshack.us/camerabuy.php?model=DSC-P72&
make=SONY]DSC-P72[/URL] at 2007-09-22

By yangra, shot with [URL=http://profile.imageshack.us/camerabuy.php?model=DSC-P72&
make=SONY]DSC-P72[/URL] at 2007-09-22
Ensuite le circuit d'essence à terminer
Beaucoup de rouille, comme d'hab

By yangra at 2007-09-22

By yangra, shot with [URL=http://profile.imageshack.us/camerabuy.php?model=DSC-P72&
make=SONY]DSC-P72[/URL] at 2007-09-22
Mais bon j'ai ce qu'il faut
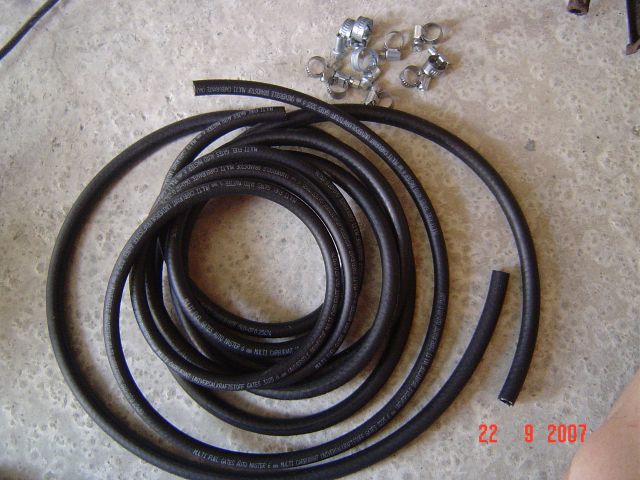
By yangra, shot with [URL=http://profile.imageshack.us/camerabuy.php?model=DSC-P72&
make=SONY]DSC-P72[/URL] at 2007-09-22

By yangra, shot with [URL=http://profile.imageshack.us/camerabuy.php?model=DSC-P72&
make=SONY]DSC-P72[/URL] at 2007-09-22
Je découpe les colliers d'origine à la disqueuse

By yangra, shot with [URL=http://profile.imageshack.us/camerabuy.php?model=DSC-P72&
make=SONY]DSC-P72[/URL] at 2007-09-22
Et je prépare le bloc filtre

By yangra, shot with [URL=http://profile.imageshack.us/camerabuy.php?model=DSC-P72&
make=SONY]DSC-P72[/URL] at 2007-09-22
Et je remonte avec du neuf

By yangra at 2007-09-22
La trappe de réservoir

By yangra, shot with [URL=http://profile.imageshack.us/camerabuy.php?model=DSC-P72&
make=SONY]DSC-P72[/URL] at 2007-09-22

By yangra, shot with [URL=http://profile.imageshack.us/camerabuy.php?model=DSC-P72&
make=SONY]DSC-P72[/URL] at 2007-09-22

By yangra, shot with [URL=http://profile.imageshack.us/camerabuy.php?model=DSC-P72&
make=SONY]DSC-P72[/URL] at 2007-09-22
ensuite encore un peu d'intérieur
mise en place des insonorisants arrière

By yangra, shot with [URL=http://profile.imageshack.us/camerabuy.php?model=DSC-P72&
make=SONY]DSC-P72[/URL] at 2007-09-22
Et la moquette arrière...

By yangra, shot with [URL=http://profile.imageshack.us/camerabuy.php?model=DSC-P72&
make=SONY]DSC-P72[/URL] at 2007-09-22
Encore un feuilleton de passé....

By yangra, shot with [URL=http://profile.imageshack.us/camerabuy.php?model=DSC-P72&
make=SONY]DSC-P72[/URL] at 2007-09-21

By yangra, shot with [URL=http://profile.imageshack.us/camerabuy.php?model=DSC-P72&
make=SONY]DSC-P72[/URL] at 2007-09-21

By yangra, shot with [URL=http://profile.imageshack.us/camerabuy.php?model=DSC-P72&
make=SONY]DSC-P72[/URL] at 2007-09-21
Ensuite, les disques de frein arrière

By yangra, shot with [URL=http://profile.imageshack.us/camerabuy.php?model=DSC-P72&
make=SONY]DSC-P72[/URL] at 2007-09-22
Montage des bagues intérieures

By yangra, shot with [URL=http://profile.imageshack.us/camerabuy.php?model=DSC-P72&
make=SONY]DSC-P72[/URL] at 2007-09-22
Graissage

By yangra, shot with [URL=http://profile.imageshack.us/camerabuy.php?model=DSC-P72&
make=SONY]DSC-P72[/URL] at 2007-09-22
Montage des bagues intérieures

By yangra, shot with [URL=http://profile.imageshack.us/camerabuy.php?model=DSC-P72&
make=SONY]DSC-P72[/URL] at 2007-09-22
Montage des joints spis extérieurs

By yangra, shot with [URL=http://profile.imageshack.us/camerabuy.php?model=DSC-P72&
make=SONY]DSC-P72[/URL] at 2007-09-22
Les bagues pour l'ABS

By yangra at 2007-09-22

By yangra, shot with [URL=http://profile.imageshack.us/camerabuy.php?model=DSC-P72&
make=SONY]DSC-P72[/URL] at 2007-09-22
La fusée graissée

By yangra, shot with [URL=http://profile.imageshack.us/camerabuy.php?model=DSC-P72&
make=SONY]DSC-P72[/URL] at 2007-09-22
Mise en place du disque complet

By yangra at 2007-09-22
Mise en place de la bague intérieure + graisse

By yangra at 2007-09-22
Puis rondelle + écrou + rondelle canelée + goupille

By yangra, shot with [URL=http://profile.imageshack.us/camerabuy.php?model=DSC-P72&
make=SONY]DSC-P72[/URL] at 2007-09-22
Le bouchon + graisse

By yangra at 2007-09-22
emmanché

By yangra at 2007-09-22
le avant/après

By yangra, shot with [URL=http://profile.imageshack.us/camerabuy.php?model=DSC-P72&
make=SONY]DSC-P72[/URL] at 2007-09-22
Ensuite, j'ai terminé la soufflerie
Un des joints qui pourri, avec l'age

By yangra, shot with [URL=http://profile.imageshack.us/camerabuy.php?model=DSC-P72&
make=SONY]DSC-P72[/URL] at 2007-09-22

By yangra, shot with [URL=http://profile.imageshack.us/camerabuy.php?model=DSC-P72&
make=SONY]DSC-P72[/URL] at 2007-09-22

By yangra, shot with [URL=http://profile.imageshack.us/camerabuy.php?model=DSC-P72&
make=SONY]DSC-P72[/URL] at 2007-09-22
puis l'autre

By yangra, shot with [URL=http://profile.imageshack.us/camerabuy.php?model=DSC-P72&
make=SONY]DSC-P72[/URL] at 2007-09-22

By yangra, shot with [URL=http://profile.imageshack.us/camerabuy.php?model=DSC-P72&
make=SONY]DSC-P72[/URL] at 2007-09-22
Puis, préparation du tableau de bord

By yangra, shot with [URL=http://profile.imageshack.us/camerabuy.php?model=DSC-P72&
make=SONY]DSC-P72[/URL] at 2007-09-22
Avec le temps, il est bien crado

By yangra, shot with [URL=http://profile.imageshack.us/camerabuy.php?model=DSC-P72&
make=SONY]DSC-P72[/URL] at 2007-09-22
Les pattes du bloc compteur traditionnelles

By yangra, shot with [URL=http://profile.imageshack.us/camerabuy.php?model=DSC-P72&
make=SONY]DSC-P72[/URL] at 2007-09-22

By yangra, shot with [URL=http://profile.imageshack.us/camerabuy.php?model=DSC-P72&
make=SONY]DSC-P72[/URL] at 2007-09-22
Les pattes pour le digifiz

By yangra, shot with [URL=http://profile.imageshack.us/camerabuy.php?model=DSC-P72&
make=SONY]DSC-P72[/URL] at 2007-09-22
Dépose des pattes

By yangra, shot with [URL=http://profile.imageshack.us/camerabuy.php?model=DSC-P72&
make=SONY]DSC-P72[/URL] at 2007-09-22
Les rivets spécifiques

By yangra, shot with [URL=http://profile.imageshack.us/camerabuy.php?model=DSC-P72&
make=SONY]DSC-P72[/URL] at 2007-09-22
Repose des pattes spécifiques

By yangra, shot with [URL=http://profile.imageshack.us/camerabuy.php?model=DSC-P72&
make=SONY]DSC-P72[/URL] at 2007-09-22
Je teste la pose du bloc, tout baigne...

By yangra, shot with [URL=http://profile.imageshack.us/camerabuy.php?model=DSC-P72&
make=SONY]DSC-P72[/URL] at 2007-09-22
J'en profite pour refixer la patte de l'autoradio

By yangra, shot with [URL=http://profile.imageshack.us/camerabuy.php?model=DSC-P72&
make=SONY]DSC-P72[/URL] at 2007-09-22
Remplacement de la boite à gants, pour le modèle avec clim : plus petite et capitonnée

By yangra, shot with [URL=http://profile.imageshack.us/camerabuy.php?model=DSC-P72&
make=SONY]DSC-P72[/URL] at 2007-09-22

By yangra, shot with [URL=http://profile.imageshack.us/camerabuy.php?model=DSC-P72&
make=SONY]DSC-P72[/URL] at 2007-09-22
ça y est c'est prêt à être monté

By yangra, shot with [URL=http://profile.imageshack.us/camerabuy.php?model=DSC-P72&
make=SONY]DSC-P72[/URL] at 2007-09-22
le tableau de bord est en place, attention aux buses de souffleries qui doivent parfaitement être emboitées

By yangra, shot with [URL=http://profile.imageshack.us/camerabuy.php?model=DSC-P72&
make=SONY]DSC-P72[/URL] at 2007-09-22
vissage du tableau de bord

By yangra, shot with [URL=http://profile.imageshack.us/camerabuy.php?model=DSC-P72&
make=SONY]DSC-P72[/URL] at 2007-09-22
Montage du digifiz et des leviers...

By yangra, shot with [URL=http://profile.imageshack.us/camerabuy.php?model=DSC-P72&
make=SONY]DSC-P72[/URL] at 2007-09-22
ça y est, tout est monté, avec la façade

By yangra, shot with [URL=http://profile.imageshack.us/camerabuy.php?model=DSC-P72&
make=SONY]DSC-P72[/URL] at 2007-09-22

By yangra, shot with [URL=http://profile.imageshack.us/camerabuy.php?model=DSC-P72&
make=SONY]DSC-P72[/URL] at 2007-09-22

By yangra, shot with [URL=http://profile.imageshack.us/camerabuy.php?model=DSC-P72&
make=SONY]DSC-P72[/URL] at 2007-09-22
Ensuite le circuit d'essence à terminer
Beaucoup de rouille, comme d'hab

By yangra at 2007-09-22

By yangra, shot with [URL=http://profile.imageshack.us/camerabuy.php?model=DSC-P72&
make=SONY]DSC-P72[/URL] at 2007-09-22
Mais bon j'ai ce qu'il faut

By yangra, shot with [URL=http://profile.imageshack.us/camerabuy.php?model=DSC-P72&
make=SONY]DSC-P72[/URL] at 2007-09-22

By yangra, shot with [URL=http://profile.imageshack.us/camerabuy.php?model=DSC-P72&
make=SONY]DSC-P72[/URL] at 2007-09-22
Je découpe les colliers d'origine à la disqueuse

By yangra, shot with [URL=http://profile.imageshack.us/camerabuy.php?model=DSC-P72&
make=SONY]DSC-P72[/URL] at 2007-09-22
Et je prépare le bloc filtre

By yangra, shot with [URL=http://profile.imageshack.us/camerabuy.php?model=DSC-P72&
make=SONY]DSC-P72[/URL] at 2007-09-22
Et je remonte avec du neuf

By yangra at 2007-09-22
La trappe de réservoir

By yangra, shot with [URL=http://profile.imageshack.us/camerabuy.php?model=DSC-P72&
make=SONY]DSC-P72[/URL] at 2007-09-22

By yangra, shot with [URL=http://profile.imageshack.us/camerabuy.php?model=DSC-P72&
make=SONY]DSC-P72[/URL] at 2007-09-22

By yangra, shot with [URL=http://profile.imageshack.us/camerabuy.php?model=DSC-P72&
make=SONY]DSC-P72[/URL] at 2007-09-22
ensuite encore un peu d'intérieur
mise en place des insonorisants arrière

By yangra, shot with [URL=http://profile.imageshack.us/camerabuy.php?model=DSC-P72&
make=SONY]DSC-P72[/URL] at 2007-09-22
Et la moquette arrière...

By yangra, shot with [URL=http://profile.imageshack.us/camerabuy.php?model=DSC-P72&
make=SONY]DSC-P72[/URL] at 2007-09-22
Encore un feuilleton de passé....
 yangraGolfoo d'argent confirmé
- Messages : 559
Date d'inscription : 05/11/2003
Localisation : Alsace
 Re: La renaissance de ma G60! Récaro XT P107!!
Mer 2 Jan 2008 - 19:17
La suite bientot!
 thomg60
- Messages : 5000
Date d'inscription : 29/10/2005
Localisation : 27, EVREUX
 Re: La renaissance de ma G60! Récaro XT P107!!
Mer 2 Jan 2008 - 19:23
Fred77 a écrit:Bienvenue
Si tu cherches qui a viré ton lien c'est moi
Imagine un peu si tous le monde fais comme toi :? , donc merci de prendre la peine de faire la présentation de ton vehicule et pas seulement un lien.
Tu voulai une presentation complete?
Je pense que c'est chose faite :mdr:
Serieux, du bon boulot, de tre bonne photos qui peuvent servir d'exemple à nous tous..
Elle va etre neuve apres.... continu sur ta lancée et fait nous de belel photo comme tu fait ;
)
 Fred77Golfoo de Diamant confirmé
- Messages : 5090
Date d'inscription : 09/07/2005
Localisation : 77
 Re: La renaissance de ma G60! Récaro XT P107!!
Mer 2 Jan 2008 - 19:24
 titoInvité
 Re: La renaissance de ma G60! Récaro XT P107!!
Mer 2 Jan 2008 - 20:07
Un travail splendide et d'une qualité rarement vu!
 Win93Golfoo de Bronze confirmé
- Messages : 301
Date d'inscription : 20/05/2005
Localisation : IDF (78)
 Re: La renaissance de ma G60! Récaro XT P107!!
Mer 2 Jan 2008 - 20:30
Bravo pour le travail effectué et puis aussi pour le reportage photos!!!!! 
Vivement la suite!
Si toutes les Golfs pouvaient être aussi bien entretenu que celle-ci!
Vivement la suite!
Si toutes les Golfs pouvaient être aussi bien entretenu que celle-ci!
 benjJeune Golfoo confirmé
- Messages : 101
Date d'inscription : 30/12/2007
Localisation : 82
 Re: La renaissance de ma G60! Récaro XT P107!!
Mer 2 Jan 2008 - 21:06
c'est pas de la resto de pingouin,jusqu'au rivets de support compteur d'origine vw 
ils ne ferment pas les portes a clés,les magasiniers vw quand ils te voient arriver :mdr:
bravo en tout cas :youpi:
seul le digifiz et l'interieur fire and ice (meme nickel)ou j'accroche moyennement sur g60,mais ce n'est que mon humble avis perso et tu l'avais prévu
j'aurais bien vu un compteur d'origine et un interieur recaro avec tissu (faut le trouver ,tu me diras),avec les "
rm"
et la couleur de l'auto :lovie:
en tout cas beau boulot,bravo encore
 WottYJeune Golfoo confirmé
- Messages : 116
Date d'inscription : 23/08/2006
Localisation : rennes - france
 Re: La renaissance de ma G60! Récaro XT P107!!
Mer 2 Jan 2008 - 21:13
felicitations , travail titanesque et intelligent !!
bravo et bonne continuation , une de plus de sauvée
bravo et bonne continuation , une de plus de sauvée
 noodlesGolfoo sur-actif
- Messages : 2223
Date d'inscription : 30/10/2005
Localisation : 80
 Re: La renaissance de ma G60! Récaro XT P107!!
Mer 2 Jan 2008 - 21:14
Superbe boulot. Que du bohneur 
 xavierGolfoo de Diamant
- Messages : 2371
Date d'inscription : 18/08/2006
Age : 42
Localisation : 85 La Roche sur Yon
 Re: La renaissance de ma G60! Récaro XT P107!!
Mer 2 Jan 2008 - 22:23
Super taf de réalisé, elle va etre neuve!!! 
Petite question, la gaine tressé pour tes cables electrique, tu l'a trouvé ou car j'en cherche?
Petite question, la gaine tressé pour tes cables electrique, tu l'a trouvé ou car j'en cherche?
 ThonyInvité
 Re: La renaissance de ma G60! Récaro XT P107!!
Mer 2 Jan 2008 - 22:47
Je ne sais pas quoi dire...c'est un travail de titan...ont voit que c'est du boulot de passioné.
Bravo :bravo:
Par contre j'ai vu que tu cherché des BBS RM...ca tombe bien je vend les mienne
Voila le lien : http://www.golfoo.net/ventes/viewtopic.php?t=150276
 yangraGolfoo d'argent confirmé
- Messages : 559
Date d'inscription : 05/11/2003
Localisation : Alsace
 Re: La renaissance de ma G60! Récaro XT P107!!
Jeu 3 Jan 2008 - 7:53
Thony a écrit:
Je ne sais pas quoi dire...c'est un travail de titan...ont voit que c'est du boulot de passioné.
Bravo :bravo:
Par contre j'ai vu que tu cherché des BBS RM...ca tombe bien je vend les mienne

Voila le lien : http://www.golfoo.net/ventes/viewtopic.php?t=150276
J'ai déjà mes RM! :mdr:
 yangraGolfoo d'argent confirmé
- Messages : 559
Date d'inscription : 05/11/2003
Localisation : Alsace
 Re: La renaissance de ma G60! Récaro XT P107!!
Jeu 3 Jan 2008 - 8:11
Je me suis occupé du bloc ABS. Quand je pense que nobreux sont ceux qui virent ce système pour remettre un système traditionnel à dépression, et je commence à croire qu'ils ont raison!
Le bloc :

By yangra, shot with [URL=http://profile.imageshack.us/camerabuy.php?model=DSC-P72&
make=SONY]DSC-P72[/URL] at 2007-09-29

By yangra, shot with [URL=http://profile.imageshack.us/camerabuy.php?model=DSC-P72&
make=SONY]DSC-P72[/URL] at 2007-09-29
Démontage :
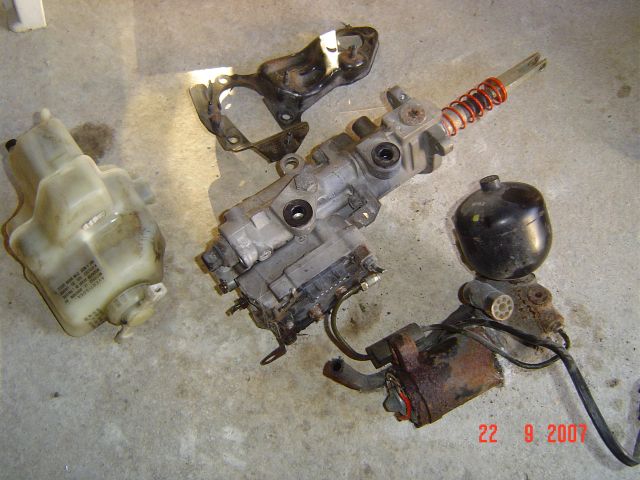
By yangra, shot with [URL=http://profile.imageshack.us/camerabuy.php?model=DSC-P72&
make=SONY]DSC-P72[/URL] at 2007-09-29

By yangra, shot with [URL=http://profile.imageshack.us/camerabuy.php?model=DSC-P72&
make=SONY]DSC-P72[/URL] at 2007-09-29

By yangra, shot with [URL=http://profile.imageshack.us/camerabuy.php?model=DSC-P72&
make=SONY]DSC-P72[/URL] at 2007-09-29
Le maître cylindre prêt à recevoir les accessoires annexes

By yangra, shot with [URL=http://profile.imageshack.us/camerabuy.php?model=DSC-P72&
make=SONY]DSC-P72[/URL] at 2007-09-29
Repose du bloc électrovannes :
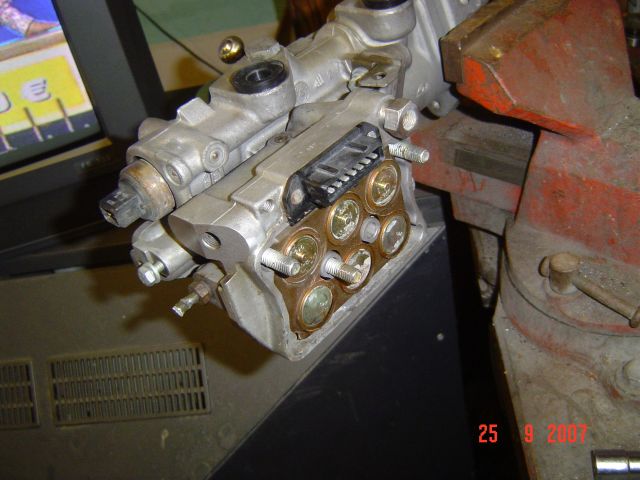
By yangra, shot with [URL=http://profile.imageshack.us/camerabuy.php?model=DSC-P72&
make=SONY]DSC-P72[/URL] at 2007-09-29
Fermeture du couvercle :

By yangra, shot with [URL=http://profile.imageshack.us/camerabuy.php?model=DSC-P72&
make=SONY]DSC-P72[/URL] at 2007-09-29
Remplacement du tuyau de la pompe haute pression

By yangra, shot with [URL=http://profile.imageshack.us/camerabuy.php?model=DSC-P72&
make=SONY]DSC-P72[/URL] at 2007-09-29

By yangra at 2007-09-29

By yangra, shot with [URL=http://profile.imageshack.us/camerabuy.php?model=DSC-P72&
make=SONY]DSC-P72[/URL] at 2007-09-29
Le bloc réassemblé, prêt à être remonté :

By yangra, shot with [URL=http://profile.imageshack.us/camerabuy.php?model=DSC-P72&
make=SONY]DSC-P72[/URL] at 2007-09-29

By yangra, shot with [URL=http://profile.imageshack.us/camerabuy.php?model=DSC-P72&
make=SONY]DSC-P72[/URL] at 2007-09-29

By yangra, shot with [URL=http://profile.imageshack.us/camerabuy.php?model=DSC-P72&
make=SONY]DSC-P72[/URL] at 2007-09-29
Repose sur la caisse :
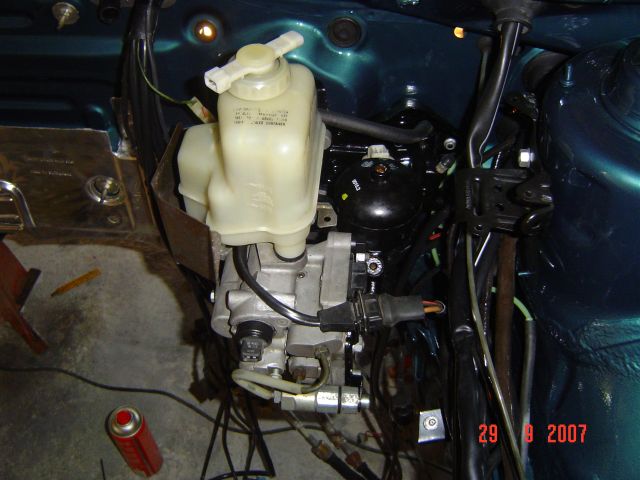
By yangra, shot with [URL=http://profile.imageshack.us/camerabuy.php?model=DSC-P72&
make=SONY]DSC-P72[/URL] at 2007-09-29
Et j'ai ressorti mon matériel de plomberie :
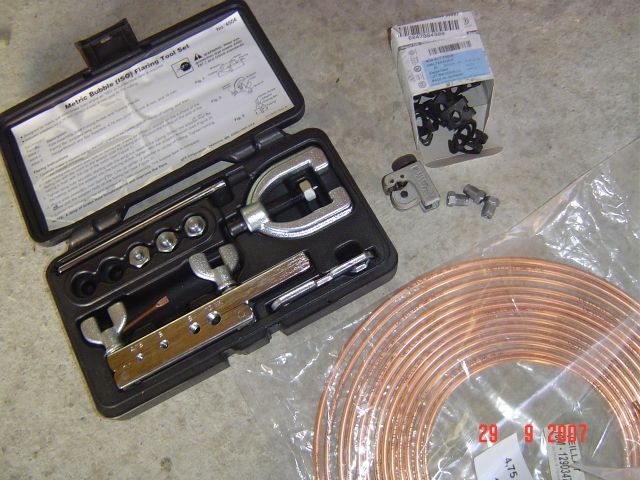
By yangra, shot with [URL=http://profile.imageshack.us/camerabuy.php?model=DSC-P72&
make=SONY]DSC-P72[/URL] at 2007-09-29
Le compensateur de freinage (voir premières pages) :

By yangra, shot with [URL=http://profile.imageshack.us/camerabuy.php?model=DSC-P72&
make=SONY]DSC-P72[/URL] at 2007-09-29
Montage du Té que j'ai fait il y a quelques semaines :

By yangra at 2007-09-29
Puis du tuyau d'arrivée (même formes qu'à l'origine) :
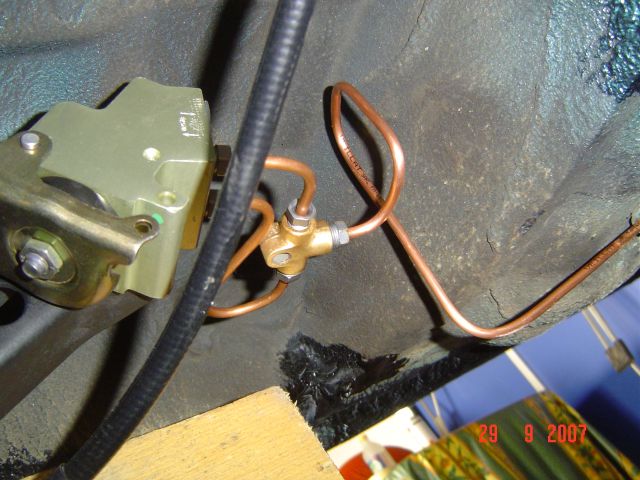
By yangra at 2007-09-29
Coté maître-cylindre :
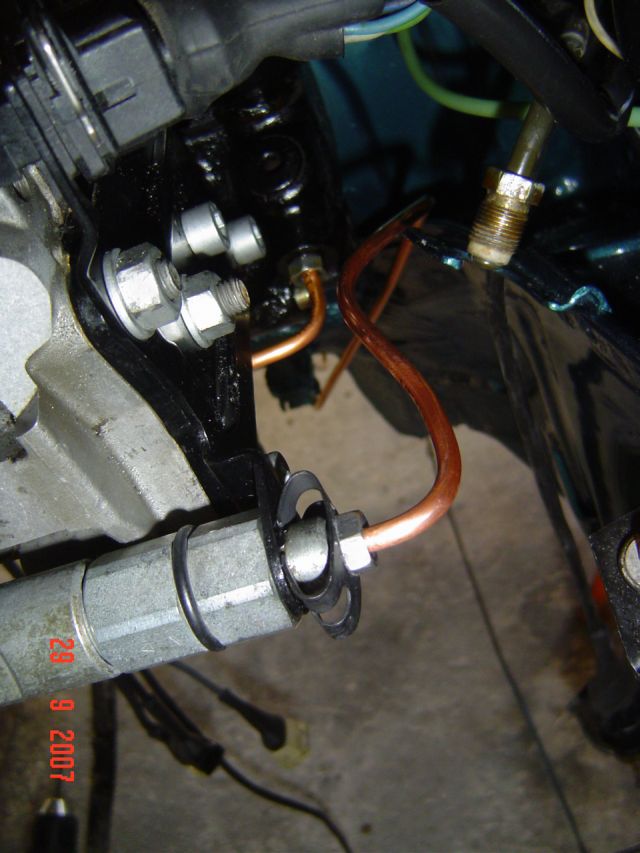
By yangra, shot with [URL=http://profile.imageshack.us/camerabuy.php?model=DSC-P72&
make=SONY]DSC-P72[/URL] at 2007-09-29
Ensuite les lignes roue avant gauche :

By yangra, shot with [URL=http://profile.imageshack.us/camerabuy.php?model=DSC-P72&
make=SONY]DSC-P72[/URL] at 2007-09-29

By yangra, shot with [URL=http://profile.imageshack.us/camerabuy.php?model=DSC-P72&
make=SONY]DSC-P72[/URL] at 2007-09-29
Puis sur avant droit :

By yangra, shot with [URL=http://profile.imageshack.us/camerabuy.php?model=DSC-P72&
make=SONY]DSC-P72[/URL] at 2007-09-29

By yangra, shot with [URL=http://profile.imageshack.us/camerabuy.php?model=DSC-P72&
make=SONY]DSC-P72[/URL] at 2007-09-29

By yangra, shot with [URL=http://profile.imageshack.us/camerabuy.php?model=DSC-P72&
make=SONY]DSC-P72[/URL] at 2007-09-29

By yangra, shot with [URL=http://profile.imageshack.us/camerabuy.php?model=DSC-P72&
make=SONY]DSC-P72[/URL] at 2007-09-29

By yangra, shot with [URL=http://profile.imageshack.us/camerabuy.php?model=DSC-P72&
make=SONY]DSC-P72[/URL] at 2007-09-29
Une fois tout installé, je branche toute la connectique sur le bloc ABS. Et j'alimente en 12V pour voir.... je mets le contact..... la pompe haute pression tourne!.... tourne..... mais pas de pression qui monte!!??!! Merde, elle s'amorce pas! c'est quoi ce bins? Je laisse tourner la pompe, toujours rien, les boules, y a un hic quelque part! Allez, ni une ni deux, je démonte la pompe... rien d'anormal....merde, qu'est-ce qui coince??? Allez, je m'en fait pas, je remplace la pompe par une autre, elle est peut-être HS....je remonte, branche, et contact....la pompe tourne, tourne,...... et rien! Put*** de bord*** de mer***, c'est quoi cette grosse mer***???
Je jette tout et j'arrète là aujourd'hui, raz-le-cul.... je me pette le cul à tout faire nickel, et ça marche pas!
Je vais voir mon gamin au foot, ça me va me changer!... Au retour, je ressaye un coup pour voir... contact,.....la pompe tourne, et là, ça y est elle débite!!! Certainement il faut attendre que la pompe se remplie de liquide... et seul le temps aide...pfff, allez, je remets tout en place correctement la semaine prochaine!
Bon je sais j'ai pas beaucoup bossé, mais bon, avec cet ABS de m****....

By yangra, shot with [URL=http://profile.imageshack.us/camerabuy.php?model=DSC-P72&
make=SONY]DSC-P72[/URL] at 2007-09-29
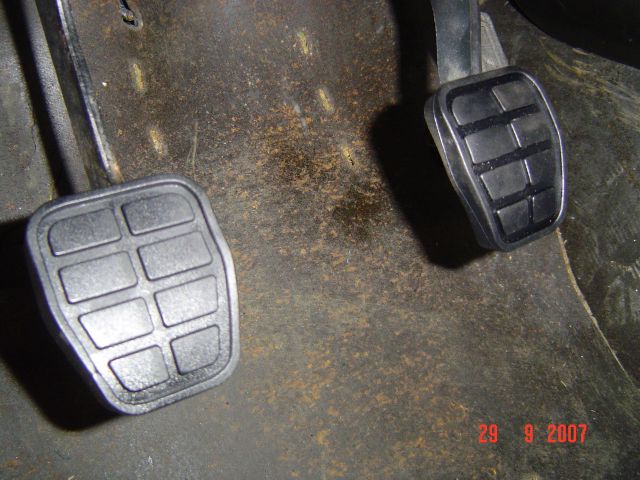
By yangra at 2007-09-29
Repose des tapis avants

By yangra at 2007-10-06

By yangra, shot with [URL=http://profile.imageshack.us/camerabuy.php?model=DSC-P72&
make=SONY]DSC-P72[/URL] at 2007-10-06

By yangra at 2007-10-06

By yangra at 2007-10-06
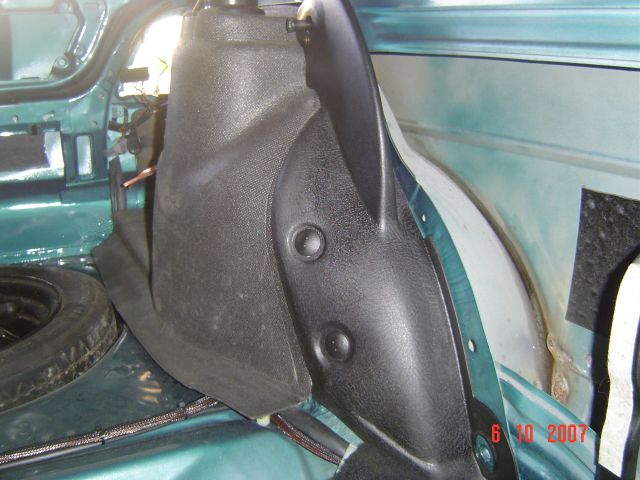
By yangra at 2007-10-06
Repose de la bobine
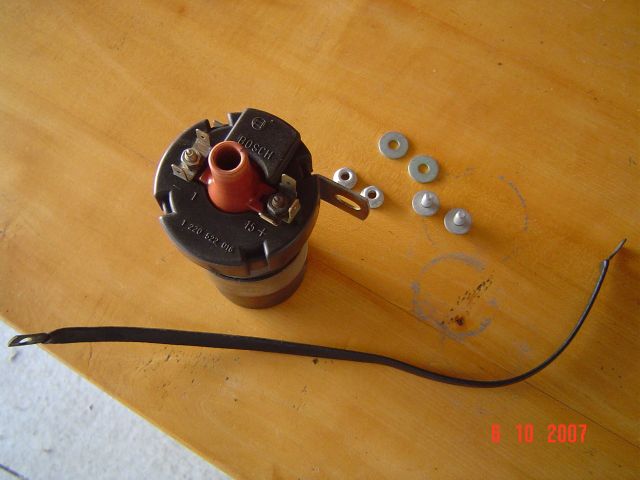
By yangra at 2007-10-06
et du cable d'accélérateur

By yangra at 2007-10-06
La moquette de coffre

By yangra, shot with [URL=http://profile.imageshack.us/camerabuy.php?model=DSC-P72&
make=SONY]DSC-P72[/URL] at 2007-10-06

By yangra at 2007-10-06
La fin du montage du régulateur de vitesse

By yangra at 2007-10-06

By yangra at 2007-10-06

By yangra at 2007-10-06
Le kit que j'avais acheté, était pévu pour une boite auto, donc il manquait un connecteur, que j'ai donc rajouté... les contacteurs sont montés en série

By yangra at 2007-10-06

By yangra at 2007-10-06
Ensuite.......

By yangra at 2007-10-06

By yangra at 2007-10-06
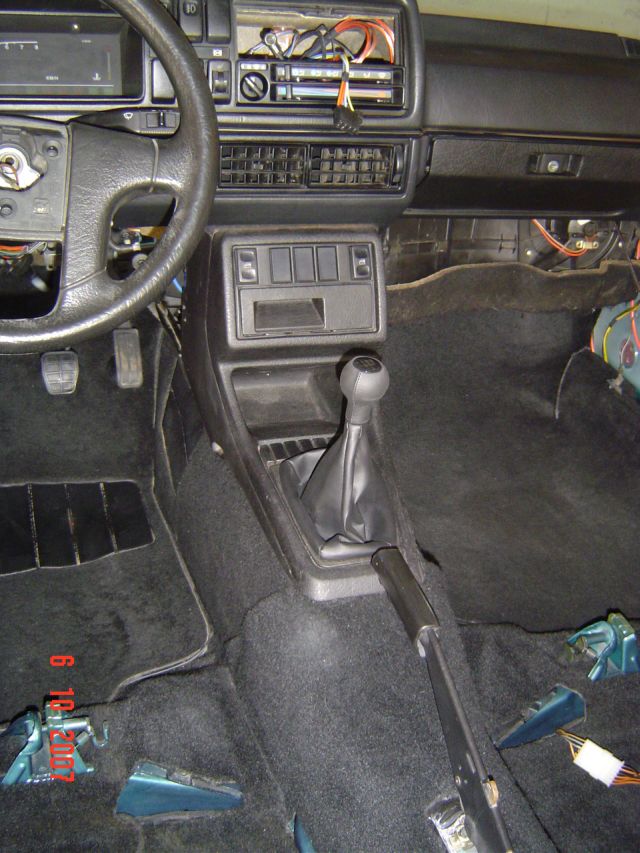
By yangra at 2007-10-06

By yangra at 2007-10-06

By yangra, shot with [URL=http://profile.imageshack.us/camerabuy.php?model=DSC-P72&
make=SONY]DSC-P72[/URL] at 2007-10-06

By yangra at 2007-10-06
Puis j'ai remonté le vide-poches spécifique à la clim :

By yangra, shot with [URL=http://profile.imageshack.us/camerabuy.php?model=DSC-P72&
make=SONY]DSC-P72[/URL] at 2007-10-06
Le défaut de la protection sous le caisson : il peluche!!!!

By yangra at 2007-10-06
Moyen simple et facile, on prends une tondeus, et un aspirateur :

By yangra, shot with [URL=http://profile.imageshack.us/camerabuy.php?model=DSC-P72&
make=SONY]DSC-P72[/URL] at 2007-10-06
et ça donne ça :

By yangra, shot with [URL=http://profile.imageshack.us/camerabuy.php?model=DSC-P72&
make=SONY]DSC-P72[/URL] at 2007-10-06
J'aipassé le faisceau pour le furtur toit ouvrant (adaptable). C'est galère! En fait j'aurai dû le faire avant de poser le tableaude bord... Donc en fait, j'ai fixé un fil rigide au bout du faisceau du plafonnier, et j'ai retiré le faisceau par le bas...
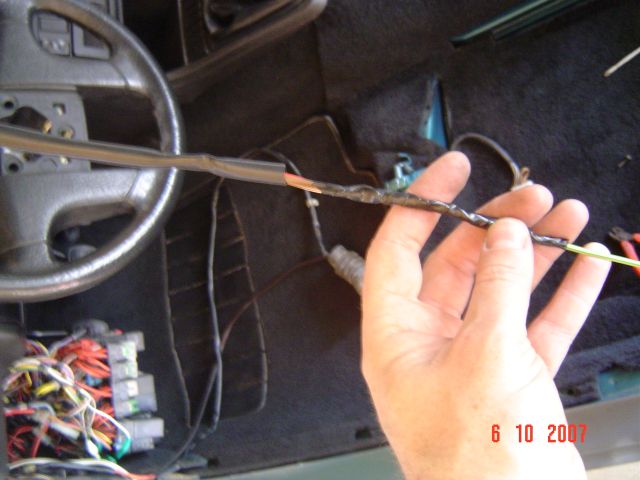
By yangra, shot with [URL=http://profile.imageshack.us/camerabuy.php?model=DSC-P72&
make=SONY]DSC-P72[/URL] at 2007-10-17
Ensuite j'ai refixé le nouveau faisceau au bout du fil rigide, et j'ai repassé le tout
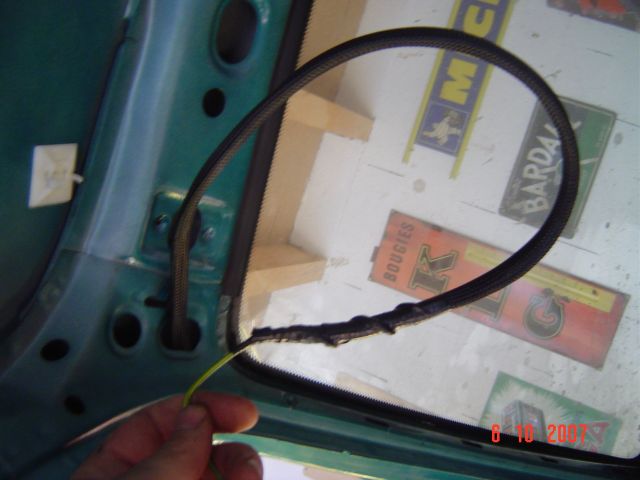
By yangra at 2007-10-06
Le bouton prévu

By yangra, shot with [URL=http://profile.imageshack.us/camerabuy.php?model=DSC-P72&
make=SONY]DSC-P72[/URL] at 2007-10-17
Ensuite j'ai réparé ma façade de chaufage/clim. Eh oui comme d'habitude,, le voyan est mort. Normallement, seule solution, remplacement de la façade, puisque le voyant n'est pas remplaçable! Mais voici la solution!
la façade :

By yangra at 2007-10-17
L'arrière :

By yangra, shot with [URL=http://profile.imageshack.us/camerabuy.php?model=DSC-P72&
make=SONY]DSC-P72[/URL] at 2007-10-17
Retirez les pins dans le connecteur en tirant dessus :

By yangra at 2007-10-17
les voici :

By yangra, shot with [URL=http://profile.imageshack.us/camerabuy.php?model=DSC-P72&
make=SONY]DSC-P72[/URL] at 2007-10-17
Ensuite coupez à l'aide d'une scie à métaux comme ci-dessous (attention, coupez jusqu'à environ 2mm de profondeur, jusqu'à atteindre un plasique interne noir.

By yangra, shot with [URL=http://profile.imageshack.us/camerabuy.php?model=DSC-P72&
make=SONY]DSC-P72[/URL] at 2007-10-17

By yangra, shot with [URL=http://profile.imageshack.us/camerabuy.php?model=DSC-P72&
make=SONY]DSC-P72[/URL] at 2007-10-17

By yangra at 2007-10-17
Enlevez la partie supérieure :

By yangra, shot with [URL=http://profile.imageshack.us/camerabuy.php?model=DSC-P72&
make=SONY]DSC-P72[/URL] at 2007-10-17
Vous verrez apparaître les 2 pattes de l'ampoule...
Retirez le plastique noir qui est juste emmanché (c'est un peu galère), en fait, c'est le porte ampoule :

By yangra, shot with [URL=http://profile.imageshack.us/camerabuy.php?model=DSC-P72&
make=SONY]DSC-P72[/URL] at 2007-10-17
Voici les deux types d'ampoule qui peuvent être montés :

By yangra at 2007-10-17
Le plus simple, vous récupérez une ampoule sur une façade qui fonctionne et vous remontez dans l'autre sens, montage du porte-ampoule :

By yangra at 2007-10-17
Puis replacez le connecteur et utilisez un pistolet à colle pour maintenir le tout :
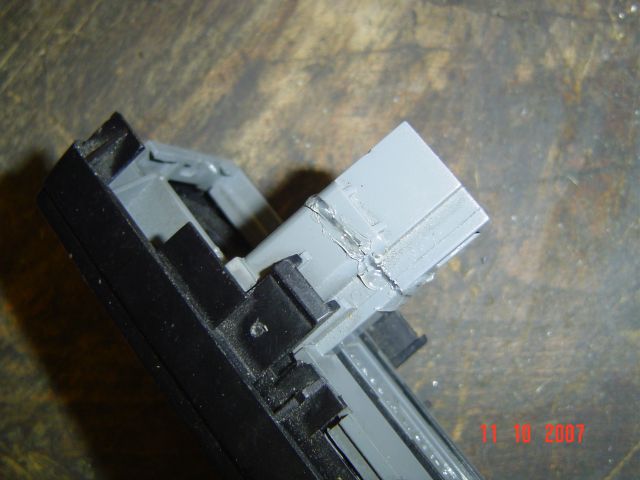
By yangra, shot with [URL=http://profile.imageshack.us/camerabuy.php?model=DSC-P72&
make=SONY]DSC-P72[/URL] at 2007-10-17
Un petit bout de thermorétractable avec colle inégrée

By yangra, shot with [URL=http://profile.imageshack.us/camerabuy.php?model=DSC-P72&
make=SONY]DSC-P72[/URL] at 2007-10-17
Remettez les pins en place, en pinçant les fils d'ampoule qui dépassent, et oupez à raz.
Puis le test :

By yangra at 2007-10-17
Ensuite, il faut que je prépare les pièces pour le sablage donc mise à nu des porte-moyeux avants :
A la presse, extraction du moyeu :

By yangra, shot with [URL=http://profile.imageshack.us/camerabuy.php?model=DSC-P72&
make=SONY]DSC-P72[/URL] at 2007-10-17

By yangra, shot with [URL=http://profile.imageshack.us/camerabuy.php?model=DSC-P72&
make=SONY]DSC-P72[/URL] at 2007-10-17
Extraire les circlips :
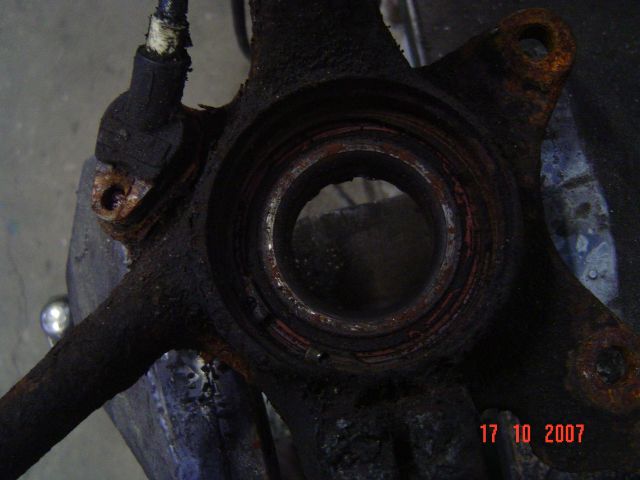
By yangra, shot with [URL=http://profile.imageshack.us/camerabuy.php?model=DSC-P72&
make=SONY]DSC-P72[/URL] at 2007-10-17

By yangra, shot with [URL=http://profile.imageshack.us/camerabuy.php?model=DSC-P72&
make=SONY]DSC-P72[/URL] at 2007-10-17

By yangra, shot with [URL=http://profile.imageshack.us/camerabuy.php?model=DSC-P72&
make=SONY]DSC-P72[/URL] at 2007-10-17
puis le roulement :

By yangra at 2007-10-17

By yangra at 2007-10-17
J'ai réussi à extraire les capteurs ABS!

By yangra at 2007-10-17

By yangra, shot with [URL=http://profile.imageshack.us/camerabuy.php?model=DSC-P72&
make=SONY]DSC-P72[/URL] at 2007-10-17
J'ai bossé sur les porte moyeux avants.... je les avait déshabillés, mais manque de bol, toutes les petites vis avaient foirées :

By yangra, shot with [URL=http://profile.imageshack.us/camerabuy.php?model=DSC-P72&
make=SONY]DSC-P72[/URL] at 2007-10-20
Donc, bruleur, pince, et on chuffe, et on dévisse...

By yangra at 2007-10-20

By yangra at 2007-10-20

By yangra at 2007-10-20
J'utilise un brûleur pur plomberie, avec ne bouteille de gaz traditionnelle, inutile de chauffer à rouge :

By yangra, shot with [URL=http://profile.imageshack.us/camerabuy.php?model=DSC-P72&
make=SONY]DSC-P72[/URL] at 2007-10-20
Puis je repasse le tarot dans tous les trous :
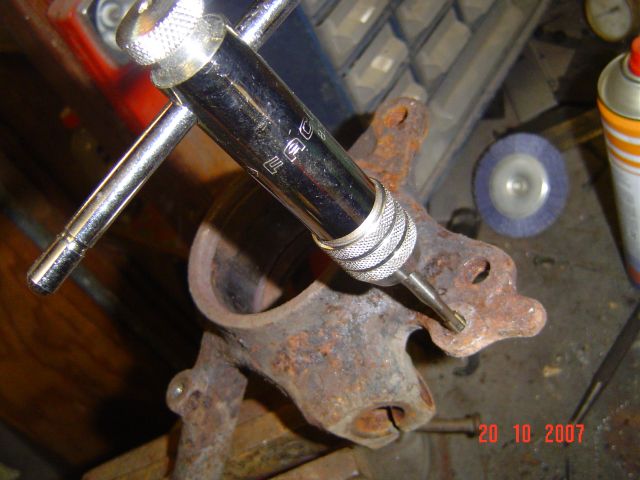
By yangra at 2007-10-20
J'ai reçu mes capteurs ABS arrières.... mais encore montés sur leur fusée!

By yangra at 2007-10-20
Et évidemment bien rouillés, et indémontables!

By yangra at 2007-10-20
Donc, seule solution :

By yangra at 2007-10-20

By yangra at 2007-10-20
Et voilà!

By yangra at 2007-10-20
J'a aussi reçu les rétros électriques dégivrants!

By yangra at 2007-10-20
le bouton :

By yangra at 2007-10-20
Le mirroir asphérique neuf! et chauffant!

By yangra at 2007-10-20

By yangra at 2007-10-20
Le vase de liquide de DA :

By yangra at 2007-10-20
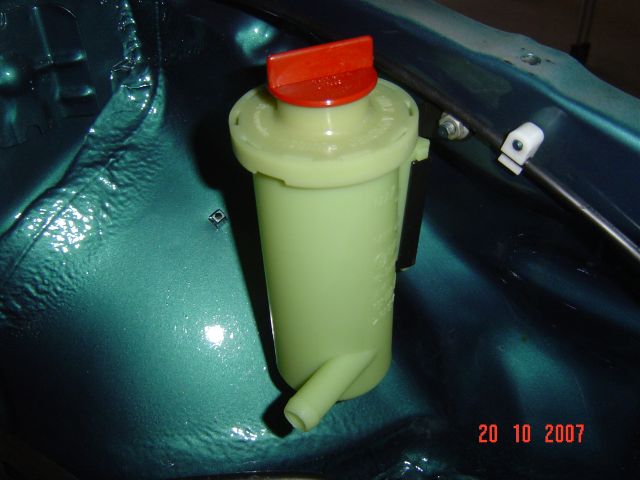
By yangra at 2007-10-20
Pour vous donner une idée de ce qui vous attends :

By yangra at 2007-10-20

By yangra at 2007-10-20
J'ai reçu les pièces du sablage!!!! Le pied!!!!

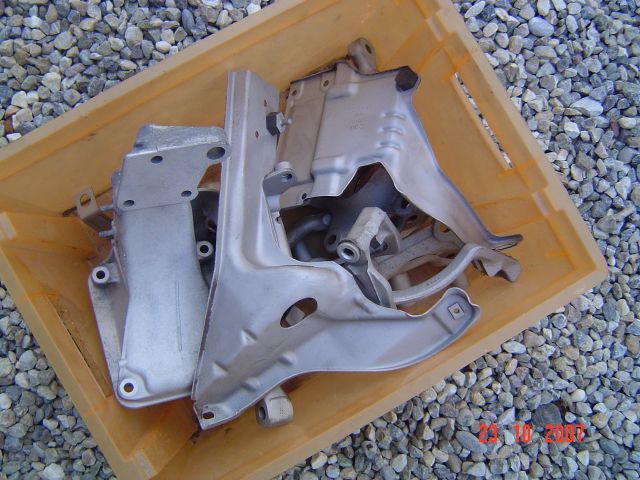
Oui, je sais, j'avais oublié d'enlever le petit silentbloc :Biggrin:
Avant

Après


Accrochage et peinture directe :

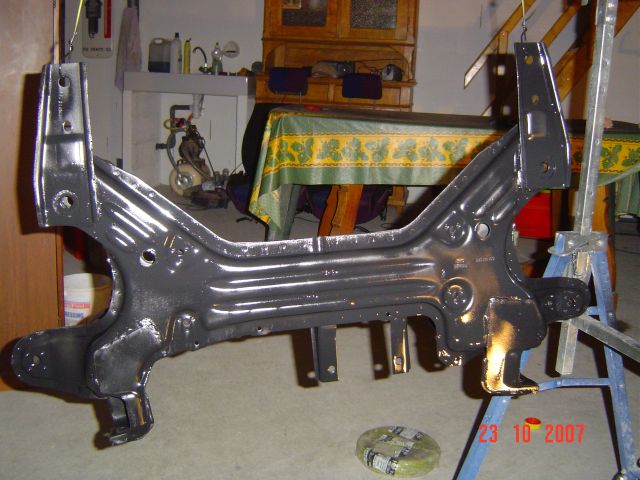

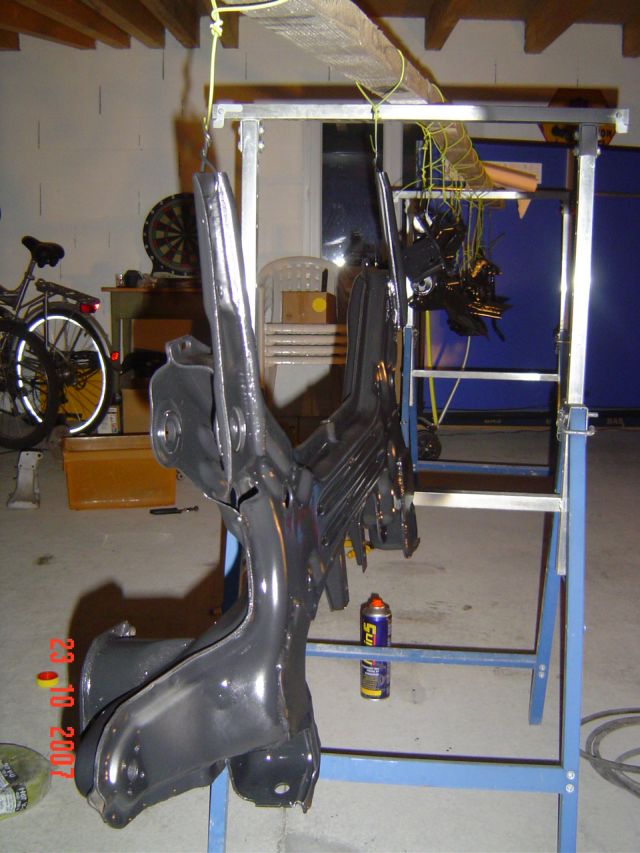
Le montage des jambes de forces avants,
Les coupelles :

Le tout, avant remontage :

les compresseurs de ressorts :

L'indispensable douille à ergots et une douille meulée spéciale pour le remontage :

Voici remontés :
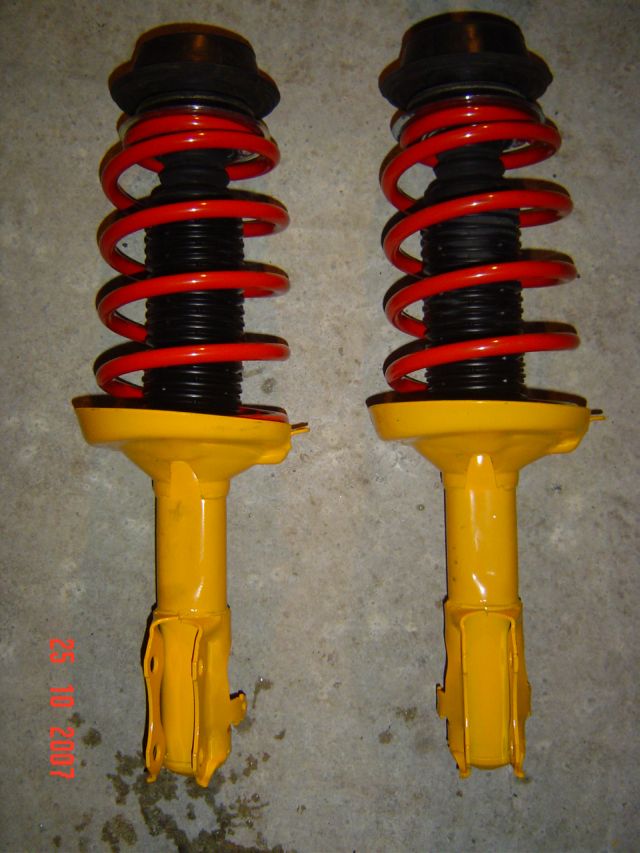

Le avant :

Remontage sur la caisse :

Ensuite, remontage du berceau :

Les triangles de suspension :

La visserie, et un taraud pour repasser dans les taraudages, pour extaire peintures, rouille, ou autres


Remontage :

Les rotules inférieures :

Montage:

Le silentboc boite de vitesses :

Montage :

La barre stabilisatrice, les accessoires :

Montage :

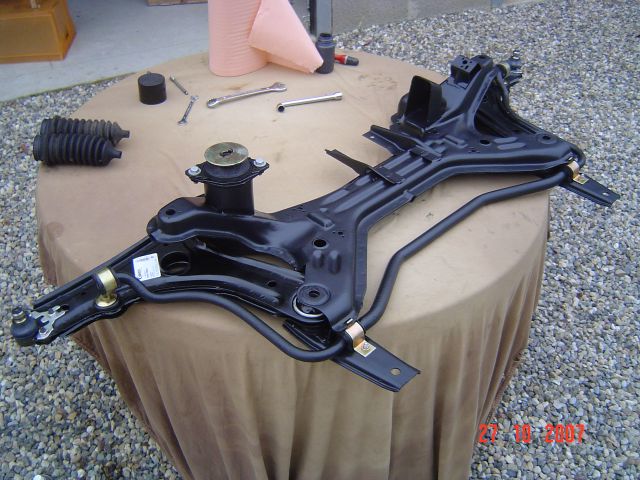
La crémaillère avant :

Avant montage :
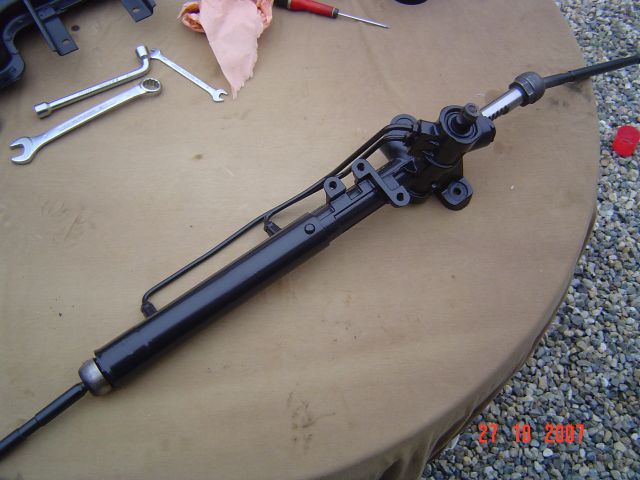
Les soufflets :

Faut graisser!

et on les monte :
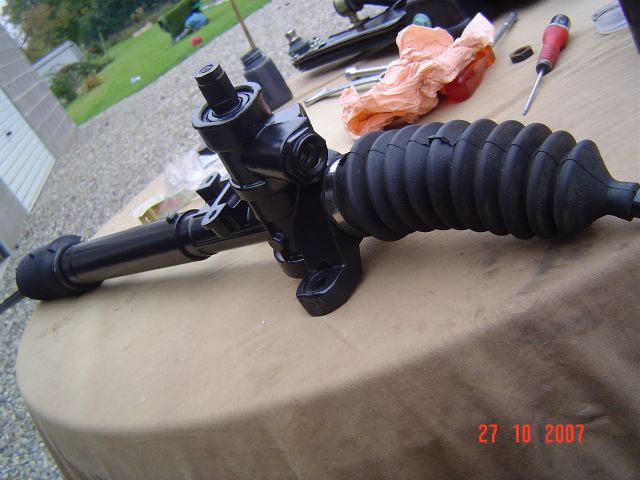
Les accessoires pour le montage :
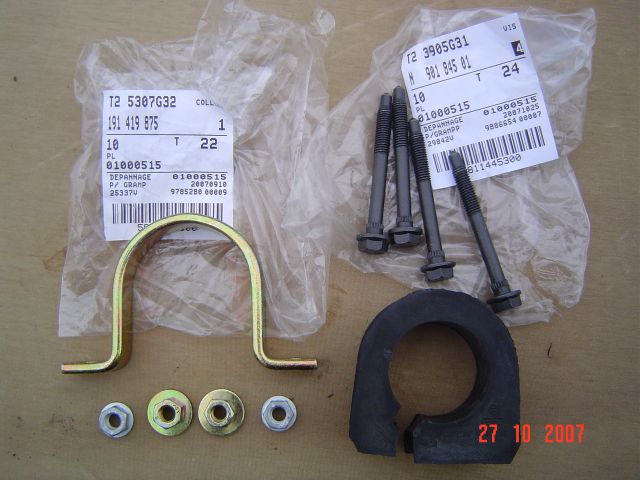
Puis, ça donne ça :


Rappelez-vous comment c'était avant!

Les vis pour le remontage sur la caisse :


Puis, le berceau inférieur avant :

Repose des silentblocs :
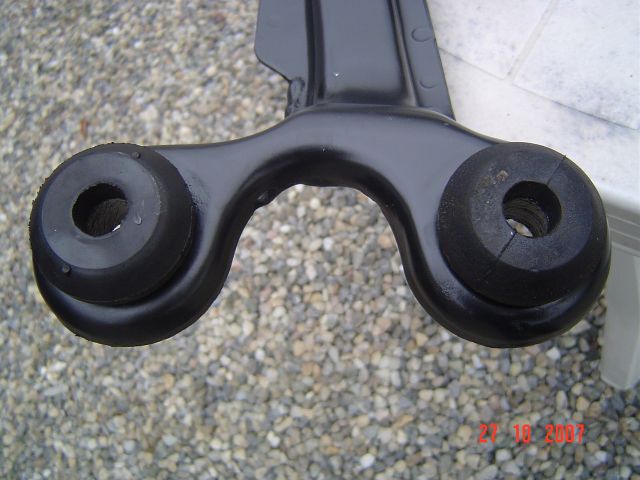
Les vis de maintient :
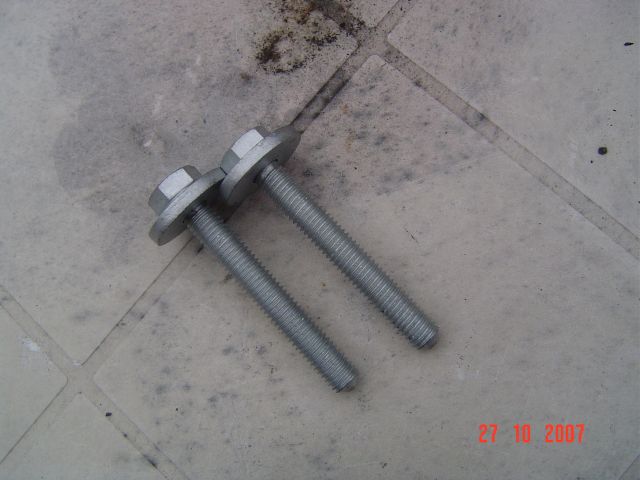
Assemblage avec l'autre traverse :

Les supports d'étriers de frein :

Et leur vis :

Montage :
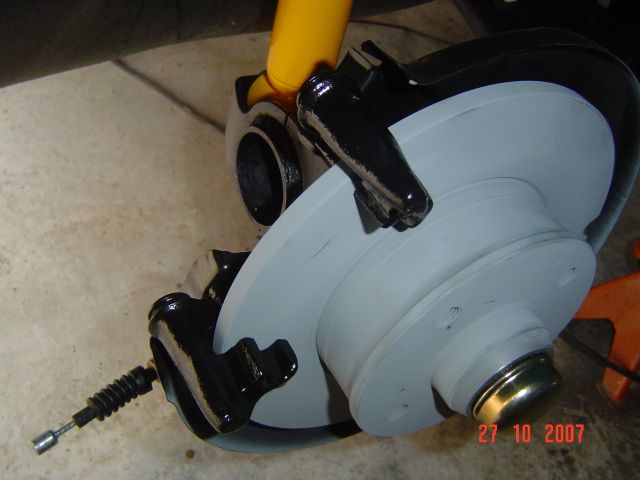
Les supports de cable ABS avants :


Les capuchons de boite à gants, spécfiques clim :


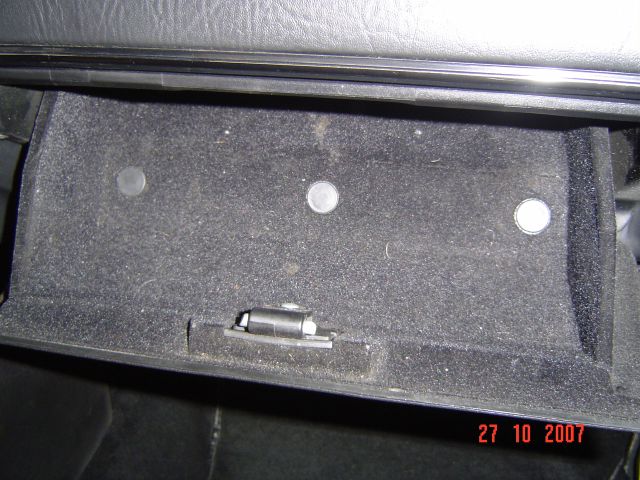
Ce que j'ai pu jeter aujourd'hui :


Remontage des porte moyeux,
Les moyeux tout neufs :


Remntage des roulements à la presse :


Puis le circlip :

Remontage des moyeux :

Et voila le travail :

La visserie pour le montage sur la caisse

Graissage léger de la tête de rotule :

montage du porte-moyeu :

Les rotules de direction :


Rappelez-vous avant :

Le silentbloc moteur arrière :


Le remontage du berceau avant :


Le silentbloc moteur avant :

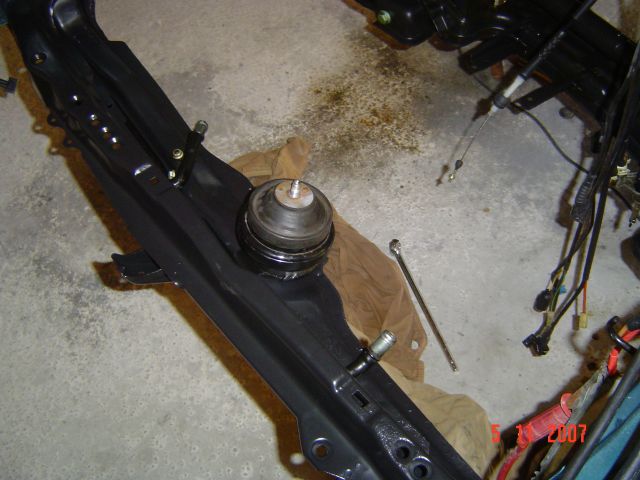
Suite sur les freins avants :

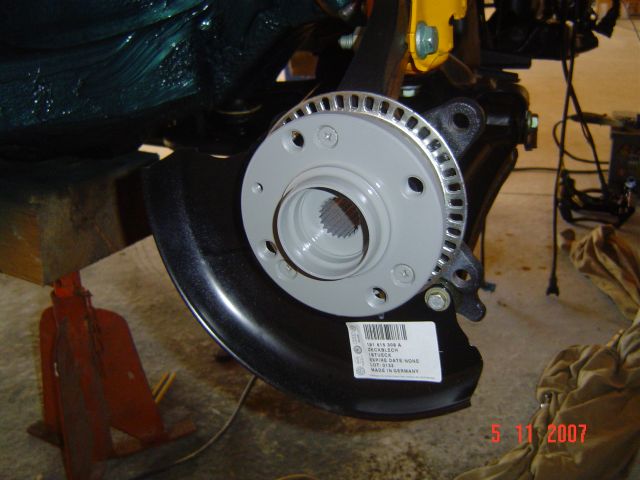

Merde, les disques se motent pas!!! Normal, j'ai monté les toles à l'envers! Personne peut le dire??? pfff, on peut rien vous demander! Les voila dans le bon sens :
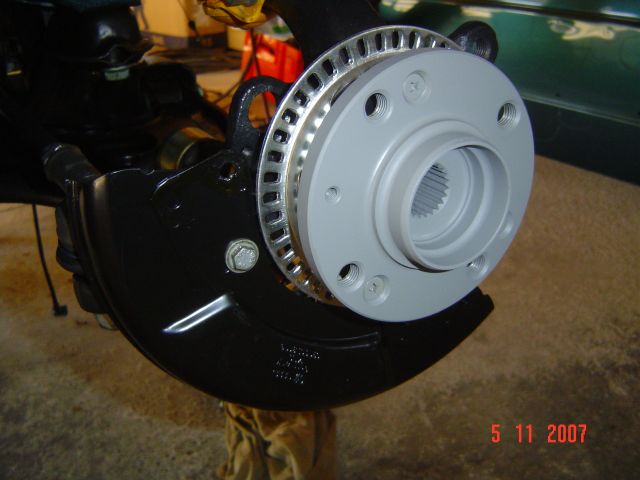

Montage des supports d'étrier avant :

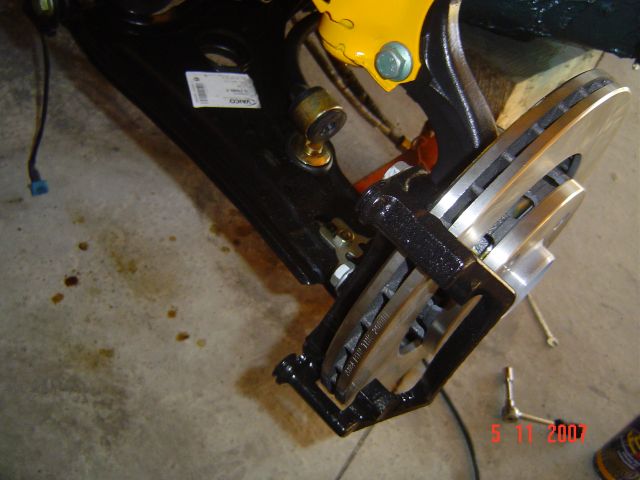
Le fameux clip :


Montage des tuyaux de DA :
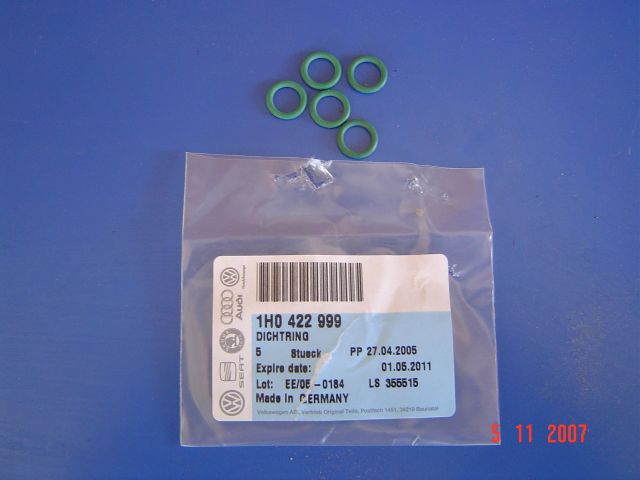
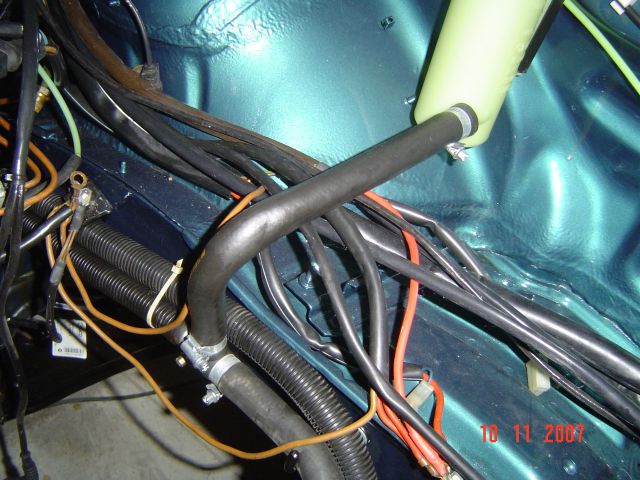

La masse antivibratoire du berceau avant :


Démontage des étiers de frein!


Sortie des pistons à l'air comprimé, attention aux doigts quand ça saute!

Dépose de la lèvre extérieure

Dépose du joint interne

Dépose du support de tuyau de frein

Même chose pour les étriers arrières :


Dépose du ressort de rappel

Dépose de la vis de ressort

Dépose du piston, en le tournant simplement dans son logement, il sort tout seul

Dépose de la lèvre extérieure

C qui reste dans l'étrier

L'outil fait maison pour précomprimé le ressort

La pince faite maison pour l'extraction du circlip (pauvre Facom)


L'outil en place

Le circlip au fond...

ça y est, c'est dehors!

On tire sur la tige qui reste dans l'étrier et il sort tout seul

Une mélasse marron apparaît, beurk!

Au fond la tige de poussée

La voici

Et on peut sortir l'axe de commande

Re beurk!

Surprise aujourd'hui, le retour du sablage!


Direct, la peinture haute température qui va bien...


J'ai remonté les étriers de frein :
les pistons sablés (uniquement les faces non fonctionnelles ont été sablées) :

Les joints spy d'axe de commande de frein à main (dim 16X24X6,5) :


repose des axes de commande (à la graisse lithium) :


La repose des ressorts intéieurs, facile! C'était plus simple que de les enlever!

Le kit de réfection pour freins AR :


trempage des lèvres extérieures :

Pendant ce temps je me suis occupé des étriers avants :
J'ai oublié de prendre le kit de réparation en photo, oups
La lèvre est posée comme ceci :

Puis on rentre le bord dans l'étrier :

Puis on pousse!

les supports de conduite (j'en ai chié aussi pour trouver la ref, voir sur les planches de Passat!!)


Les purgeurs :


Avant de remoter les pistons arrières, petit controle interne :

Ensuite, montage : on les tourne sur l'axe centrale et ça rentre presque tout seul!

Les vis de ressort

Les ressorts :

Le montage :

Ensuite un peu de plomberie de nouveau (à l'avant), le premier qui dit que c'est pas symétrique, je lui arrache la tête :

Avant :

Les conduites :


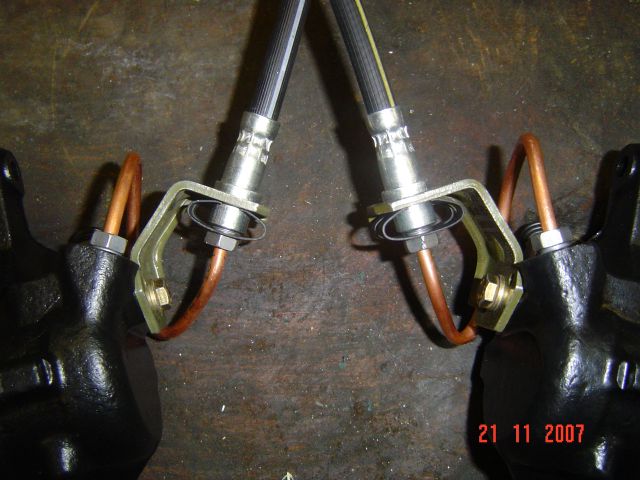
Les toles de protection :


Les conduites arrières :


Pour finir, la purge des étriers arrièrs, à faire avant la pose de l'étrier!!!
Une seringue, du liquide de frein :

On rempli par la vis de purge

Jusqu'à ce qu'il n'y ai plus d'air à la sortie :

Et voilà! Ils attendent plus que d'être montés!

Le bloc :

By yangra, shot with [URL=http://profile.imageshack.us/camerabuy.php?model=DSC-P72&
make=SONY]DSC-P72[/URL] at 2007-09-29

By yangra, shot with [URL=http://profile.imageshack.us/camerabuy.php?model=DSC-P72&
make=SONY]DSC-P72[/URL] at 2007-09-29
Démontage :

By yangra, shot with [URL=http://profile.imageshack.us/camerabuy.php?model=DSC-P72&
make=SONY]DSC-P72[/URL] at 2007-09-29

By yangra, shot with [URL=http://profile.imageshack.us/camerabuy.php?model=DSC-P72&
make=SONY]DSC-P72[/URL] at 2007-09-29

By yangra, shot with [URL=http://profile.imageshack.us/camerabuy.php?model=DSC-P72&
make=SONY]DSC-P72[/URL] at 2007-09-29
Le maître cylindre prêt à recevoir les accessoires annexes

By yangra, shot with [URL=http://profile.imageshack.us/camerabuy.php?model=DSC-P72&
make=SONY]DSC-P72[/URL] at 2007-09-29
Repose du bloc électrovannes :

By yangra, shot with [URL=http://profile.imageshack.us/camerabuy.php?model=DSC-P72&
make=SONY]DSC-P72[/URL] at 2007-09-29
Fermeture du couvercle :

By yangra, shot with [URL=http://profile.imageshack.us/camerabuy.php?model=DSC-P72&
make=SONY]DSC-P72[/URL] at 2007-09-29
Remplacement du tuyau de la pompe haute pression

By yangra, shot with [URL=http://profile.imageshack.us/camerabuy.php?model=DSC-P72&
make=SONY]DSC-P72[/URL] at 2007-09-29

By yangra at 2007-09-29

By yangra, shot with [URL=http://profile.imageshack.us/camerabuy.php?model=DSC-P72&
make=SONY]DSC-P72[/URL] at 2007-09-29
Le bloc réassemblé, prêt à être remonté :

By yangra, shot with [URL=http://profile.imageshack.us/camerabuy.php?model=DSC-P72&
make=SONY]DSC-P72[/URL] at 2007-09-29

By yangra, shot with [URL=http://profile.imageshack.us/camerabuy.php?model=DSC-P72&
make=SONY]DSC-P72[/URL] at 2007-09-29

By yangra, shot with [URL=http://profile.imageshack.us/camerabuy.php?model=DSC-P72&
make=SONY]DSC-P72[/URL] at 2007-09-29
Repose sur la caisse :

By yangra, shot with [URL=http://profile.imageshack.us/camerabuy.php?model=DSC-P72&
make=SONY]DSC-P72[/URL] at 2007-09-29
Et j'ai ressorti mon matériel de plomberie :

By yangra, shot with [URL=http://profile.imageshack.us/camerabuy.php?model=DSC-P72&
make=SONY]DSC-P72[/URL] at 2007-09-29
Le compensateur de freinage (voir premières pages) :

By yangra, shot with [URL=http://profile.imageshack.us/camerabuy.php?model=DSC-P72&
make=SONY]DSC-P72[/URL] at 2007-09-29
Montage du Té que j'ai fait il y a quelques semaines :

By yangra at 2007-09-29
Puis du tuyau d'arrivée (même formes qu'à l'origine) :

By yangra at 2007-09-29
Coté maître-cylindre :

By yangra, shot with [URL=http://profile.imageshack.us/camerabuy.php?model=DSC-P72&
make=SONY]DSC-P72[/URL] at 2007-09-29
Ensuite les lignes roue avant gauche :

By yangra, shot with [URL=http://profile.imageshack.us/camerabuy.php?model=DSC-P72&
make=SONY]DSC-P72[/URL] at 2007-09-29

By yangra, shot with [URL=http://profile.imageshack.us/camerabuy.php?model=DSC-P72&
make=SONY]DSC-P72[/URL] at 2007-09-29
Puis sur avant droit :

By yangra, shot with [URL=http://profile.imageshack.us/camerabuy.php?model=DSC-P72&
make=SONY]DSC-P72[/URL] at 2007-09-29

By yangra, shot with [URL=http://profile.imageshack.us/camerabuy.php?model=DSC-P72&
make=SONY]DSC-P72[/URL] at 2007-09-29

By yangra, shot with [URL=http://profile.imageshack.us/camerabuy.php?model=DSC-P72&
make=SONY]DSC-P72[/URL] at 2007-09-29

By yangra, shot with [URL=http://profile.imageshack.us/camerabuy.php?model=DSC-P72&
make=SONY]DSC-P72[/URL] at 2007-09-29

By yangra, shot with [URL=http://profile.imageshack.us/camerabuy.php?model=DSC-P72&
make=SONY]DSC-P72[/URL] at 2007-09-29
Une fois tout installé, je branche toute la connectique sur le bloc ABS. Et j'alimente en 12V pour voir.... je mets le contact..... la pompe haute pression tourne!.... tourne..... mais pas de pression qui monte!!??!! Merde, elle s'amorce pas! c'est quoi ce bins? Je laisse tourner la pompe, toujours rien, les boules, y a un hic quelque part! Allez, ni une ni deux, je démonte la pompe... rien d'anormal....merde, qu'est-ce qui coince??? Allez, je m'en fait pas, je remplace la pompe par une autre, elle est peut-être HS....je remonte, branche, et contact....la pompe tourne, tourne,...... et rien! Put*** de bord*** de mer***, c'est quoi cette grosse mer***???
Je jette tout et j'arrète là aujourd'hui, raz-le-cul.... je me pette le cul à tout faire nickel, et ça marche pas!
Je vais voir mon gamin au foot, ça me va me changer!... Au retour, je ressaye un coup pour voir... contact,.....la pompe tourne, et là, ça y est elle débite!!! Certainement il faut attendre que la pompe se remplie de liquide... et seul le temps aide...pfff, allez, je remets tout en place correctement la semaine prochaine!
Bon je sais j'ai pas beaucoup bossé, mais bon, avec cet ABS de m****....

By yangra, shot with [URL=http://profile.imageshack.us/camerabuy.php?model=DSC-P72&
make=SONY]DSC-P72[/URL] at 2007-09-29

By yangra at 2007-09-29
Repose des tapis avants

By yangra at 2007-10-06

By yangra, shot with [URL=http://profile.imageshack.us/camerabuy.php?model=DSC-P72&
make=SONY]DSC-P72[/URL] at 2007-10-06

By yangra at 2007-10-06

By yangra at 2007-10-06

By yangra at 2007-10-06
Repose de la bobine

By yangra at 2007-10-06
et du cable d'accélérateur

By yangra at 2007-10-06
La moquette de coffre

By yangra, shot with [URL=http://profile.imageshack.us/camerabuy.php?model=DSC-P72&
make=SONY]DSC-P72[/URL] at 2007-10-06

By yangra at 2007-10-06
La fin du montage du régulateur de vitesse

By yangra at 2007-10-06

By yangra at 2007-10-06

By yangra at 2007-10-06
Le kit que j'avais acheté, était pévu pour une boite auto, donc il manquait un connecteur, que j'ai donc rajouté... les contacteurs sont montés en série

By yangra at 2007-10-06

By yangra at 2007-10-06
Ensuite.......

By yangra at 2007-10-06

By yangra at 2007-10-06

By yangra at 2007-10-06

By yangra at 2007-10-06

By yangra, shot with [URL=http://profile.imageshack.us/camerabuy.php?model=DSC-P72&
make=SONY]DSC-P72[/URL] at 2007-10-06

By yangra at 2007-10-06
Puis j'ai remonté le vide-poches spécifique à la clim :

By yangra, shot with [URL=http://profile.imageshack.us/camerabuy.php?model=DSC-P72&
make=SONY]DSC-P72[/URL] at 2007-10-06
Le défaut de la protection sous le caisson : il peluche!!!!

By yangra at 2007-10-06
Moyen simple et facile, on prends une tondeus, et un aspirateur :

By yangra, shot with [URL=http://profile.imageshack.us/camerabuy.php?model=DSC-P72&
make=SONY]DSC-P72[/URL] at 2007-10-06
et ça donne ça :

By yangra, shot with [URL=http://profile.imageshack.us/camerabuy.php?model=DSC-P72&
make=SONY]DSC-P72[/URL] at 2007-10-06
J'aipassé le faisceau pour le furtur toit ouvrant (adaptable). C'est galère! En fait j'aurai dû le faire avant de poser le tableaude bord... Donc en fait, j'ai fixé un fil rigide au bout du faisceau du plafonnier, et j'ai retiré le faisceau par le bas...

By yangra, shot with [URL=http://profile.imageshack.us/camerabuy.php?model=DSC-P72&
make=SONY]DSC-P72[/URL] at 2007-10-17
Ensuite j'ai refixé le nouveau faisceau au bout du fil rigide, et j'ai repassé le tout

By yangra at 2007-10-06
Le bouton prévu

By yangra, shot with [URL=http://profile.imageshack.us/camerabuy.php?model=DSC-P72&
make=SONY]DSC-P72[/URL] at 2007-10-17
Ensuite j'ai réparé ma façade de chaufage/clim. Eh oui comme d'habitude,, le voyan est mort. Normallement, seule solution, remplacement de la façade, puisque le voyant n'est pas remplaçable! Mais voici la solution!
la façade :

By yangra at 2007-10-17
L'arrière :

By yangra, shot with [URL=http://profile.imageshack.us/camerabuy.php?model=DSC-P72&
make=SONY]DSC-P72[/URL] at 2007-10-17
Retirez les pins dans le connecteur en tirant dessus :

By yangra at 2007-10-17
les voici :

By yangra, shot with [URL=http://profile.imageshack.us/camerabuy.php?model=DSC-P72&
make=SONY]DSC-P72[/URL] at 2007-10-17
Ensuite coupez à l'aide d'une scie à métaux comme ci-dessous (attention, coupez jusqu'à environ 2mm de profondeur, jusqu'à atteindre un plasique interne noir.

By yangra, shot with [URL=http://profile.imageshack.us/camerabuy.php?model=DSC-P72&
make=SONY]DSC-P72[/URL] at 2007-10-17

By yangra, shot with [URL=http://profile.imageshack.us/camerabuy.php?model=DSC-P72&
make=SONY]DSC-P72[/URL] at 2007-10-17

By yangra at 2007-10-17
Enlevez la partie supérieure :

By yangra, shot with [URL=http://profile.imageshack.us/camerabuy.php?model=DSC-P72&
make=SONY]DSC-P72[/URL] at 2007-10-17
Vous verrez apparaître les 2 pattes de l'ampoule...
Retirez le plastique noir qui est juste emmanché (c'est un peu galère), en fait, c'est le porte ampoule :

By yangra, shot with [URL=http://profile.imageshack.us/camerabuy.php?model=DSC-P72&
make=SONY]DSC-P72[/URL] at 2007-10-17
Voici les deux types d'ampoule qui peuvent être montés :

By yangra at 2007-10-17
Le plus simple, vous récupérez une ampoule sur une façade qui fonctionne et vous remontez dans l'autre sens, montage du porte-ampoule :

By yangra at 2007-10-17
Puis replacez le connecteur et utilisez un pistolet à colle pour maintenir le tout :

By yangra, shot with [URL=http://profile.imageshack.us/camerabuy.php?model=DSC-P72&
make=SONY]DSC-P72[/URL] at 2007-10-17
Un petit bout de thermorétractable avec colle inégrée

By yangra, shot with [URL=http://profile.imageshack.us/camerabuy.php?model=DSC-P72&
make=SONY]DSC-P72[/URL] at 2007-10-17
Remettez les pins en place, en pinçant les fils d'ampoule qui dépassent, et oupez à raz.
Puis le test :

By yangra at 2007-10-17
Ensuite, il faut que je prépare les pièces pour le sablage donc mise à nu des porte-moyeux avants :
A la presse, extraction du moyeu :

By yangra, shot with [URL=http://profile.imageshack.us/camerabuy.php?model=DSC-P72&
make=SONY]DSC-P72[/URL] at 2007-10-17

By yangra, shot with [URL=http://profile.imageshack.us/camerabuy.php?model=DSC-P72&
make=SONY]DSC-P72[/URL] at 2007-10-17
Extraire les circlips :

By yangra, shot with [URL=http://profile.imageshack.us/camerabuy.php?model=DSC-P72&
make=SONY]DSC-P72[/URL] at 2007-10-17

By yangra, shot with [URL=http://profile.imageshack.us/camerabuy.php?model=DSC-P72&
make=SONY]DSC-P72[/URL] at 2007-10-17

By yangra, shot with [URL=http://profile.imageshack.us/camerabuy.php?model=DSC-P72&
make=SONY]DSC-P72[/URL] at 2007-10-17
puis le roulement :

By yangra at 2007-10-17

By yangra at 2007-10-17
J'ai réussi à extraire les capteurs ABS!

By yangra at 2007-10-17

By yangra, shot with [URL=http://profile.imageshack.us/camerabuy.php?model=DSC-P72&
make=SONY]DSC-P72[/URL] at 2007-10-17
J'ai bossé sur les porte moyeux avants.... je les avait déshabillés, mais manque de bol, toutes les petites vis avaient foirées :

By yangra, shot with [URL=http://profile.imageshack.us/camerabuy.php?model=DSC-P72&
make=SONY]DSC-P72[/URL] at 2007-10-20
Donc, bruleur, pince, et on chuffe, et on dévisse...

By yangra at 2007-10-20

By yangra at 2007-10-20

By yangra at 2007-10-20
J'utilise un brûleur pur plomberie, avec ne bouteille de gaz traditionnelle, inutile de chauffer à rouge :

By yangra, shot with [URL=http://profile.imageshack.us/camerabuy.php?model=DSC-P72&
make=SONY]DSC-P72[/URL] at 2007-10-20
Puis je repasse le tarot dans tous les trous :

By yangra at 2007-10-20
J'ai reçu mes capteurs ABS arrières.... mais encore montés sur leur fusée!

By yangra at 2007-10-20
Et évidemment bien rouillés, et indémontables!

By yangra at 2007-10-20
Donc, seule solution :

By yangra at 2007-10-20

By yangra at 2007-10-20
Et voilà!

By yangra at 2007-10-20
J'a aussi reçu les rétros électriques dégivrants!

By yangra at 2007-10-20
le bouton :

By yangra at 2007-10-20
Le mirroir asphérique neuf! et chauffant!

By yangra at 2007-10-20

By yangra at 2007-10-20
Le vase de liquide de DA :

By yangra at 2007-10-20

By yangra at 2007-10-20
Pour vous donner une idée de ce qui vous attends :

By yangra at 2007-10-20

By yangra at 2007-10-20
J'ai reçu les pièces du sablage!!!! Le pied!!!!


Oui, je sais, j'avais oublié d'enlever le petit silentbloc :Biggrin:
Avant

Après


Accrochage et peinture directe :


Le montage des jambes de forces avants,
Les coupelles :

Le tout, avant remontage :

les compresseurs de ressorts :

L'indispensable douille à ergots et une douille meulée spéciale pour le remontage :

Voici remontés :


Le avant :

Remontage sur la caisse :

Ensuite, remontage du berceau :

Les triangles de suspension :

La visserie, et un taraud pour repasser dans les taraudages, pour extaire peintures, rouille, ou autres


Remontage :

Les rotules inférieures :

Montage:

Le silentboc boite de vitesses :

Montage :

La barre stabilisatrice, les accessoires :

Montage :


La crémaillère avant :

Avant montage :

Les soufflets :

Faut graisser!

et on les monte :

Les accessoires pour le montage :

Puis, ça donne ça :


Rappelez-vous comment c'était avant!

Les vis pour le remontage sur la caisse :


Puis, le berceau inférieur avant :

Repose des silentblocs :

Les vis de maintient :

Assemblage avec l'autre traverse :

Les supports d'étriers de frein :

Et leur vis :

Montage :

Les supports de cable ABS avants :


Les capuchons de boite à gants, spécfiques clim :


Ce que j'ai pu jeter aujourd'hui :


Remontage des porte moyeux,
Les moyeux tout neufs :


Remntage des roulements à la presse :


Puis le circlip :

Remontage des moyeux :

Et voila le travail :

La visserie pour le montage sur la caisse

Graissage léger de la tête de rotule :

montage du porte-moyeu :

Les rotules de direction :


Rappelez-vous avant :

Le silentbloc moteur arrière :


Le remontage du berceau avant :


Le silentbloc moteur avant :


Suite sur les freins avants :


Merde, les disques se motent pas!!! Normal, j'ai monté les toles à l'envers! Personne peut le dire??? pfff, on peut rien vous demander! Les voila dans le bon sens :


Montage des supports d'étrier avant :


Le fameux clip :


Montage des tuyaux de DA :


La masse antivibratoire du berceau avant :


Démontage des étiers de frein!


Sortie des pistons à l'air comprimé, attention aux doigts quand ça saute!

Dépose de la lèvre extérieure

Dépose du joint interne

Dépose du support de tuyau de frein

Même chose pour les étriers arrières :


Dépose du ressort de rappel

Dépose de la vis de ressort

Dépose du piston, en le tournant simplement dans son logement, il sort tout seul

Dépose de la lèvre extérieure

C qui reste dans l'étrier

L'outil fait maison pour précomprimé le ressort

La pince faite maison pour l'extraction du circlip (pauvre Facom)


L'outil en place

Le circlip au fond...

ça y est, c'est dehors!

On tire sur la tige qui reste dans l'étrier et il sort tout seul

Une mélasse marron apparaît, beurk!

Au fond la tige de poussée

La voici

Et on peut sortir l'axe de commande

Re beurk!

Surprise aujourd'hui, le retour du sablage!


Direct, la peinture haute température qui va bien...


J'ai remonté les étriers de frein :
les pistons sablés (uniquement les faces non fonctionnelles ont été sablées) :

Les joints spy d'axe de commande de frein à main (dim 16X24X6,5) :


repose des axes de commande (à la graisse lithium) :


La repose des ressorts intéieurs, facile! C'était plus simple que de les enlever!

Le kit de réfection pour freins AR :


trempage des lèvres extérieures :

Pendant ce temps je me suis occupé des étriers avants :
J'ai oublié de prendre le kit de réparation en photo, oups
La lèvre est posée comme ceci :

Puis on rentre le bord dans l'étrier :

Puis on pousse!

les supports de conduite (j'en ai chié aussi pour trouver la ref, voir sur les planches de Passat!!)


Les purgeurs :


Avant de remoter les pistons arrières, petit controle interne :

Ensuite, montage : on les tourne sur l'axe centrale et ça rentre presque tout seul!

Les vis de ressort

Les ressorts :

Le montage :

Ensuite un peu de plomberie de nouveau (à l'avant), le premier qui dit que c'est pas symétrique, je lui arrache la tête :

Avant :

Les conduites :


Les toles de protection :


Les conduites arrières :


Pour finir, la purge des étriers arrièrs, à faire avant la pose de l'étrier!!!
Une seringue, du liquide de frein :

On rempli par la vis de purge

Jusqu'à ce qu'il n'y ai plus d'air à la sortie :

Et voilà! Ils attendent plus que d'être montés!

Page 1 sur 40 • 1, 2, 3 ... 20 ... 40 

Permission de ce forum:
Vous ne pouvez pas répondre aux sujets dans ce forum